
1. 아이템 슬롯UI 및 코드 제작
만들어둔 인벤토리를 통해 실제 인벤토리 UI가 호출되고 이 UI에 아이템이 표시되도록 구현해보자.
아이템리스트가 ScrollView를 통해 나오도록 만들어 보려고 한다.
이를 위해 아이템슬롯 UI를 만들어보자 UI에 필요한 항목은 아이콘,이름,개수이다.
프리팹을 제작해주고 이 SlotButton에 아이콘,이름, 개수를 아이템 정보에 따라 달라질 수 있도록 클래스를 만들어주자.
SlotButton.cs
using UnityEngine;
using UnityEngine.UI;
using TMPro;

public class SlotButton : MonoBehaviour
{
    [SerializeField] private Image itemIcon;          // 아이템 아이콘 표시
    [SerializeField] private TextMeshProUGUI itemName; // 아이템 이름 및 개수 표시
    [SerializeField] private TextMeshProUGUI itemCount; // 아이템 이름 및 개수 표시
    private ItemSlot currentItemSlot;                 // 현재 슬롯에 연결된 아이템 데이터

    // 슬롯 UI 업데이트
    public void UpdateSlotUI(ItemSlot itemSlot)
    {
        currentItemSlot = itemSlot;

        if (currentItemSlot != null && currentItemSlot.itemData != null)
        {
            if (currentItemSlot.itemData.icon != null)
            {
                itemIcon.sprite = currentItemSlot.itemData.icon;
                itemIcon.gameObject.SetActive(true);
            }
            else
            {
                Debug.LogWarning($"아이템 {currentItemSlot.itemData.itemName}에 아이콘이 없습니다!");
            }

            itemName.text = $"{currentItemSlot.itemData.itemName}";
            itemCount.text = $"{currentItemSlot.quantity} 개";
        }
        else
        {
            Debug.LogWarning("슬롯 UI를 업데이트할 데이터가 없습니다!");
            itemIcon.gameObject.SetActive(false);
            itemName.text = "";
            itemCount.text = "";
        }
    }

}
2.인벤토리UI제작 및 코그 구현
그리고 이에 맞춰 ScrollView가 포함된 UI를 제작해주자. 이때 아이템들이 담길 부모객체에 Vertical Layout Group과 Content Size Filter가 적용되어 있어야한다.
그리고 팝업UI로 이 UI를 호출할 수 있도록 UI_Popup을 상속받아서 UI_Inventory 클래스를 구현해주자. 이때 InventoryManager에서 가지고 있는 리스트를 반환해주는 함수를 추가해주자.
InventoryManager.cs
public List<ItemSlot> GetOwnedItems()
{
    return inventory;
}
UI_Inventory.cs
using System.Collections.Generic;
using UnityEngine;
public class UI_Inventory : UI_Popup
{
[SerializeField] private Transform slotContainer; // 슬롯 UI 부모 객체
[SerializeField] private GameObject slotPrefab; // 슬롯 UI 프리팹
private List<ItemSlot> itemSlots = new List<ItemSlot>();
public override void Init()
{
base.Init();
RefreshUI(); // UI 활성화 시 즉시 인벤토리 데이터 업데이트
}
public void RefreshUI()
{
List<ItemSlot> inventory = Managers.Inventory.GetOwnedItems(); // 현재 인벤토리 아이템 목록
// 필요한 슬롯 개수와 현재 슬롯 개수 비교
int requiredSlotCount = inventory.Count;
int currentSlotCount = slotContainer.childCount;
// 슬롯 부족 시 추가 생성
for (int i = currentSlotCount; i < requiredSlotCount; i++)
{
GameObject newSlot = Instantiate(slotPrefab, slotContainer);
newSlot.SetActive(false); // 비활성화 상태로 생성
}
// 슬롯 업데이트
for (int i = 0; i < requiredSlotCount; i++)
{
Transform slotTransform = slotContainer.GetChild(i);
slotTransform.gameObject.SetActive(true); // 활성화
SlotButton slotButton = slotTransform.GetComponent<SlotButton>();
slotButton.UpdateSlotUI(inventory[i]); // 슬롯 UI 업데이트
}
// 남는 슬롯 비활성화
for (int i = requiredSlotCount; i < currentSlotCount; i++)
{
slotContainer.GetChild(i).gameObject.SetActive(false);
}
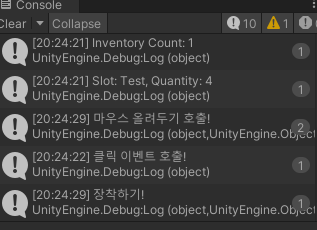
// 디버그 로그
Debug.Log($"Inventory Count: {inventory.Count}");
foreach (var slot in inventory)
{
Debug.Log($"Slot: {slot.itemData.itemName}, Quantity: {slot.quantity}");
}
}
private void CreateSlotUI(ItemSlot itemSlot)
{
GameObject slotObj = Instantiate(slotPrefab, slotContainer);
slotObj.SetActive(true);
SlotButton slotButton = slotObj.GetComponent<SlotButton>();
slotButton.UpdateSlotUI(itemSlot);
// 슬롯 데이터 디버그 확인
Debug.Log($"Created Slot for Item: {itemSlot.itemData.itemName}, Quantity: {itemSlot.quantity}");
}
}
이렇게 해주고 Player에서 호출해주면 된다.
Player.cs
 private void OpenInventory(InputAction.CallbackContext context)
 {
     DebugEx.Log("인벤토리 키 입력");
     UI_Inventory inventoryPopup = FindAnyObjectByType<UI_Inventory>();
     if (inventoryPopup == null)
     {
         Managers.UI.ShowPopupUI<UI_Inventory>();

     }
     else
     {
         Managers.UI.CloseAllPopupUI();
     }
 }
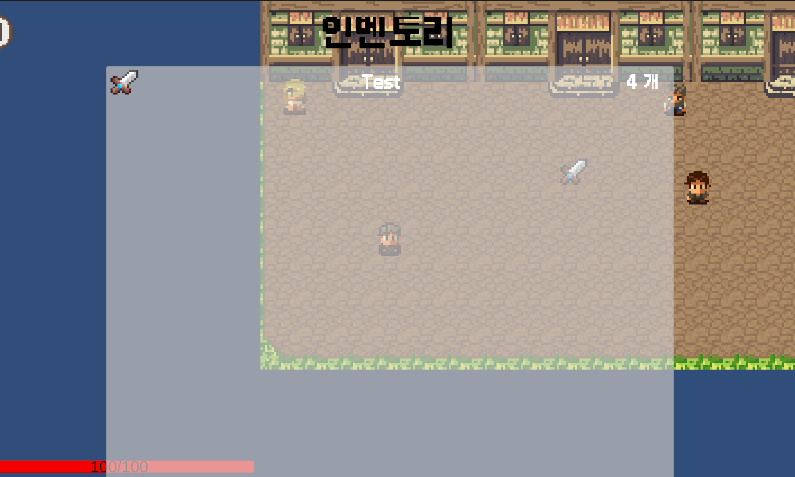
이렇게 해주면 정상적으로 인벤토리가 호출되는 것을 볼 수 있다.
3.클릭이벤트 구현
인벤토리에서 아이템을 클릭했을 때 이벤트를 구현해보자
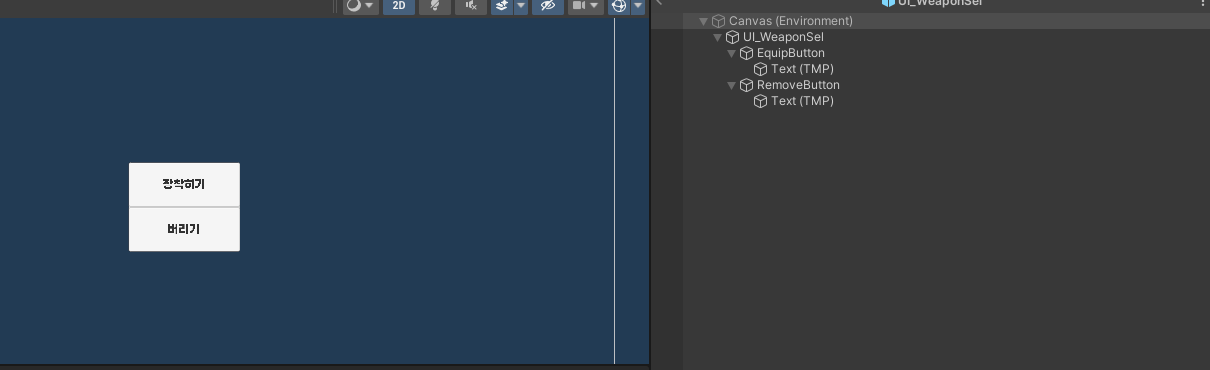
우선 아이템을 클릭했을 때 나올 UI를 제작해보자.
일단 장착하기와 버리기 버튼만이 있는 상태로 버튼UI를 만들어주면 된다.
클릭이벤트를 구현하기 위해 전체 WeaponSel에 관한 코드를 작성해주자.
코드를 통해 2가지 버튼에 바인딩하고 이 버튼을 가져와서 이벤트를 추가해주자. 이때 게임오브젝트와 enum에서 변수의 명이 동일해야 바인딩이 가능하다.
UI_WeaponSel.cs
using System.Collections;
using System.Collections.Generic;
using UnityEngine;
using UnityEngine.EventSystems;
using UnityEngine.UI;

public class UI_WeaponSel : UI_Popup
{
    public enum Buttons
    {
        EquipButton,
        RemoveButton,
    }

    public override void Init()
    {
        Bind<Button>(typeof(Buttons));

        GetButton((int)Buttons.EquipButton).gameObject.AddUIEvent(EquipWeapon);
    }

    void EquipWeapon(PointerEventData eventData)
    {
        SlotButton currentItem = transform.parent.gameObject.GetComponent<SlotButton>();
        if (currentItem != null)
        {
            currentItem.UseItem();
        }
    }
}
클릭이벤트를 위해 유니티에서 제공해주는 인터페이스를 사용해보자
나는 IPointerClickHandler, IPointerUpHandler, IPointerEnterHandler, IPointerExitHandler 이렇게 4가지를 사용해보았다.
SlotButton.cs
using UnityEngine;
using UnityEngine.UI;
using TMPro;
using UnityEngine.EventSystems;

public class SlotButton : UI_Base, IPointerClickHandler, IPointerUpHandler, IPointerEnterHandler, IPointerExitHandler
{
    [SerializeField] private Image itemIcon;          // 아이템 아이콘 표시
    [SerializeField] private TextMeshProUGUI itemName; // 아이템 이름
    [SerializeField] private TextMeshProUGUI itemInfo;  // 아이템 설명
    [SerializeField] private TextMeshProUGUI itemCount; // 아이템 개수
    private ItemSlot currentItemSlot;                 // 현재 슬롯에 연결된 아이템 데이터


    // 아이템 사용 로직
    public void UseItem()
    {
        if (currentItemSlot.itemData.itemType == Define.ItemType.Consumable)
        {
            Debug.Log($"사용: {currentItemSlot.itemData.itemName}");
            Managers.Inventory.RemoveItem(currentItemSlot.itemData, 1);
            //Managers.Inventory.RefreshUI();
        }
        else if(currentItemSlot.itemData.itemType == Define.ItemType.Equipment)
        {
            DebugEx.Log("장착하기!");
        }
        else
        {
            Debug.Log($"{currentItemSlot.itemData.itemName}는 사용할 수 없는 아이템입니다.");
        }
    }

    public void OnPointerClick(PointerEventData eventData)
    {
        Debug.Log("클릭 이벤트 호출!");

        UI_WeaponSel uI_WeaponSel = FindAnyObjectByType<UI_WeaponSel>();
        if( uI_WeaponSel == null )
        {
            uI_WeaponSel = Managers.UI.ShowPopupUI<UI_WeaponSel>();
            uI_WeaponSel.gameObject.transform.SetParent(transform, false);
            Vector3 loaction = eventData.position;
            loaction.y -= 50;
            uI_WeaponSel.gameObject.transform.SetPositionAndRotation(loaction, Quaternion.identity);
        }
        else
        {
            Managers.UI.ClosePopupUI(uI_WeaponSel);
        }
        // 팝업 생성


    }


    public void OnPointerUp(PointerEventData eventData)
    {

    }

    public void OnPointerEnter(PointerEventData eventData)
    {
        DebugEx.Log("마우스 올려두기 호출!");
    }

    public void OnPointerExit(PointerEventData eventData)
    {
        DebugEx.Log("마우스 내려놓기 호출!");
        UI_WeaponSel uI_WeaponSel = FindAnyObjectByType<UI_WeaponSel>();
        if (uI_WeaponSel != null)
        {
            Managers.UI.ClosePopupUI(uI_WeaponSel);
        }
    }
}
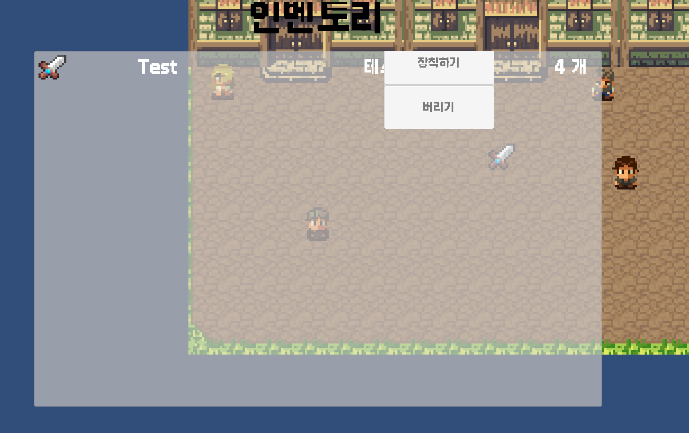
이때 선택된 아이템의 자식으로 팝업을 두는 것으로 나중에 아이템의 정보를 쉽게 얻어오려고 했다. 그리고 마우스 클릭하곳에서 가깝게 팝업이 뜨도록 transform의 위치를 수정해주었다.
실제로 작동시켜보면 잘 작동하는 것을 볼 수 있다.
'게임공부 > Unity' 카테고리의 다른 글
| [Unity]최적화 관련 팁 (0) | 2025.01.08 |
|---|---|
| [C#][Unity][나만의 탑뷰 게임 만들기]7. 인벤토리 시스템 만들기2 (1) | 2025.01.02 |
| [C#][Unity][나만의 탑뷰 게임 만들기]5. 저장시스템 기초만들기 (1) | 2024.12.22 |
| [C#][Unity][나만의 탑뷰 게임 만들기]4. 아이템 시스템 만들기 (0) | 2024.12.18 |
| [C#][Unity][나만의 탑뷰 게임 만들기]3. 퀘스트시스템 만들기-2 (1) | 2024.11.28 |