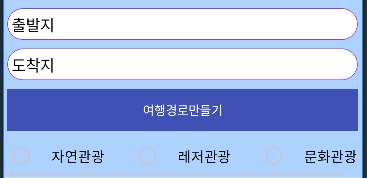
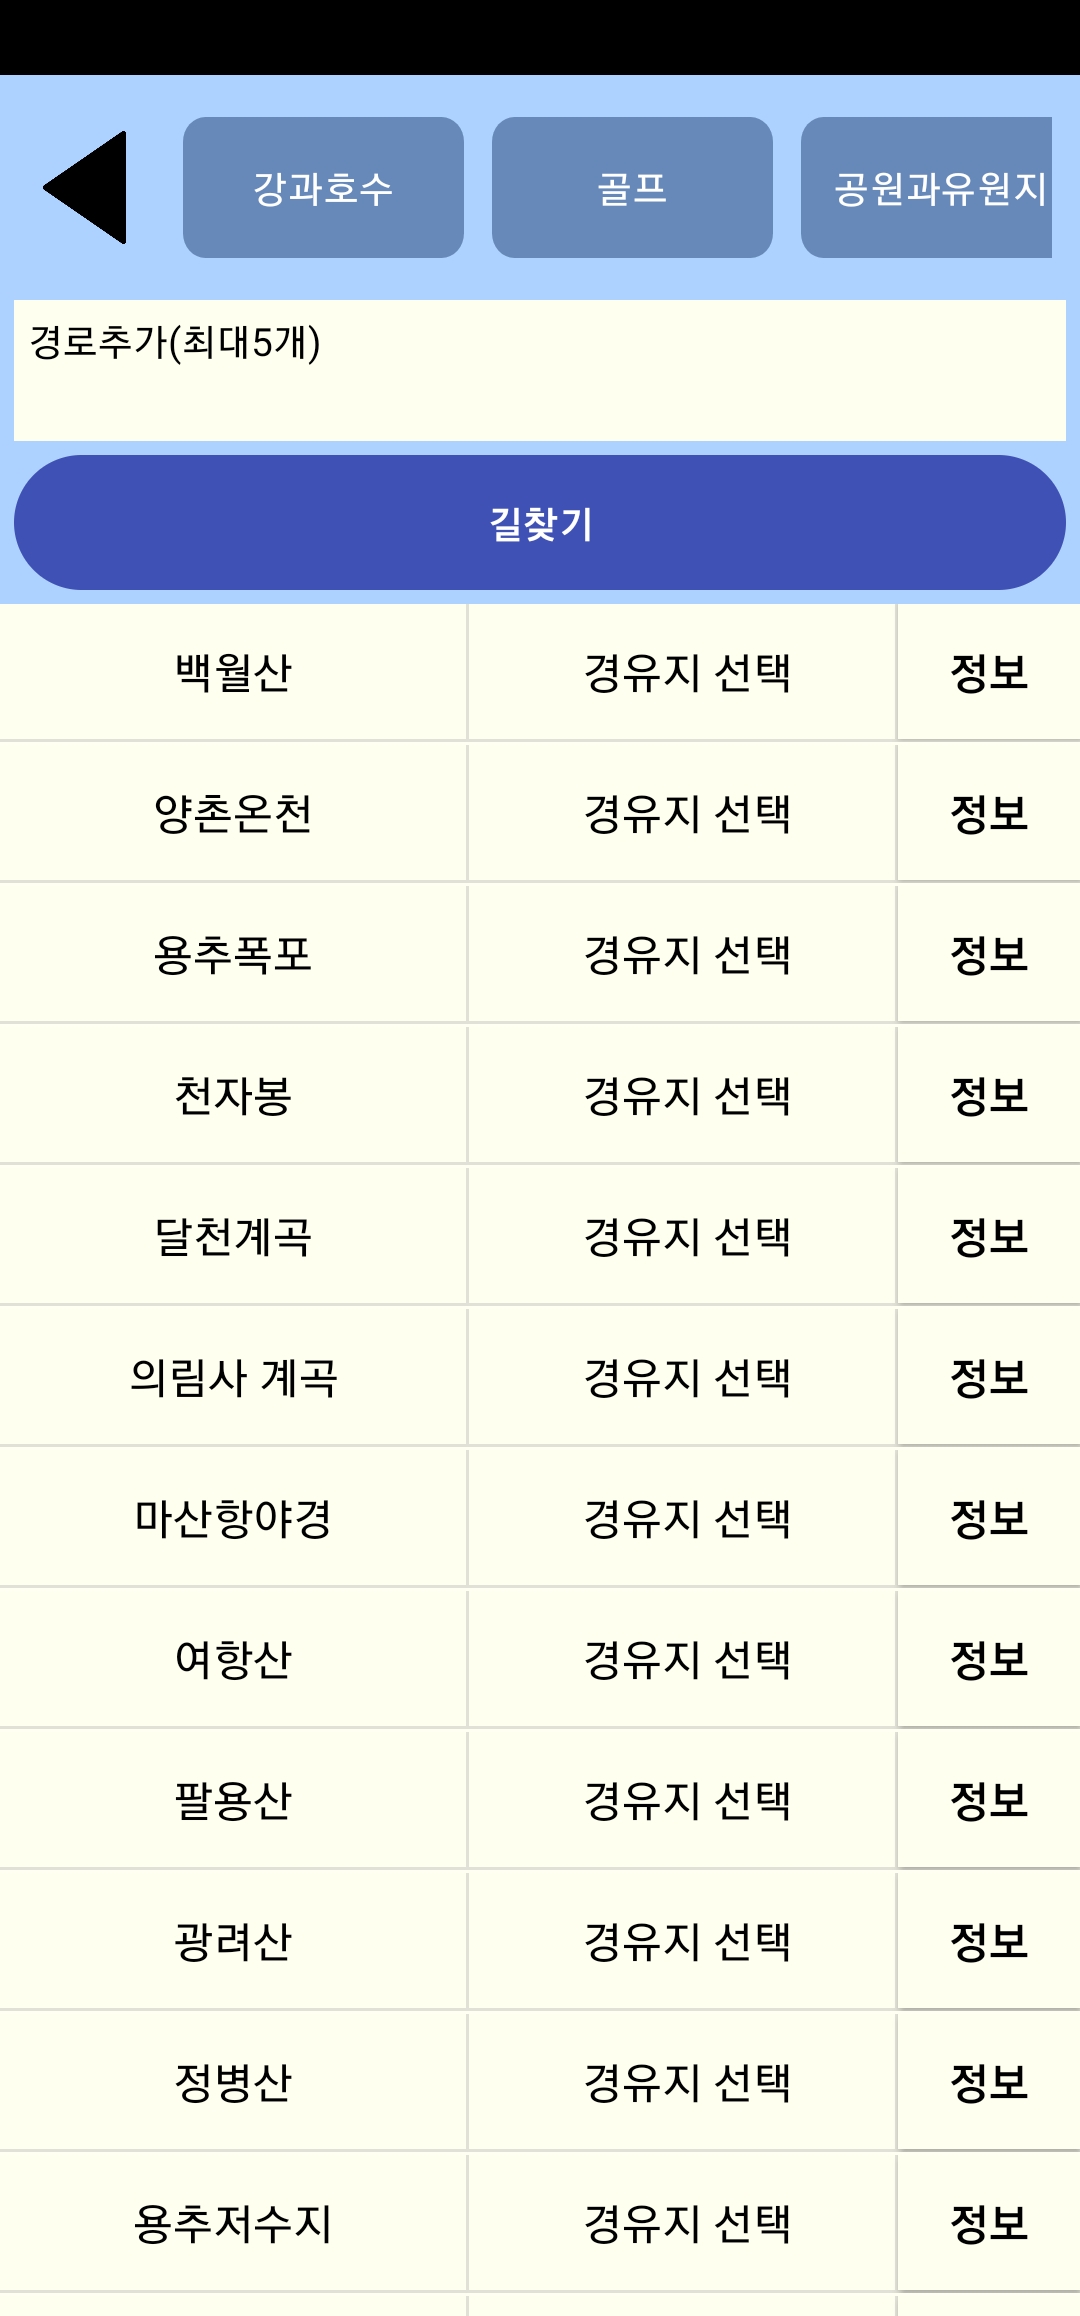
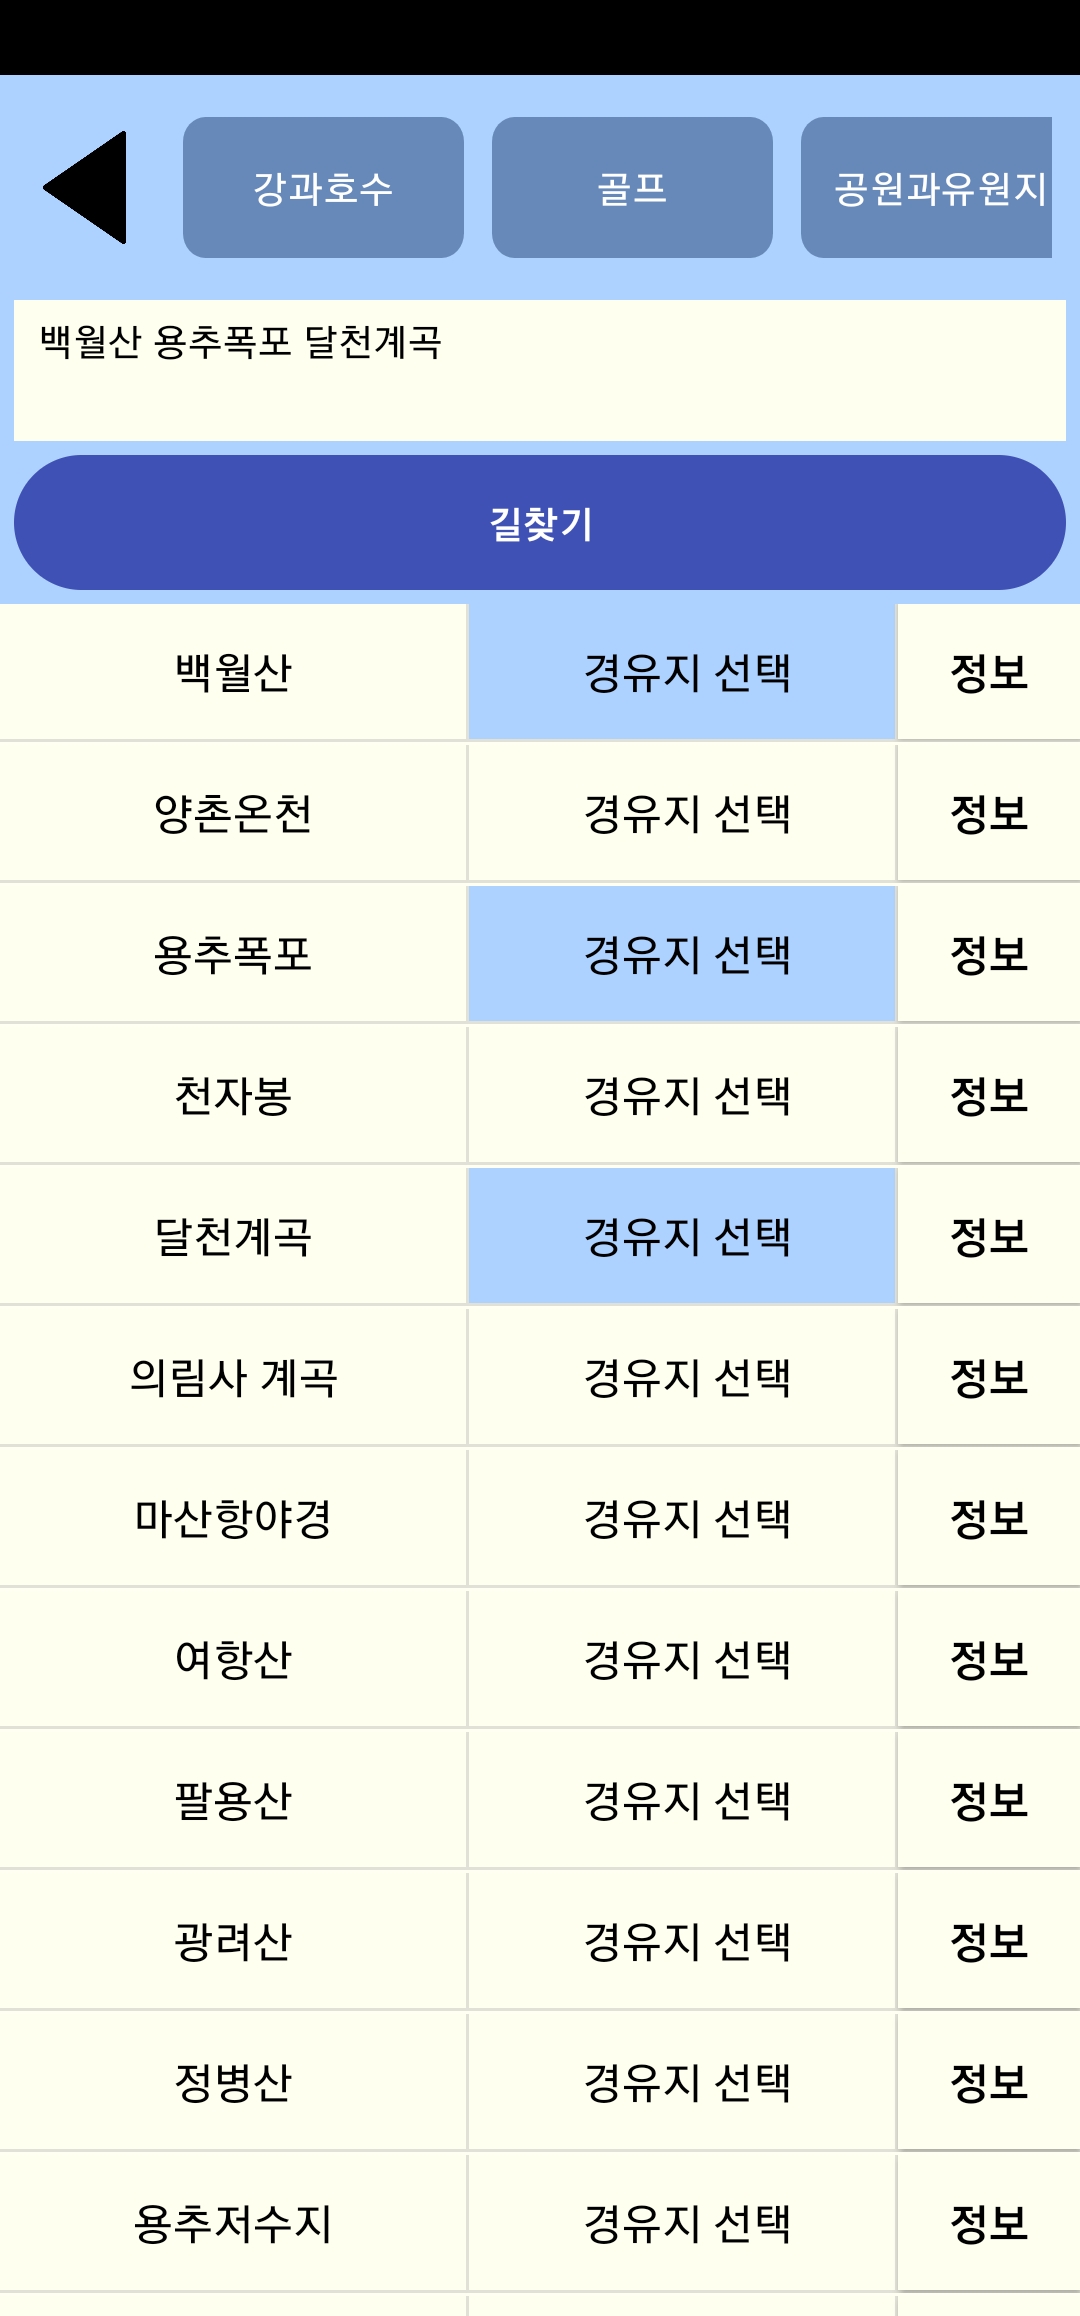
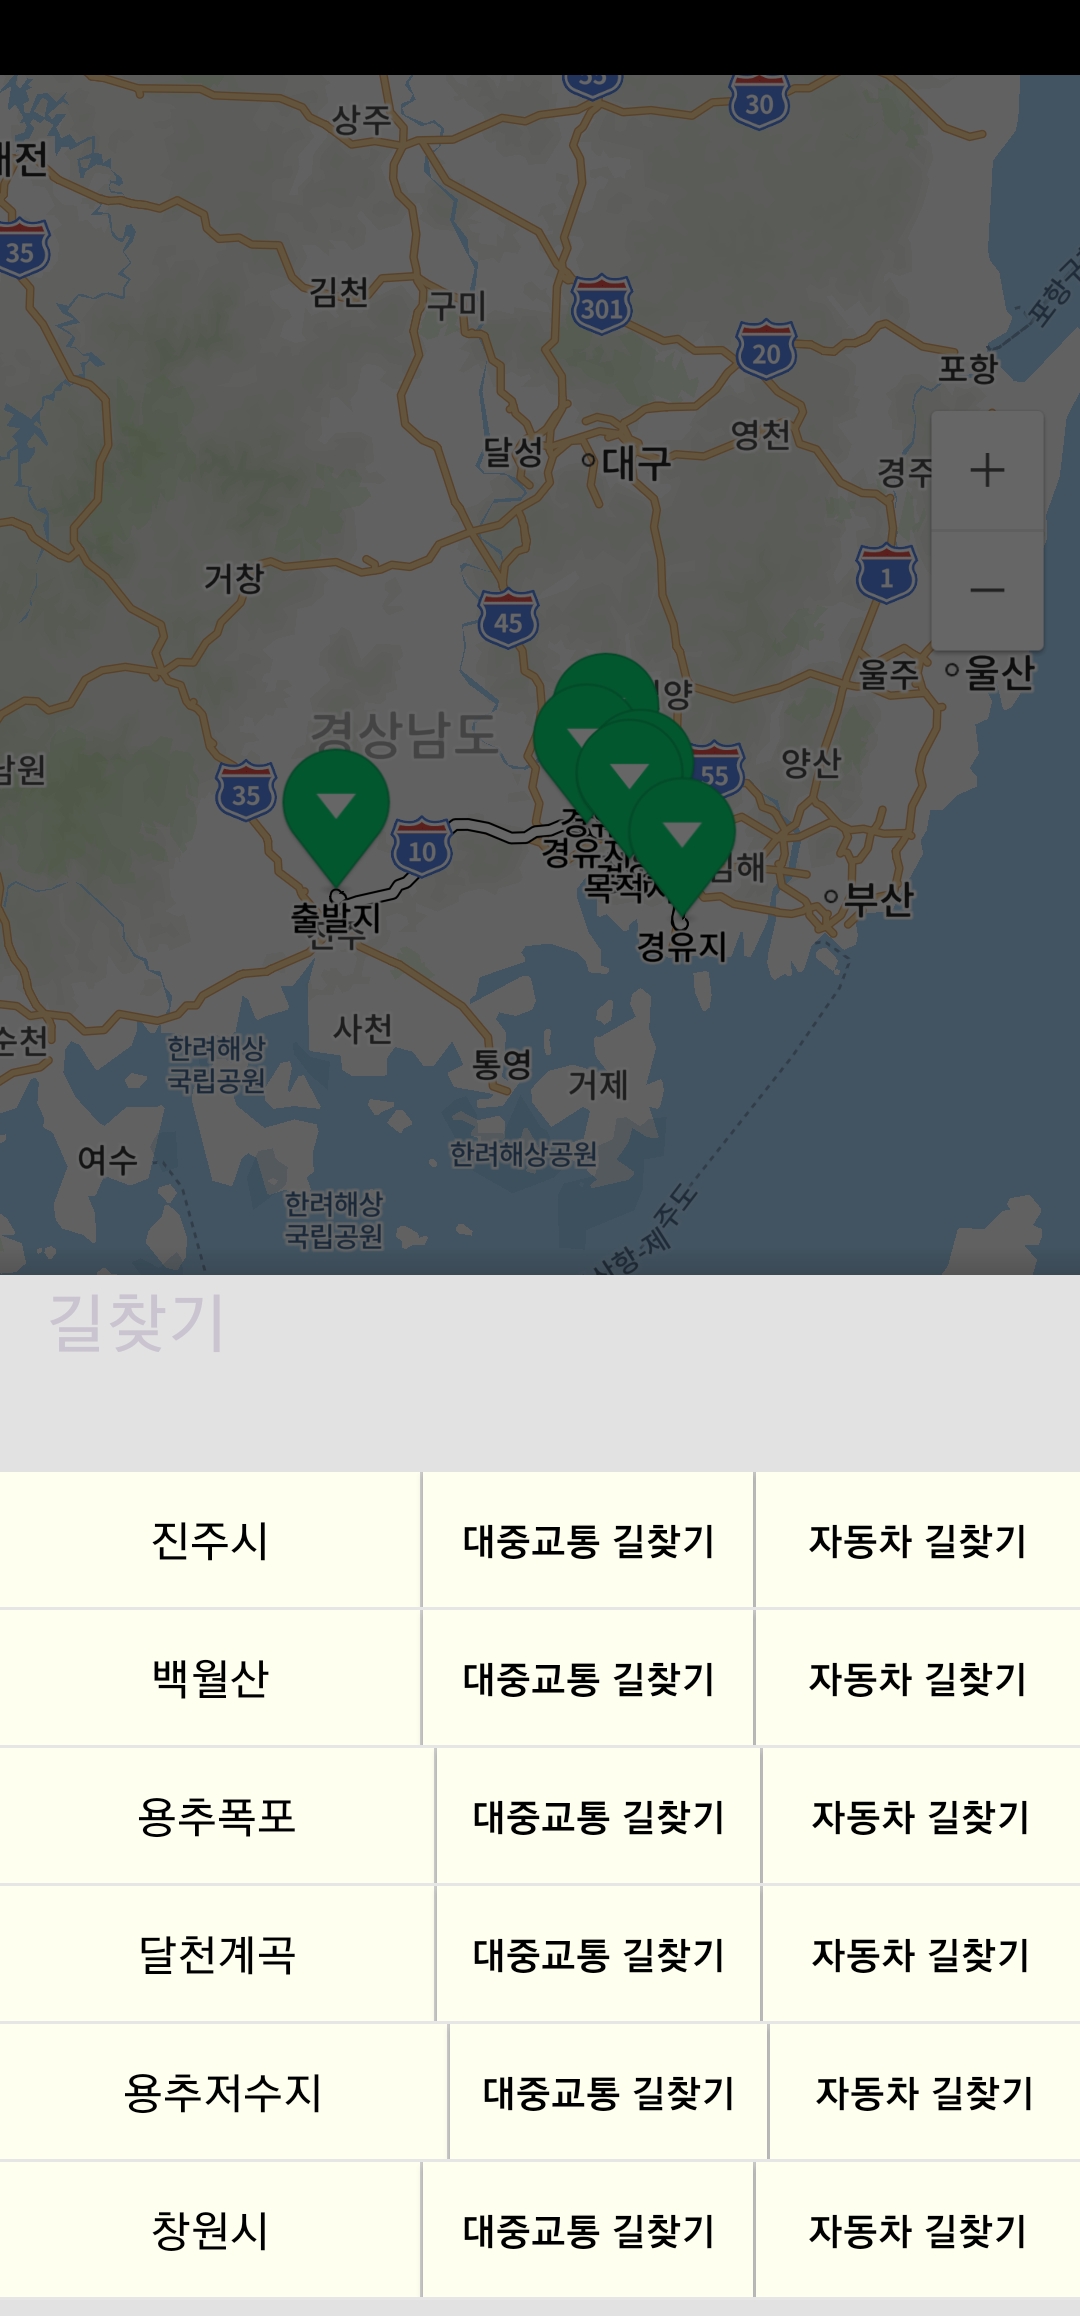
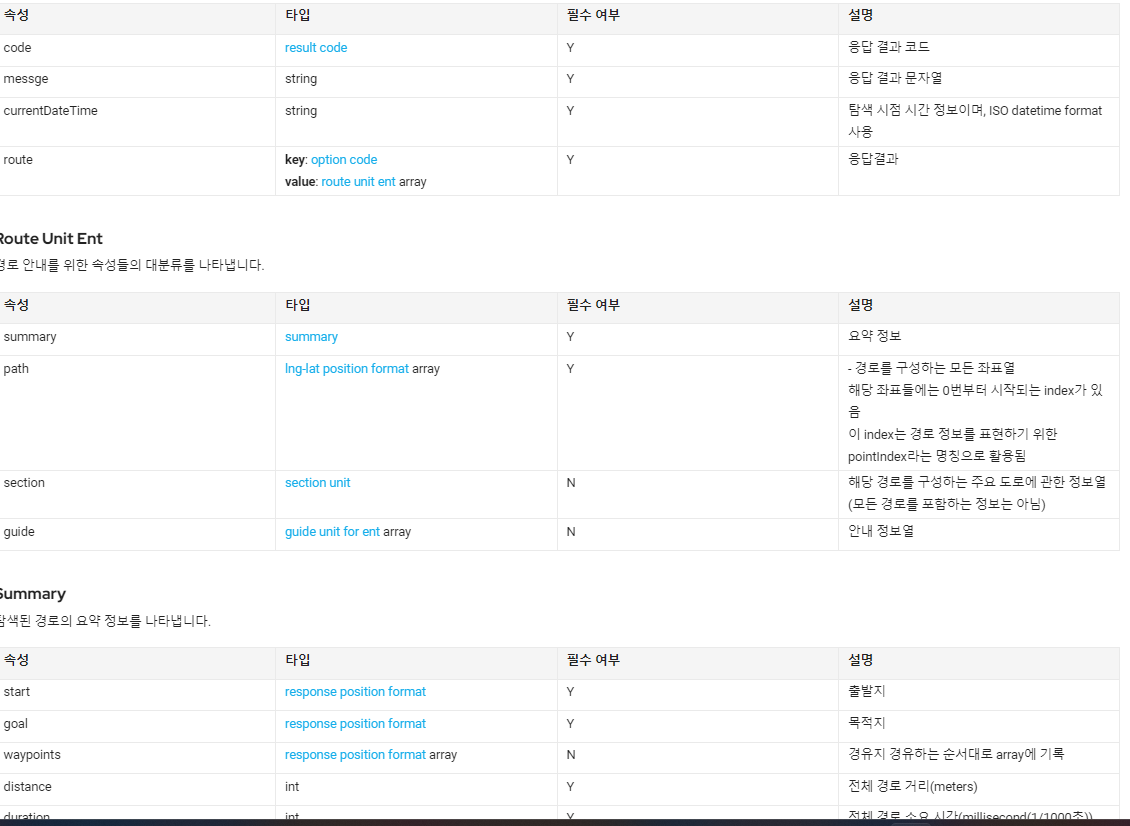
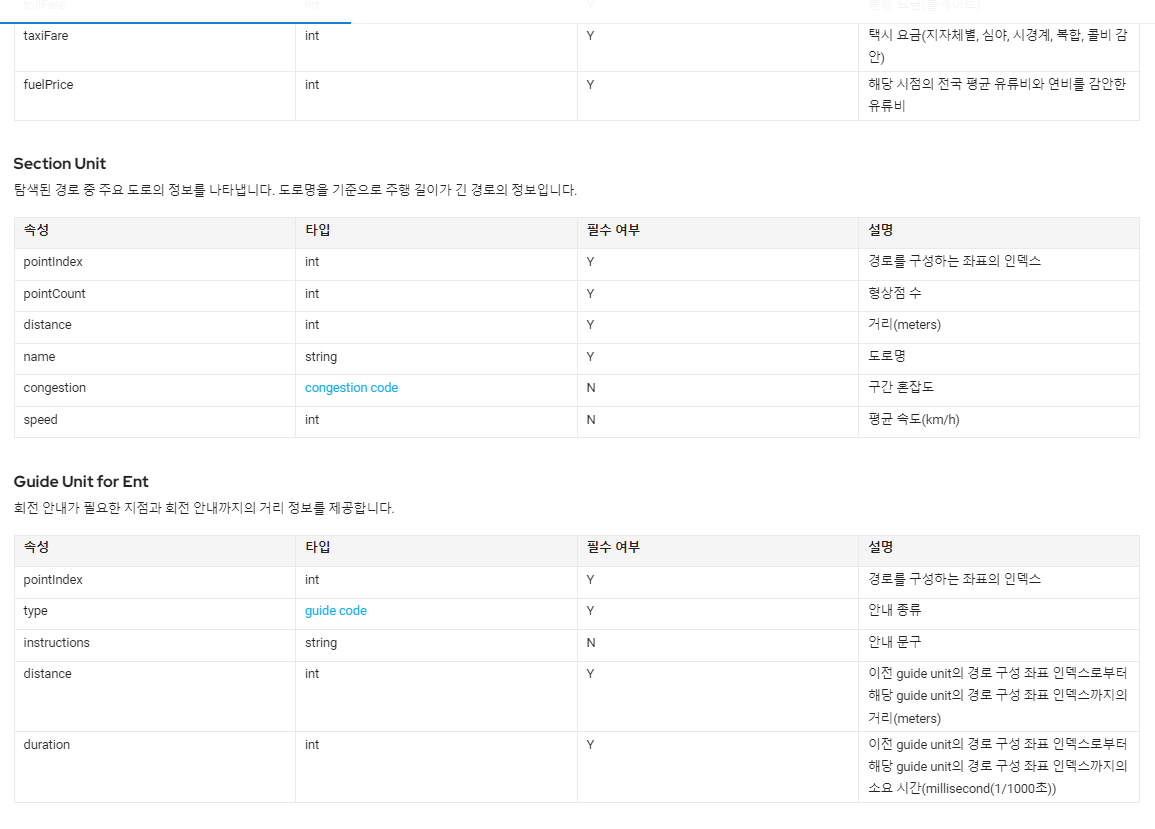
이번에는 경남드리의 부가기능과 그것을 구현하면서 배운 점에 대해 적어보려고 한다.
주요한 경남드리의 부가기능에는 회원가입, 좋아요 및 리뷰가 있다.
1)회원가입
회원가입은 FireBase의 공식문서를 참고하여 만들었다.
https://firebase.google.com/docs/auth/android/start?hl=ko&authuser=2
Android에서 Firebase 인증 시작하기 | Firebase Authentication
Google I/O 2023에서 Firebase의 주요 소식을 확인하세요. 자세히 알아보기 의견 보내기 Android에서 Firebase 인증 시작하기 컬렉션을 사용해 정리하기 내 환경설정을 기준으로 콘텐츠를 저장하고 분류하
firebase.google.com
이 문서에 보면 신규 사용자 가입이라는 항목이 있다. 이 항목 코드를 가져와서 사용해주는데 만약 이름이나 사진을 넣어주고 싶다면 가입하는 코드 내에서 회원가입이 정상적으로 이루진 후에 유저의 정보에 이름과 사진을 추가해주는 코드가 들어가도록 구현해주면 된다.
mAuth.createUserWithEmailAndPassword(email, password)
        .addOnCompleteListener(this, new OnCompleteListener<AuthResult>() {
            @Override
            public void onComplete(@NonNull Task<AuthResult> task) {
                if (task.isSuccessful()) {
                    // Sign in success, update UI with the signed-in user's information
                    Log.d(TAG, "createUserWithEmail:success");
                    FirebaseUser user = mAuth.getCurrentUser();
                    updateUI(user);
                } else {
                    // If sign in fails, display a message to the user.
                    Log.w(TAG, "createUserWithEmail:failure", task.getException());
                    Toast.makeText(EmailPasswordActivity.this, "Authentication failed.",
                            Toast.LENGTH_SHORT).show();
                    updateUI(null);
                }
            }
        });
이 email과 password에 우리의 값을 넣어서 isSuccessful 시에 회원가입 시 성공인 화면이 나올 수 있도록 만들어 보겠다.
일단 회원가입에 유저정보를 받을 수 있게 틀을 xml로 작성해주자
<FrameLayout xmlns:android="http://schemas.android.com/apk/res/android"
    xmlns:tools="http://schemas.android.com/tools"
    android:layout_width="match_parent"
    android:layout_height="match_parent"
    android:background="#AED2FF">


    <LinearLayout
        android:layout_width="match_parent"
        android:layout_height="match_parent"
        android:orientation="vertical">

        <LinearLayout
            android:layout_width="match_parent"
            android:layout_height="wrap_content"
            android:orientation="horizontal">

            <TextView
                android:id="@+id/back"
                android:layout_width="50dp"
                android:layout_height="50dp"
                android:layout_marginLeft="20dp"
                android:layout_marginTop="20dp"
                android:background="@drawable/backspaceimage"
                android:textColor="@color/purple_700"
                android:textSize="20dp" />

            <TextView
                android:id="@+id/signup"
                android:layout_width="wrap_content"
                android:layout_height="wrap_content"
                android:layout_marginTop="20dp"
                android:layout_marginBottom="20dp"
                android:layout_weight="2"
                android:gravity="center"
                android:text="회원 가입"
                android:textColor="@color/purple_700"
                android:textSize="25dp" />
        </LinearLayout>

        <ScrollView
            android:layout_width="match_parent"
            android:layout_height="match_parent">

            <LinearLayout
                android:layout_width="match_parent"
                android:layout_height="wrap_content"
                android:layout_marginLeft="30dp"
                android:layout_marginTop="10dp"
                android:layout_marginRight="30dp"
                android:orientation="vertical">


                <TextView
                    android:id="@+id/signIDtext"
                    android:layout_width="match_parent"
                    android:layout_height="wrap_content"
                    android:layout_marginBottom="5dp"
                    android:text="닉네임"
                    android:textColor="@color/purple_700"
                    android:textSize="20dp"
                    android:textStyle="bold" />

                <EditText
                    android:id="@+id/signID"
                    android:layout_width="wrap_content"
                    android:layout_height="40dp"
                    android:layout_marginBottom="20dp"
                    android:background="@color/white"
                    android:ems="10"
                    android:hint=" 닉네임"
                    android:inputType="textPersonName"
                    android:text=""
                    android:textColor="@color/black"
                    android:textColorHint="#60000000" />


                <TextView
                    android:id="@+id/signmailtext"
                    android:layout_width="match_parent"
                    android:layout_height="wrap_content"
                    android:layout_marginBottom="5dp"
                    android:text="이메일"
                    android:textColor="@color/purple_700"
                    android:textSize="20dp"
                    android:textStyle="bold" />

                <EditText
                    android:id="@+id/signmail"
                    android:layout_width="wrap_content"
                    android:layout_height="40dp"
                    android:layout_marginBottom="20dp"
                    android:background="@color/white"
                    android:ems="10"
                    android:hint="이메일"
                    android:inputType="textPersonName"
                    android:text=""
                    android:textColor="@color/black"
                    android:textColorHint="#60000000" />

                <TextView
                    android:id="@+id/signPWtext"
                    android:layout_width="match_parent"
                    android:layout_height="wrap_content"
                    android:layout_marginBottom="5dp"
                    android:text="비밀번호"
                    android:textColor="@color/purple_700"
                    android:textSize="20dp"
                    android:textStyle="bold" />


                <EditText
                    android:id="@+id/signPW"
                    android:layout_width="wrap_content"
                    android:layout_height="40dp"
                    android:layout_marginBottom="20dp"
                    android:background="@color/white"
                    android:ems="10"
                    android:hint=" 비밀번호"
                    android:inputType="textPassword"
                    android:text=""
                    android:textColor="@color/black"
                    android:textColorHint="#60000000" />

                <TextView
                    android:id="@+id/signPW2text"
                    android:layout_width="match_parent"
                    android:layout_height="wrap_content"
                    android:layout_marginBottom="5dp"
                    android:text="비밀번호 확인"
                    android:textColor="@color/purple_700"
                    android:textSize="20dp"
                    android:textStyle="bold" />

                <LinearLayout
                    android:layout_width="match_parent"
                    android:layout_height="wrap_content"
                    android:orientation="horizontal">

                    <EditText
                        android:id="@+id/signPW2"
                        android:layout_width="wrap_content"
                        android:layout_height="40dp"
                        android:layout_marginBottom="20dp"
                        android:background="@color/white"
                        android:ems="10"
                        android:hint=" 비밀번호 다시 입력"
                        android:inputType="textPassword"
                        android:text=""
                        android:textColor="@color/black"
                        android:textColorHint="#60000000" />

                    <androidx.appcompat.widget.AppCompatButton
                        android:id="@+id/pwcheckbutton"
                        android:layout_width="wrap_content"
                        android:layout_height="40dp"
                        android:layout_marginLeft="10dp"
                        android:background="@drawable/cate_button_selector"
                        android:text="확인"
                        android:textColor="@color/white"
                        android:textSize="16sp"
                        android:textStyle="bold" />
                </LinearLayout>

                <androidx.appcompat.widget.AppCompatButton
                    android:id="@+id/signupbutton"
                    android:layout_width="wrap_content"
                    android:layout_height="40dp"
                    android:layout_gravity="center"
                    android:layout_marginTop="20dp"
                    android:background="@drawable/cate_button_selector"
                    android:text="가입"
                    android:textColor="@color/white"
                    android:textSize="16sp"
                    android:textStyle="bold" />

            </LinearLayout>
        </ScrollView>

    </LinearLayout>
</FrameLayout>
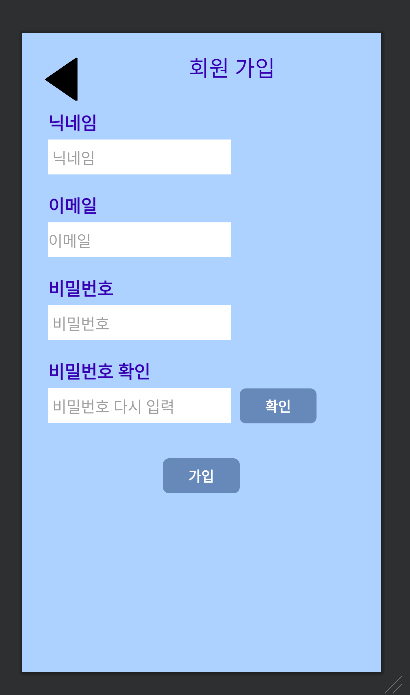
유저 닉네임과 아이디 비밀번호를 EditText로 유저가 직접 입력할 수 있도록 하였다. 그리고 비밀번호 확인버튼과 뒤로가기 버튼, 회원가입 버튼을 만들어서 누를 수 있게 구현하였다.
밑은 실제로 구현된 화면이다.
이 EditText에 있는 값을 가져온 다음 위에 있던 함수와 똑같이 작성해준다음 매개변수만 우리의 값으로 대체해 준다.
String mypw=pw.getText().toString();
String mypw2=pw2.getText().toString();
String myemail=email.getText().toString();
String myname=name.getText().toString();
if(mypw.equals(mypw2)){
    mFirebaseAuth.createUserWithEmailAndPassword(myemail, mypw)
            .addOnCompleteListener(signUp.this, new OnCompleteListener<AuthResult>() {
                @Override
                public void onComplete(@NonNull Task<AuthResult> task) {
                    if (task.isSuccessful()) {
                        // Sign in success, update UI with the signed-in user's information
                        Toast.makeText(signUp.this, "회원가입성공",Toast.LENGTH_LONG).show();
                        FirebaseUser user = mFirebaseAuth.getCurrentUser();
                        UserProfileChangeRequest profileUpdates = new UserProfileChangeRequest.Builder()
                                .setDisplayName(myname).build();
                        user.updateProfile(profileUpdates)
                                .addOnCompleteListener(new OnCompleteListener<Void>() {
                                    @Override
                                    public void onComplete(@NonNull Task<Void> task) {
                                        if (task.isSuccessful()) {

                                        }else{
                                            Log.d(TAG, "실패.");
                                        }
                                    }
                                });

                        onBackPressed();
                    } else {
                        // If sign in fails, display a message to the user.
                        Toast.makeText(signUp.this, "회원가입 실패",Toast.LENGTH_LONG).show();
                    }
                }
            });
}else{
    Toast.makeText(signUp.this, "비밀번호가 중복체크 실패",Toast.LENGTH_LONG).show();
}
2)로그인
로그인 또한 Firebase 위의 링크의 공식문서에 잘 작성돼있다. 코드를 보자면
mAuth.signInWithEmailAndPassword(email, password)
        .addOnCompleteListener(this, new OnCompleteListener<AuthResult>() {
            @Override
            public void onComplete(@NonNull Task<AuthResult> task) {
                if (task.isSuccessful()) {
                    // Sign in success, update UI with the signed-in user's information
                    Log.d(TAG, "signInWithEmail:success");
                    FirebaseUser user = mAuth.getCurrentUser();
                    updateUI(user);
                } else {
                    // If sign in fails, display a message to the user.
                    Log.w(TAG, "signInWithEmail:failure", task.getException());
                    Toast.makeText(EmailPasswordActivity.this, "Authentication failed.",
                            Toast.LENGTH_SHORT).show();
                    updateUI(null);
                }
            }
        });
이 email과 password에 우리의 값을 넣어서 isSuccessful 시에 로그인 성공인 화면이 나올 수 있도록 만들어 보겠다.
일단 기반이 되는 xml 파일을 보자면 회원가입과 동일하게 입력받는 부분이 EditText로 구현되어 있다. 또한 로그인 할 수 있는 버튼과 회원가입화면으로 넘어갈 수 있는 회원가입 글자도 클릭가능하게 만들어 주었다.
<?xml version="1.0" encoding="utf-8"?>
<FrameLayout xmlns:android="http://schemas.android.com/apk/res/android"
    xmlns:tools="http://schemas.android.com/tools"
    android:layout_width="match_parent"
    android:layout_height="match_parent"
    android:background="#AED2FF"
    tools:context=".Login">


    <TextView
        android:id="@+id/loginbackbutton"
        android:layout_width="50dp"
        android:layout_height="50dp"
        android:layout_margin="20dp"
        android:layout_weight="1.7"
        android:background="@drawable/backspaceimage"
        android:textColor="@color/purple_700"
        android:textSize="20dp" />

    <LinearLayout
        android:layout_width="match_parent"
        android:layout_height="match_parent"
        android:layout_marginLeft="40dp"
        android:layout_marginTop="200dp"
        android:layout_marginRight="30dp"
        android:layout_marginBottom="30dp"
        android:orientation="vertical">

        <TextView
            android:id="@+id/logintext"
            android:layout_width="match_parent"
            android:layout_height="wrap_content"
            android:layout_marginBottom="20dp"
            android:gravity="center_horizontal"
            android:text="회원 로그인"
            android:textAlignment="center"
            android:textColor="@color/purple_700"
            android:textSize="25dp"
            android:textStyle="bold" />

        <EditText
            android:id="@+id/my_Id"
            android:layout_width="wrap_content"
            android:layout_height="40dp"
            android:layout_gravity="center"
            android:layout_marginBottom="10dp"
            android:background="@color/white"
            android:ems="10"
            android:hint="아이디"
            android:inputType="textEmailAddress"
            android:text=""
            android:textColor="@color/black"
            android:textColorHint="@color/gray" />

        <EditText
            android:id="@+id/my_pw"
            android:layout_width="wrap_content"
            android:layout_height="40dp"
            android:layout_gravity="center"
            android:background="@color/white"
            android:ems="10"
            android:hint="비밀번호"
            android:inputType="textPassword"
            android:textColor="@color/black"
            android:textColorHint="@color/gray" />

        <androidx.appcompat.widget.AppCompatButton
            android:id="@+id/loginbutton"
            android:layout_width="wrap_content"
            android:layout_height="35dp"
            android:layout_gravity="center"
            android:layout_marginTop="20dp"
            android:background="@drawable/cate_button_selector"
            android:text="로그인"
            android:textColor="@color/white"
            android:textSize="13sp"
            android:textStyle="bold" />

        <TextView
            android:id="@+id/signin"
            android:layout_width="wrap_content"
            android:layout_height="wrap_content"
            android:layout_gravity="center"
            android:layout_marginTop="10dp"
            android:text="회원가입"
            android:textColor="@color/black"
            android:textSize="13dp"
            android:textStyle="bold" />

    </LinearLayout>
</FrameLayout>
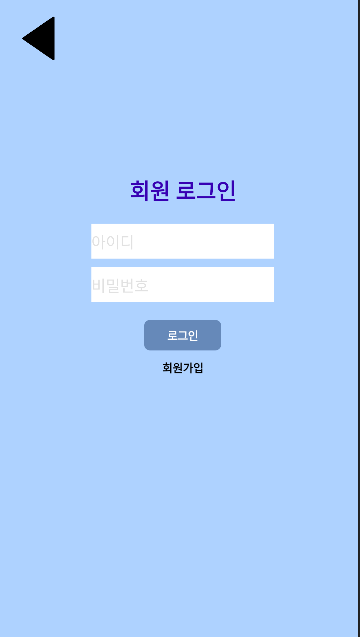
실제로 코드로 구현된 화면이다.
로그인 버튼을 눌렀을 때 위의 공식문서에서의 코드를 바탕으로 EditText의 값을 받아와서 함수에 넣어주면 된다.
public void onClick(View view) {
    String email=my_Id.getText().toString();
    String password=my_pw.getText().toString();
    mAuth.signInWithEmailAndPassword(email, password)
            .addOnCompleteListener(Login.this, new OnCompleteListener<AuthResult>() {
                @Override
                public void onComplete(@NonNull Task<AuthResult> task) {
                    if (task.isSuccessful()) {
                        Toast.makeText(Login.this,"로그인 성공",Toast.LENGTH_LONG).show();
                        FirebaseUser user = mAuth.getCurrentUser();
                        Intent intent=new Intent(getApplicationContext(),HomeActivity.class);
                        intent.setFlags(Intent.FLAG_ACTIVITY_NEW_TASK |  Intent.FLAG_ACTIVITY_CLEAR_TOP);//액티비티 스택제거
                        startActivity(intent);
                    } else {
                        Toast.makeText(Login.this, "로그인 실패", Toast.LENGTH_SHORT).show();
                    }
                }
            });
}
3)리뷰 및 좋아요
사실 리뷰 및 좋아요 기능을 구현하려고 할 때 어려웠던 점이 리뷰가 삭제도 가능해야하고 각 관광지의 리뷰와 각 유저간의 리뷰도 구분하여 가져올 수 있어야 하는데 어떻게 구현해야할 지 방식이 생각이 잘 나지않았다. 여러번의 시도 끝에 나는 Firestore에서 문서를 삭제할 때 문서의 ID가 있어야 되기 때문에 리뷰를 저장할 때 생성과 동시에 저장된 리뷰데이터를 불러올 때 문서의 아이디를 저장해주는 방식으로 구현하였고 유저, 관광지 구분을 위해 관광지 이름과 유저의 이메일도 같이 저장하였다.
처음으로 리뷰가 보이게될 틀이 될 xml을 구현해 보았다. 이 리뷰페이지는 관광지 이름을 위에 띄우고 리스트뷰로 리뷰가 리스트형태로 유동적으로 나올 수 있게 만들었다. 그리고 제일 밑에는 리뷰를 작성할 수있게 EditText, 저장할 수 있게 버튼을 붙여 주었다.
<?xml version="1.0" encoding="utf-8"?>
<LinearLayout xmlns:android="http://schemas.android.com/apk/res/android"
    android:layout_width="match_parent"
    android:layout_height="match_parent"
    android:layout_centerHorizontal="false"
    android:background="#FFFFF0"
    android:orientation="vertical"
    android:verticalScrollbarPosition="left">

    <LinearLayout
        android:layout_width="match_parent"
        android:layout_height="match_parent"
        android:layout_weight="1"
        android:orientation="vertical">

        <TextView
            android:id="@+id/cityName"
            android:layout_width="match_parent"
            android:layout_height="wrap_content"
            android:background="@color/gray"
            android:gravity="center"
            android:text="관광지 이름"
            android:textColor="#000000"
            android:textSize="34sp"
            android:textStyle="bold" />

        <LinearLayout
            android:layout_width="match_parent"
            android:layout_height="match_parent"
            android:orientation="vertical">

            <FrameLayout
                android:id="@+id/routeFragment"
                android:layout_width="match_parent"
                android:layout_height="match_parent"
                android:layout_weight="2">

                <ListView
                    android:id="@+id/review_rlist"
                    android:layout_width="wrap_content"
                    android:layout_height="wrap_content" />
            </FrameLayout>

            <LinearLayout
                android:layout_width="match_parent"
                android:layout_height="wrap_content"
                android:gravity="center_horizontal"
                android:orientation="horizontal">

                <EditText
                    android:id="@+id/reviewtextbox"
                    android:layout_width="wrap_content"
                    android:layout_height="wrap_content"
                    android:layout_marginRight="10dp"
                    android:hint="여기에 리뷰를 작성해 주세요"
                    android:inputType="text"
                    android:padding="15dp"
                    android:textColor="#000000"
                    android:textColorHint="#8B000000" />

                <Button
                    android:id="@+id/reviewbutton"
                    android:layout_width="wrap_content"
                    android:layout_height="wrap_content"
                    android:scrollIndicators="none"
                    android:text="등록"
                    android:textColor="@color/white" />
            </LinearLayout>

        </LinearLayout>
    </LinearLayout>


</LinearLayout>
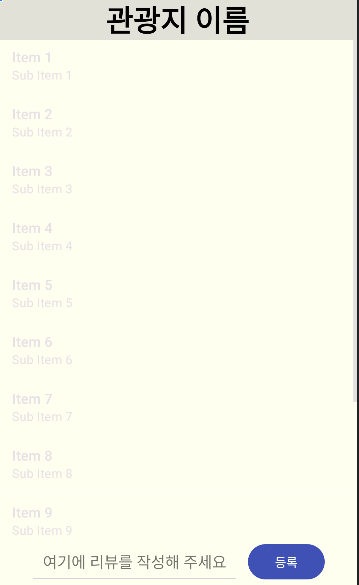
실제로 구현된 화면이다.
등록버튼을 눌렀을 때 로그인이 돼있는 경우 로그인된 유저의 정보를 Firebaseuser 을 통해 받아온 다음 EditText에 있는 값을 받아오고 유저이메일과 관광지이름을 FireStore에 저장해주면 된다.
user = FirebaseAuth.getInstance().getCurrentUser();
if (user == null) {
    Toast.makeText(getApplicationContext(),"로그인을 하세요",Toast.LENGTH_LONG).show();
    Intent go_intent=new Intent(ReviewActivity.this, Login.class);
    startActivity(go_intent);
} else {
    String email=user.getEmail();
    reviewtextbox=findViewById(R.id.reviewtextbox);
    Map<String, Object> adddata = new HashMap<>();
    adddata.put("review_text", reviewtextbox.getText().toString());
    adddata.put("user_email",email);
    adddata.put("con_name",name);


    db.collection("Review_Data")
            .add(adddata)
            .addOnSuccessListener(new OnSuccessListener<DocumentReference>() {
                @Override
                public void onSuccess(DocumentReference documentReference) {
                    Toast.makeText(getApplicationContext(),"리뷰등록완료!",Toast.LENGTH_LONG).show();
                    review.clear();
                    db.collection("Review_Data")
                            .whereEqualTo("con_name",name)
                            .get()
                            .addOnCompleteListener(new OnCompleteListener<QuerySnapshot>() {
                                @Override
                                public void onComplete(@NonNull Task<QuerySnapshot> task) {
                                    if (task.isSuccessful()) {
                                        adddata.put("document_id",documentReference.getId());
                                        db.collection("Review_Data").document(documentReference.getId())
                                                .set(adddata)
                                                .addOnSuccessListener(new OnSuccessListener<Void>() {
                                                    @Override
                                                    public void onSuccess(Void aVoid) {

                                                    }
                                                })
                                                .addOnFailureListener(new OnFailureListener() {
                                                    @Override
                                                    public void onFailure(@NonNull Exception e) {
                                                    }
                                                });


                                        for (QueryDocumentSnapshot document : task.getResult()) {
                                            review.add(document.get("review_text",String.class));
                                        }
                                        ReviewListAdapter=new List_Adapter_Review(ReviewActivity.this,review);
                                        review_List.setAdapter(ReviewListAdapter);
                                    } else {
                                        Log.d(TAG, "Error getting documents: ", task.getException());
                                    }
                                }
                            });
                }
            })
            .addOnFailureListener(new OnFailureListener() {
                @Override
                public void onFailure(@NonNull Exception e) {
                    Log.w(TAG, "Error adding document", e);
                }
            });


}'Project > 경남드리' 카테고리의 다른 글
| [Android][JAVA]2장. 경남드리 (0) | 2023.10.18 |
|---|---|
| 1장. 학기에서 공모전으로 (4) | 2023.10.17 |
| 0장. 시작 (0) | 2023.10.17 |