

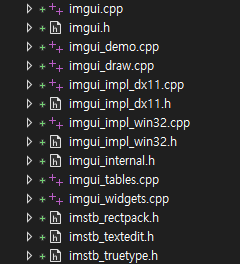
이제 GUI를 사용해 보자. GUI는 ImGUI라는 라이브러리를 가져와서 사용해볼 것인데 이것은 따로 라이브러리 파일이 있다기보다는 솔루션파일에서 필요한 부분의 소스코드를 가져와서 사용하면 된다.
일단 ImGUI를 사용하기위한 소스코드를 모두 가져오고 AssimpTool에서 새로운 클래스를 만들어서 이곳에서 우리가 가져와서 사용해보도록하자
ImGuiDemo.h
#pragma once
#include "IExecute.h"

class ImGuiDemo : public IExecute
{
public:
	void Init() override;
	void Update() override;
	void Render() override;

	void Test();

private:
	bool show_demo_window = true;
	bool show_another_window = false;
	Vec4 clear_color = Vec4(0.f);
};
ImGuiDemo.cpp
#include "pch.h"
#include "ImGuiDemo.h"
#include "GeometryHelper.h"
#include "Camera.h"
#include "GameObject.h"
#include "CameraScript.h"
#include "MeshRenderer.h"
#include "Mesh.h"
#include "Material.h"
#include "Model.h"
#include "ModelRenderer.h"

void ImGuiDemo::Init()
{
	//Setup Dear ImGui context
	IMGUI_CHECKVERSION();
	ImGui::CreateContext();
	ImGuiIO& io = ImGui::GetIO(); (void)io;
	io.ConfigFlags |= ImGuiConfigFlags_NavEnableKeyboard;     // Enable Keyboard Controls
	io.ConfigFlags |= ImGuiConfigFlags_NavEnableGamepad;      // Enable Gamepad Controls

	//Setup Dear ImGui style
	ImGui::StyleColorsDark();
	//ImGui::StyleColorsLight();

	//Setup Platform/Renderer backends
	ImGui_ImplWin32_Init(GAME->GetGameDesc().hWnd);
	ImGui_ImplDX11_Init(DEVICE.Get(), DC.Get());
}

void ImGuiDemo::Update()
{
	// Start the Dear ImGui frame
	ImGui_ImplDX11_NewFrame();
	ImGui_ImplWin32_NewFrame();
	ImGui::NewFrame();

	//UI
	Test();
}

void ImGuiDemo::Render()
{
	// Rendering
	ImGui::Render();

	/*const float clear_color_with_alpha[4] = { clear_color.x * clear_color.w, clear_color.y * clear_color.w, clear_color.z * clear_color.w, clear_color.w };
	g_pd3dDeviceContext->OMSetRenderTargets(1, &g_mainRenderTargetView, NULL);
	g_pd3dDeviceContext->ClearRenderTargetView(g_mainRenderTargetView, clear_color_with_alpha);*/

	ImGui_ImplDX11_RenderDrawData(ImGui::GetDrawData());
}

void ImGuiDemo::Test()
{
	// 1. Show the big demo window (Most of the sample code is in ImGui::ShowDemoWindow()! You can browse its code to learn more about Dear ImGui!).
	if (show_demo_window)
		ImGui::ShowDemoWindow(&show_demo_window);

	// 2. Show a simple window that we create ourselves. We use a Begin/End pair to create a named window.
	{
		static float f = 0.0f;
		static int counter = 0;

		ImGui::Begin("Hello, world!");                          // Create a window called "Hello, world!" and append into it.

		ImGui::Text("This is some useful text.");               // Display some text (you can use a format strings too)
		ImGui::Checkbox("Demo Window", &show_demo_window);      // Edit bools storing our window open/close state
		ImGui::Checkbox("Another Window", &show_another_window);

		ImGui::SliderFloat("float", &f, 0.0f, 1.0f);            // Edit 1 float using a slider from 0.0f to 1.0f
		ImGui::ColorEdit3("clear color", (float*)&clear_color); // Edit 3 floats representing a color

		if (ImGui::Button("Button"))                            // Buttons return true when clicked (most widgets return true when edited/activated)
			counter++;
		ImGui::SameLine();
		ImGui::Text("counter = %d", counter);

		//ImGui::Text("Application average %.3f ms/frame (%.1f FPS)", 1000.0f / io.Framerate, io.Framerate);
		ImGui::End();
	}

	// 3. Show another simple window.
	if (show_another_window)
	{
		ImGui::Begin("Another Window", &show_another_window);   // Pass a pointer to our bool variable (the window will have a closing button that will clear the bool when clicked)
		ImGui::Text("Hello from another window!");
		if (ImGui::Button("Close Me"))
			show_another_window = false;
		ImGui::End();
	}
}
이렇게 해주면 일단 뭔가 뜨기는한다. 하지만 눌러도 반응이 없고 잘려서 보인다.
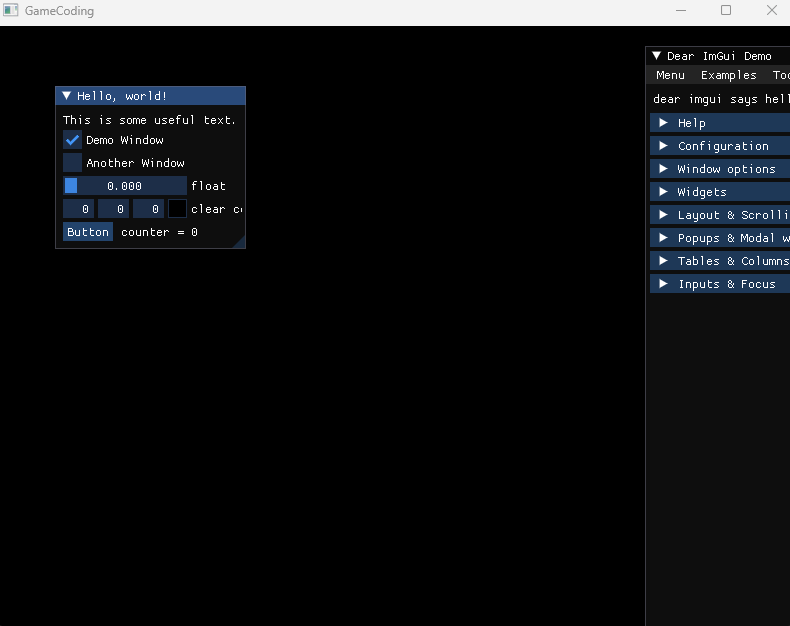
일단 왜 마우스입력이 처리되지 않는지 살펴보기 위해 우리가 입력을 처리했던 제일 메인함수인 Game으로 돌아가보고 ImGUI 샘플코드와 비교해보자. 비교해보면 샘플에서는 입력을 처리하기 위해 윈도우 헨틀를 두고 사용하고 있다는 것을 알 수 있다. 우리도 이 방식을 활용하여 전방선언을 해준 뒤에 Extern 하여 사용해주자
Game.cpp
#include "pch.h"
#include "Game.h"
#include "IExecute.h"

extern IMGUI_IMPL_API LRESULT ImGui_ImplWin32_WndProcHandler(HWND hWnd, UINT msg, WPARAM wParam, LPARAM lParam);

LRESULT CALLBACK Game::WndProc(HWND handle, UINT message, WPARAM wParam, LPARAM lParam)
{
	if (ImGui_ImplWin32_WndProcHandler(handle, message, wParam, lParam))
		return true;

	switch (message)
	{
	case WM_SIZE:
		break;
	case WM_CLOSE:
	case WM_DESTROY:
		PostQuitMessage(0);
		break;
	default:
		return ::DefWindowProc(handle, message, wParam, lParam);
	}
}
이렇게 해주면 이제 입력이 처리되는 모습을 볼 수 있다.

이제 샘플코드의 내용을 분석하고 우리의 방식대로 활용해보자. 우선 Test함수에서 2번부분을 복사한 다음 우리의 방식
대로 사용해보자.
ImGuiDemo.cpp
void ImGuiDemo::Test()
{
	// 1. Show the big demo window (Most of the sample code is in ImGui::ShowDemoWindow()! You can browse its code to learn more about Dear ImGui!).
	if (show_demo_window)
		ImGui::ShowDemoWindow(&show_demo_window);

	// 2. Show a simple window that we create ourselves. We use a Begin/End pair to create a named window.
	{
		static float f = 0.0f;
		static int counter = 0;

		ImGui::Begin("Hello, world!");                          // Create a window called "Hello, world!" and append into it.

		ImGui::Text("This is some useful text.");               // Display some text (you can use a format strings too)
		ImGui::Checkbox("Demo Window", &show_demo_window);      // Edit bools storing our window open/close state
		ImGui::Checkbox("Another Window", &show_another_window);

		ImGui::SliderFloat("float", &f, 0.0f, 1.0f);            // Edit 1 float using a slider from 0.0f to 1.0f
		ImGui::ColorEdit3("clear color", (float*)&clear_color); // Edit 3 floats representing a color

		if (ImGui::Button("Button"))                            // Buttons return true when clicked (most widgets return true when edited/activated)
			counter++;
		ImGui::SameLine();
		ImGui::Text("counter = %d", counter);

		//ImGui::Text("Application average %.3f ms/frame (%.1f FPS)", 1000.0f / io.Framerate, io.Framerate);
		ImGui::End();
	}

	//MY Code
	{
		static float f = 0.0f;
		static int counter = 0;

		ImGui::Begin("Hello, world!");                          // Create a window called "Hello, world!" and append into it.

		ImGui::Text("Sudden Hello From Me");

		//ImGui::Text("Application average %.3f ms/frame (%.1f FPS)", 1000.0f / io.Framerate, io.Framerate);
		ImGui::End();
	}

	// 3. Show another simple window.
	if (show_another_window)
	{
		ImGui::Begin("Another Window", &show_another_window);   // Pass a pointer to our bool variable (the window will have a closing button that will clear the bool when clicked)
		ImGui::Text("Hello from another window!");
		if (ImGui::Button("Close Me"))
			show_another_window = false;
		ImGui::End();
	}
}
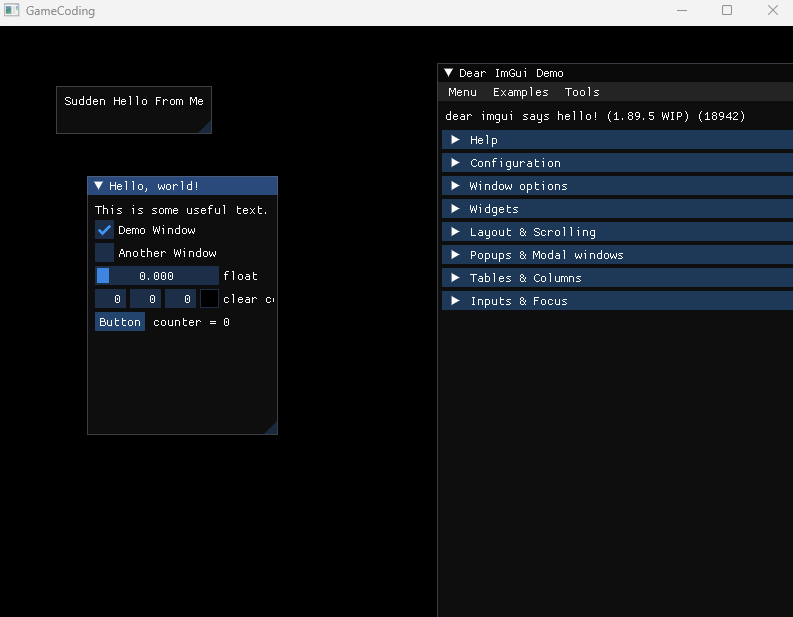
이렇게 해주게되면 밑의 결과처럼 Hello World창에서 Text가 제일 밑에 출력되고 있다.
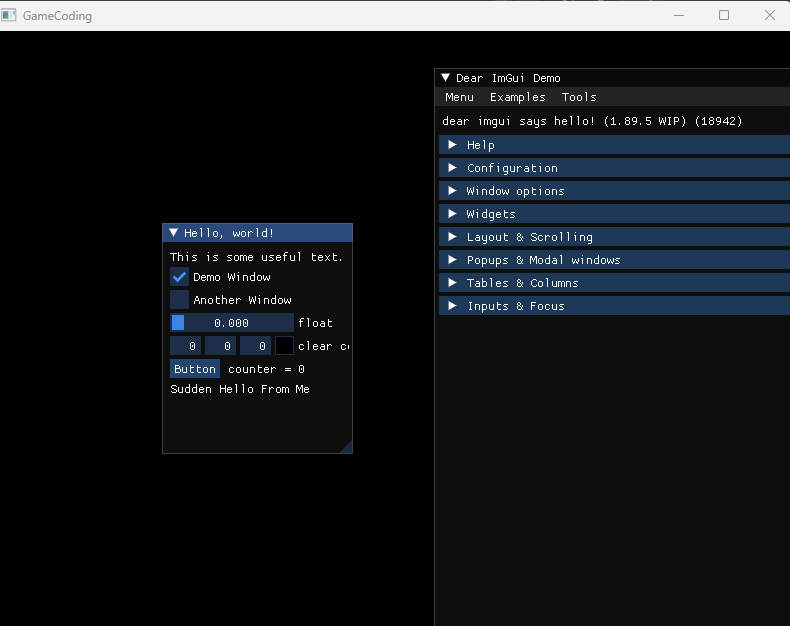
생각을 해보면 Begin의 키값에 따라 지정된 영역에 추가되는 것이라고 볼 수 있다. Begin의 값을 다르게 하면 다른 창이 새로 생기는 것을 볼 수 있다.
이제 우리가 작업할 때 새로운 부분을 추가하는 매니저 클래스를 만들고 이 매니저에 초기화하는 부분과 렌더해주는
부분을 넣어주자
ImGuiManager.h
#pragma once

class ImGuiManager
{
	DECLARE_SINGLE(ImGuiManager);

public:
	void Init();
	void Update();
	void Render();

};
ImGuiManager.cpp
#include "pch.h"
#include "ImGuiManager.h"


void ImGuiManager::Init()
{
	IMGUI_CHECKVERSION();
	ImGui::CreateContext();
	ImGuiIO& io = ImGui::GetIO(); (void)io;
	io.ConfigFlags |= ImGuiConfigFlags_NavEnableKeyboard;     // Enable Keyboard Controls
	io.ConfigFlags |= ImGuiConfigFlags_NavEnableGamepad;      // Enable Gamepad Controls

	// Setup Dear ImGui style
	ImGui::StyleColorsDark();
	//ImGui::StyleColorsLight();

	// Setup Platform/Renderer backends
	ImGui_ImplWin32_Init(GAME->GetGameDesc().hWnd);
	ImGui_ImplDX11_Init(DEVICE.Get(), DC.Get());
}

void ImGuiManager::Update()
{
	ImGui_ImplDX11_NewFrame();
	ImGui_ImplWin32_NewFrame();
	ImGui::NewFrame();
}

void ImGuiManager::Render()
{
	// Rendering
	ImGui::Render();
	ImGui_ImplDX11_RenderDrawData(ImGui::GetDrawData());
}
이렇게 해줬으면 매니저를 Game쪽에서 사용해서 초기화 및 렌더부분을 추가해주고 Demo 클래스에서 초기화 및 렌더부분은 제거해주자
Game.cpp
#include "pch.h"
#include "Game.h"
#include "IExecute.h"

extern IMGUI_IMPL_API LRESULT ImGui_ImplWin32_WndProcHandler(HWND hWnd, UINT msg, WPARAM wParam, LPARAM lParam);

WPARAM Game::Run(GameDesc& desc)
{
	_desc = desc;
	assert(_desc.app != nullptr);

	// 1) 윈도우 창 정보 등록
	MyRegisterClass();

	// 2) 윈도우 창 생성
	if (!InitInstance(SW_SHOWNORMAL))
		return FALSE;

	GRAPHICS->Init(_desc.hWnd);
	TIME->Init();
	INPUT->Init(_desc.hWnd);
	GUI->Init();

	_desc.app->Init();

	MSG msg = { 0 };

	while (msg.message != WM_QUIT)
	{
		if (::PeekMessage(&msg, NULL, 0, 0, PM_REMOVE))
		{
			::TranslateMessage(&msg);
			::DispatchMessage(&msg);
		}
		else
		{
			Update();
		}
	}

	return msg.wParam;
}


ATOM Game::MyRegisterClass()
{
	WNDCLASSEXW wcex;

	wcex.cbSize = sizeof(WNDCLASSEX);

	wcex.style = CS_HREDRAW | CS_VREDRAW;
	wcex.lpfnWndProc = WndProc;
	wcex.cbClsExtra = 0;
	wcex.cbWndExtra = 0;
	wcex.hInstance = _desc.hInstance;
	wcex.hIcon = ::LoadIcon(NULL, IDI_WINLOGO);
	wcex.hCursor = ::LoadCursor(nullptr, IDC_ARROW);
	wcex.hbrBackground = (HBRUSH)(COLOR_WINDOW + 1);
	wcex.lpszMenuName = NULL;
	wcex.lpszClassName = _desc.appName.c_str();
	wcex.hIconSm = wcex.hIcon;

	return RegisterClassExW(&wcex);
}

BOOL Game::InitInstance(int cmdShow)
{
	RECT windowRect = { 0, 0, _desc.width, _desc.height };
	::AdjustWindowRect(&windowRect, WS_OVERLAPPEDWINDOW, false);

	_desc.hWnd = CreateWindowW(_desc.appName.c_str(), _desc.appName.c_str(), WS_OVERLAPPEDWINDOW,
		CW_USEDEFAULT, 0, windowRect.right - windowRect.left, windowRect.bottom - windowRect.top, nullptr, nullptr, _desc.hInstance, nullptr);

	if (!_desc.hWnd)
		return FALSE;

	::ShowWindow(_desc.hWnd, cmdShow);
	::UpdateWindow(_desc.hWnd);

	return TRUE;
}

LRESULT CALLBACK Game::WndProc(HWND handle, UINT message, WPARAM wParam, LPARAM lParam)
{
	if (ImGui_ImplWin32_WndProcHandler(handle, message, wParam, lParam))
		return true;

	switch (message)
	{
	case WM_SIZE:
		break;
	case WM_CLOSE:
	case WM_DESTROY:
		PostQuitMessage(0);
		break;
	default:
		return ::DefWindowProc(handle, message, wParam, lParam);
	}
}

void Game::Update()
{
	TIME->Update();
	INPUT->Update();

	GRAPHICS->RenderBegin();

	GUI->Update();
	_desc.app->Update();
	_desc.app->Render();
	GUI->Render();

	GRAPHICS->RenderEnd();
}
ImGuiDemo.cpp
#include "pch.h"
#include "ImGuiDemo.h"
#include "GeometryHelper.h"
#include "Camera.h"
#include "GameObject.h"
#include "CameraScript.h"
#include "MeshRenderer.h"
#include "Mesh.h"
#include "Material.h"
#include "Model.h"
#include "ModelRenderer.h"
void ImGuiDemo::Init()
{
//Setup Dear ImGui context
//IMGUI_CHECKVERSION();
//ImGui::CreateContext();
//ImGuiIO& io = ImGui::GetIO(); (void)io;
//io.ConfigFlags |= ImGuiConfigFlags_NavEnableKeyboard; // Enable Keyboard Controls
//io.ConfigFlags |= ImGuiConfigFlags_NavEnableGamepad; // Enable Gamepad Controls
//Setup Dear ImGui style
//ImGui::StyleColorsDark();
//ImGui::StyleColorsLight();
//Setup Platform/Renderer backends
//ImGui_ImplWin32_Init(GAME->GetGameDesc().hWnd);
//ImGui_ImplDX11_Init(DEVICE.Get(), DC.Get());
}
void ImGuiDemo::Update()
{
// Start the Dear ImGui frame
//ImGui_ImplDX11_NewFrame();
//ImGui_ImplWin32_NewFrame();
//ImGui::NewFrame();
//UI
Test();
}
void ImGuiDemo::Render()
{
// Rendering
//ImGui::Render();
/*const float clear_color_with_alpha[4] = { clear_color.x * clear_color.w, clear_color.y * clear_color.w, clear_color.z * clear_color.w, clear_color.w };
//g_pd3dDeviceContext->OMSetRenderTargets(1, &g_mainRenderTargetView, NULL);
//g_pd3dDeviceContext->ClearRenderTargetView(g_mainRenderTargetView, clear_color_with_alpha);*/
//ImGui_ImplDX11_RenderDrawData(ImGui::GetDrawData());
}
void ImGuiDemo::Test()
{
// 1. Show the big demo window (Most of the sample code is in ImGui::ShowDemoWindow()! You can browse its code to learn more about Dear ImGui!).
if (show_demo_window)
ImGui::ShowDemoWindow(&show_demo_window);
// 2. Show a simple window that we create ourselves. We use a Begin/End pair to create a named window.
{
static float f = 0.0f;
static int counter = 0;
ImGui::Begin("Hello, world!"); // Create a window called "Hello, world!" and append into it.
ImGui::Text("This is some useful text."); // Display some text (you can use a format strings too)
ImGui::Checkbox("Demo Window", &show_demo_window); // Edit bools storing our window open/close state
ImGui::Checkbox("Another Window", &show_another_window);
ImGui::SliderFloat("float", &f, 0.0f, 1.0f); // Edit 1 float using a slider from 0.0f to 1.0f
ImGui::ColorEdit3("clear color", (float*)&clear_color); // Edit 3 floats representing a color
if (ImGui::Button("Button")) // Buttons return true when clicked (most widgets return true when edited/activated)
counter++;
ImGui::SameLine();
ImGui::Text("counter = %d", counter);
//ImGui::Text("Application average %.3f ms/frame (%.1f FPS)", 1000.0f / io.Framerate, io.Framerate);
ImGui::End();
}
//MY Code
{
static float f = 0.0f;
static int counter = 0;
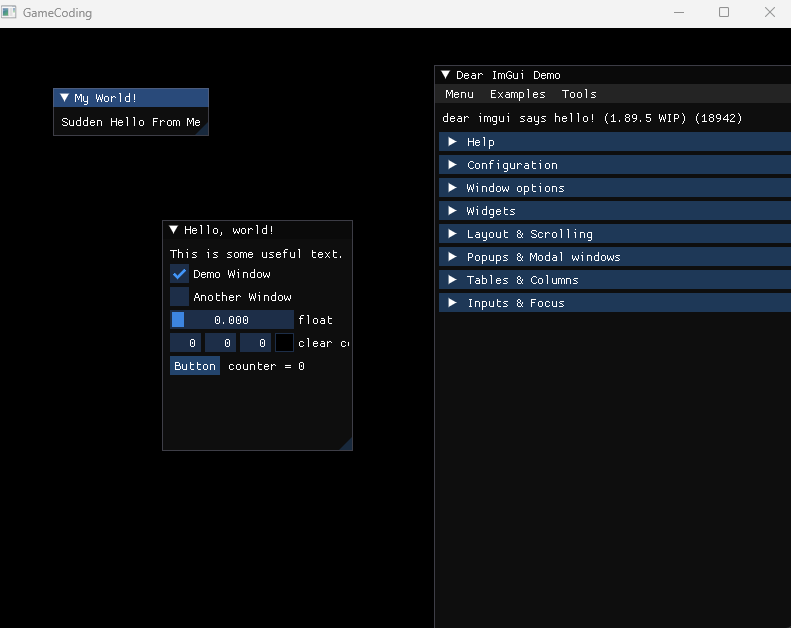
ImGui::Begin("My World!",nullptr,
ImGuiWindowFlags_NoTitleBar |
ImGuiWindowFlags_NoMove);
ImGui::Text("Sudden Hello From Me");
//ImGui::Text("Application average %.3f ms/frame (%.1f FPS)", 1000.0f / io.Framerate, io.Framerate);
ImGui::End();
}
// 3. Show another simple window.
if (show_another_window)
{
ImGui::Begin("Another Window", &show_another_window); // Pass a pointer to our bool variable (the window will have a closing button that will clear the bool when clicked)
ImGui::Text("Hello from another window!");
if (ImGui::Button("Close Me"))
show_another_window = false;
ImGui::End();
}
}
이렇게 해주면 정상적으로 작동한다.
'게임공부 > Directx11' 카테고리의 다른 글
| [Directx11][C++][3D]14. 애니메이션(데이터추출& 활용1) (0) | 2024.09.17 |
|---|---|
| [Directx11][C++][3D]13. 애니메이션(이론& 스키닝) (1) | 2024.09.16 |
| [Directx11][C++][3D]10. Assimp(Model) (0) | 2024.09.14 |
| [Directx11][C++][3D]9. Assimp(Bone & Model) (0) | 2024.09.14 |
| [Directx11][C++][3D]8. Assimp(Material) (0) | 2024.09.14 |