

1.애니메이션 활용4(트위닝)
이제 애니메이션에서 마지막으로 트위닝이라는 것을 해보도록 하자. 트위닝이란 두 애니메이션이 바뀔때 사이에 트랜지션을 넣어주는 것 이다. 이를 위해 쉐이더 코드에서 트랜지션의 지속시간과 현재, 다음 애니메이션의 정보를 받을 수 있도록 구조체와 버퍼를 선언해주자.
TweenDemo.fx
struct TweenFrameDesc
{
    float tweenDuration;        //트랜지션 지속시간
    float tweenRatio;
    float tweenSumTime;
    float padding;
    KeyframeDesc curr;
    KeyframeDesc next;
};


cbuffer TweenBuffer
{
    TweenFrameDesc TweenFrames;
};
이렇게 한 뒤에 이제 현재 애니메이션 사이에서도 보간을 하지만 과 다음 애니메이션과 이어질때도 보간하도록 기존 함수를 수정해주자.
TweenDemo.fx
matrix GetAnimationMatrix(VertexTextureNormalTangentBlend input)
{
    float indices[4] = { input.blendIndices.x, input.blendIndices.y, input.blendIndices.z, input.blendIndices.w };
	float weights[4] = { input.blendWeights.x, input.blendWeights.y, input.blendWeights.z, input.blendWeights.w };

    int animIndex[2];
    int currFrame[2];
    int nextFrame[2];
    float ratio[2];

    animIndex[0] = TweenFrames.curr.animIndex;
    currFrame[0] = TweenFrames.curr.currFrame;
    nextFrame[0] = TweenFrames.curr.nextFrame;
    ratio[0] = TweenFrames.curr.ratio;

    animIndex[1] = TweenFrames.next.animIndex;
    currFrame[1] = TweenFrames.next.currFrame;
    nextFrame[1] = TweenFrames.next.nextFrame;
    ratio[1] = TweenFrames.next.ratio;

    float4 c0, c1, c2, c3;
    float4 n0, n1, n2, n3;

    matrix curr = 0;
    matrix next = 0;
    matrix transform = 0;

    //각 뼈의 가중치에 따른 행렬 누적
    for (int i = 0; i < 4; i++)
    {
        //처음 애니메이션
        c0 = TransformMap.Load(int4(indices[i] * 4 + 0, currFrame[0], animIndex[0], 0));
        c1 = TransformMap.Load(int4(indices[i] * 4 + 1, currFrame[0], animIndex[0], 0));
        c2 = TransformMap.Load(int4(indices[i] * 4 + 2, currFrame[0], animIndex[0], 0));
        c3 = TransformMap.Load(int4(indices[i] * 4 + 3, currFrame[0], animIndex[0], 0));
        curr = matrix(c0, c1, c2, c3);

        n0 = TransformMap.Load(int4(indices[i] * 4 + 0, nextFrame[0], animIndex[0], 0));
        n1 = TransformMap.Load(int4(indices[i] * 4 + 1, nextFrame[0], animIndex[0], 0));
        n2 = TransformMap.Load(int4(indices[i] * 4 + 2, nextFrame[0], animIndex[0], 0));
        n3 = TransformMap.Load(int4(indices[i] * 4 + 3, nextFrame[0], animIndex[0], 0));
        next = matrix(n0, n1, n2, n3);

        matrix result = lerp(curr, next, ratio[0]);

		// 다음 애니메이션
        if (animIndex[1] >= 0)
        {
            c0 = TransformMap.Load(int4(indices[i] * 4 + 0, currFrame[1], animIndex[1], 0));
            c1 = TransformMap.Load(int4(indices[i] * 4 + 1, currFrame[1], animIndex[1], 0));
            c2 = TransformMap.Load(int4(indices[i] * 4 + 2, currFrame[1], animIndex[1], 0));
            c3 = TransformMap.Load(int4(indices[i] * 4 + 3, currFrame[1], animIndex[1], 0));
            curr = matrix(c0, c1, c2, c3);

            n0 = TransformMap.Load(int4(indices[i] * 4 + 0, nextFrame[1], animIndex[1], 0));
            n1 = TransformMap.Load(int4(indices[i] * 4 + 1, nextFrame[1], animIndex[1], 0));
            n2 = TransformMap.Load(int4(indices[i] * 4 + 2, nextFrame[1], animIndex[1], 0));
            n3 = TransformMap.Load(int4(indices[i] * 4 + 3, nextFrame[1], animIndex[1], 0));
            next = matrix(n0, n1, n2, n3);

            matrix nextResult = lerp(curr, next, ratio[1]);
            result = lerp(result, nextResult, TweenFrames.tweenRatio);
        }

        transform += mul(weights[i], result);
    }

    return transform;
}
이렇게 수정해준 다음 RenderManager 클래스에서 값을 동일하게 넣어줄 수 있도록 구조체를 선언하고 생성자와 다음 애니메이션으로 교체했다면 값을 초기화 해주는 함수도 넣어주자. 그리고 이 버퍼를 초기화하고 데이터를 밀어넣는 함수도 같이 만들어주자.
RenderManager.h
struct TweenDesc
{
	TweenDesc()
	{
		curr.animIndex = 0;
		next.animIndex = -1;
	}

	void ClearNextAnim()
	{
		next.animIndex = -1;
		next.currFrame = 0;
		next.nextFrame = 0;
		next.sumTime = 0;
		tweenSumTime = 0;
		tweenRatio = 0;
	}

	float tweenDuration = 1.0f;
	float tweenDuration = 1.0f;
	float tweenRatio = 0.f;
	float tweenSumTime = 0.f;
	float padding = 0.f;
	KeyframeDesc curr;
	KeyframeDesc next;
};

public:
	void PushTweenData(const TweenDesc& desc);
private:
	TweenDesc _tweenDesc;
	shared_ptr<ConstantBuffer<TweenDesc>> _tweenBuffer;
	ComPtr<ID3DX11EffectConstantBuffer> _tweenEffectBuffer;
RenderManager.cpp
void RenderManager::Init(shared_ptr<Shader> shader)
{
	_tweenBuffer = make_shared<ConstantBuffer<TweenDesc>>();
	_tweenBuffer->Create();
	_tweenEffectBuffer = _shader->GetConstantBuffer("TweenBuffer");
}

void RenderManager::PushTweenData(const TweenDesc& desc)
{
	_tweenDesc = desc;
	_tweenBuffer->CopyData(_tweenDesc);
	_tweenEffectBuffer->SetConstantBuffer(_tweenBuffer->GetComPtr().Get());
}
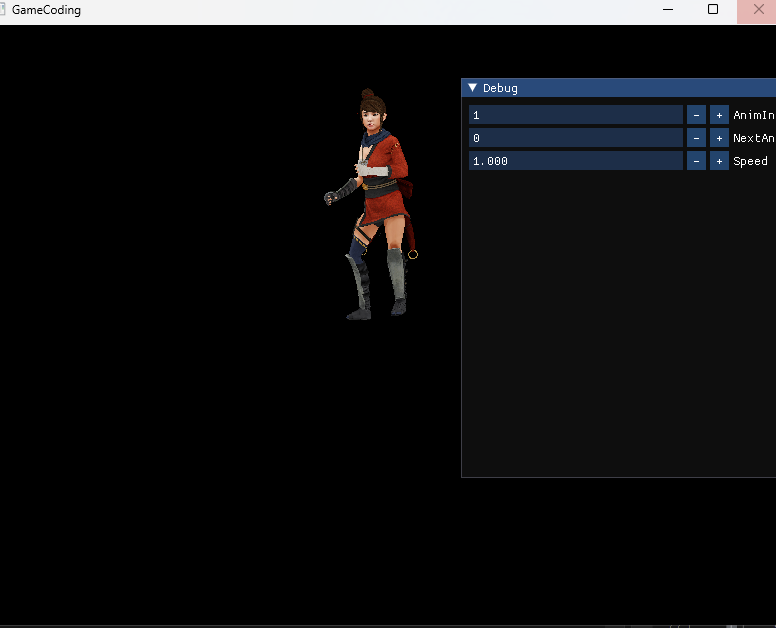
이렇게 해주고 이제 ModelAnimator의 Update부분을 수정해주면 된다. 중요한 부분은 현재 애니메이션은 진행시키고 만약 다음 애니메이션이 예약되어 있다면 두 애니메이션을 섞어서 재생해주면 된다.
ModelAnimator.cpp
void ModelAnimator::Update()
{
	if (_model == nullptr)
		return;

	//TODO
	if (_texture == nullptr)
		CreateTexture();

	TweenDesc& desc = _tweenDesc;

	desc.curr.sumTime += DT;
	//현재 애니메이션
	{
		shared_ptr<ModelAnimation> currentAnim = _model->GetAnimationByIndex(desc.curr.animIndex);
		if (currentAnim)
		{
			float timePerFrame = 1 / (currentAnim->frameRate * desc.curr.speed);
			if (desc.curr.sumTime >= timePerFrame)
			{
				desc.curr.sumTime = 0;
				desc.curr.currFrame = (desc.curr.currFrame + 1) % currentAnim->frameCount;
				desc.curr.nextFrame = (desc.curr.currFrame + 1) % currentAnim->frameCount;
			}

			desc.curr.ratio = (desc.curr.sumTime / timePerFrame);
		}
	}

	// 다음 애니메이션이 예약 되어 있다면
	if (desc.next.animIndex >= 0)
	{
		desc.tweenSumTime += DT;
		desc.tweenRatio = desc.tweenSumTime / desc.tweenDuration;

		if (desc.tweenRatio >= 1.f)
		{
			// 애니메이션 교체 성공
			desc.curr = desc.next;
			desc.ClearNextAnim();
		}
		else
		{
			// 교체중
			shared_ptr<ModelAnimation> nextAnim = _model->GetAnimationByIndex(desc.next.animIndex);
			desc.next.sumTime += DT;

			float timePerFrame = 1.f / (nextAnim->frameRate * desc.next.speed);

			if (desc.next.ratio >= 1.f)
			{
				desc.next.sumTime = 0;

				desc.next.currFrame = (desc.next.currFrame + 1) % nextAnim->frameCount;
				desc.next.nextFrame = (desc.next.currFrame + 1) % nextAnim->frameCount;
			}

			desc.next.ratio = desc.next.sumTime / timePerFrame;
		}
	}

	//Anim Update
	ImGui::InputInt("AnimIndex", &desc.curr.animIndex);
	_keyframeDesc.animIndex %= _model->GetAnimationCount();

	//다음 애니메이션 골라주기
	static int32 nextAnimIndex = 0;
	if (ImGui::InputInt("NextAnimIndex", &nextAnimIndex))
	{
		nextAnimIndex %= _model->GetAnimationCount();
		desc.ClearNextAnim(); // 기존꺼 밀어주기
		desc.next.animIndex = nextAnimIndex;
	}

	if (_model->GetAnimationCount() > 0)
		desc.curr.animIndex %= _model->GetAnimationCount();


	ImGui::InputFloat("Speed", &desc.curr.speed, 0.5f, 4.f);

	//애니메이션 현재 프레임 정보
	RENDER->PushTweenData(desc);

	//SRV를 전달
	_shader->GetSRV("TransformMap")->SetResource(_srv.Get());

	//Bones -> shader
	BoneDesc boneDesc;

	const uint32 boneCount = _model->GetBoneCount();

	for (uint32 i = 0; i < boneCount; i++)
	{
		shared_ptr<ModelBone> bone = _model->GetBoneByIndex(i);
		boneDesc.transforms[i] = bone->transform;
	}
	RENDER->PushBoneData(boneDesc);

	//Transform
	auto world = GetTransform()->GetWorldMatrix();
	RENDER->PushTransformData(TransformDesc{ world });

	const auto& meshes = _model->GetMeshes();
	for (auto& mesh : meshes)
	{
		if (mesh->material)
			mesh->material->Update();

		//BoneIndex
		_shader->GetScalar("BoneIndex")->SetInt(mesh->boneIndex);

		uint32 stride = mesh->vertexBuffer->GetStride();
		uint32 offset = mesh->vertexBuffer->GetOffset();

		//각 매쉬를 버퍼에 할당
		DC->IASetVertexBuffers(0, 1, mesh->vertexBuffer->GetComPtr().GetAddressOf(), &stride, &offset);
		DC->IASetIndexBuffer(mesh->indexBuffer->GetComPtr().Get(), DXGI_FORMAT_R32_UINT, 0);

		_shader->DrawIndexed(0, _pass, mesh->indexBuffer->GetCount(), 0, 0);
	}
}
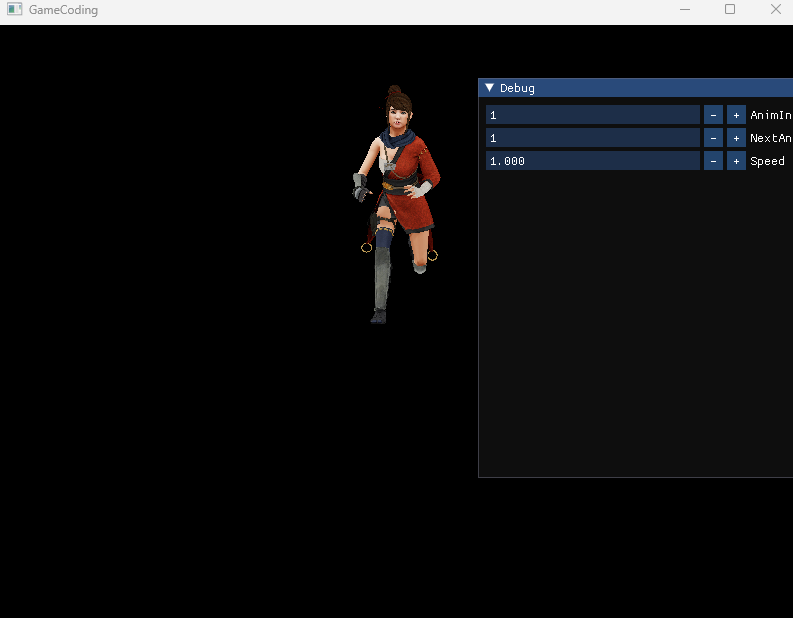
이렇게 해주면 이제 자연스럽게 애니메이션이 변경되는 모습을 볼 수 있다.
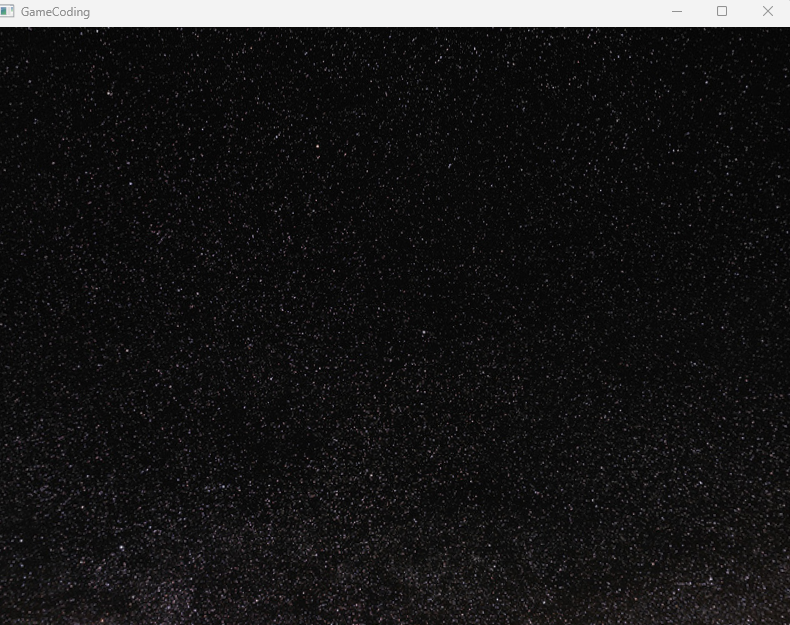
2.Sky Box
이제 하늘을 보이도록 만들어보자. 하늘을 보이게 하는 방법은 첫번째는 하늘을 큐브 모양의 형태로 만들어 준 다음에 큐브 모양을 카메라를 따라 다니게 붙여주면 된다. 지금은 조금 더 쉽게 구 형태로 만들어보자.
그리고 이 구가 엄청 멀리 있을 텐데 그 만큼 멀리있는 물체가 있을 때 그 물체도 보이게끔 처리해야한다. 그리고 이 구를 엄청 크게 한다고 해도 뒷면이라서 보이지 않기 때문에 이 부분도 처리를 해주어야한다.
Global.fx
RasterizerState FrontCounterClockwiseTrue
{
    FrontCounterClockwise = true;
};
카메라의 거의 끝에 구가 위치해야하는데 이 처리는 쉐이더쪽에서 하늘쪽을 그릴때만 깊이를 1에 가깝게 세팅해준다.
그리고 구를 쉐이더에서 처리해줄 때 카메라와 같은 위치에 원점이 있어야하기 때문에 월드변환을 스킵해준다.
이때 화면을 회전했을 때 자연스럽게 보이기 위해 회전의 값은 적용하려고 하면 4*4 행렬에서 마지막을 0으로 밀어주면 된다.
이때 투영화와 Rasterizer 단계를 w 값을 나눠주는데 이를 통해 깊이값이 0~1사이로 바뀌게 된다. 이때 투영단계에서 w값에 1의 근사값을 곱해주면 깊이가 카메라의 끝에 위치하게 되기 때문에 저 멀리에 있게 보인다.
SkyDemo.fx
#include "00. Global.fx"
#include "00. Light.fx"

struct VS_OUT
{
    float4 position : SV_POSITION;
    float2 uv : TEXCOORD;
};


VS_OUT VS(VertexTextureNormalTangent input)
{
    VS_OUT output;

	// Local -> World -> View -> Projection
    float4 viewPos = mul(float4(input.position.xyz, 0), V);
    //투영좌표
    float4 clipSpacePos = mul(viewPos, P);
    output.position = clipSpacePos.xyzw;
    //
    output.position.z = output.position.w * 0.999999f;

    output.uv = input.uv;

    return output;
}

float4 PS(VS_OUT input) : SV_TARGET
{
    float4 color = DiffuseMap.Sample(LinearSampler, input.uv);
    return color;
}


technique11 T0
{
    pass P0
    {
        SetRasterizerState(FrontCounterClockwiseTrue);
        SetVertexShader(CompileShader(vs_5_0, VS()));
        SetPixelShader(CompileShader(ps_5_0, PS()));
    }
};
이렇게 해주고 이제 하늘에 해당하는 Texture를 Material로 Load하고 구를 만들어주면 된다.
SkyDemo.cpp
#include "pch.h"
#include "SkyDemo.h"
#include "GeometryHelper.h"
#include "Camera.h"
#include "GameObject.h"
#include "CameraScript.h"
#include "MeshRenderer.h"
#include "Mesh.h"
#include "Material.h"
#include "Model.h"
#include "ModelRenderer.h"
#include "ModelAnimator.h"

void SkyDemo::Init()
{
	RESOURCES->Init();
	_shader = make_shared<Shader>(L"18. SkyDemo.fx");

	// Material
	{
		shared_ptr<Material> material = make_shared<Material>();
		material->SetShader(_shader);
		auto texture = RESOURCES->Load<Texture>(L"Sky", L"..\\Resources\\Textures\\Sky01.jpg");
		material->SetDiffuseMap(texture);
		MaterialDesc& desc = material->GetMaterialDesc();
		desc.ambient = Vec4(1.f);
		desc.diffuse = Vec4(1.f);
		desc.specular = Vec4(1.f);
		RESOURCES->Add(L"Sky", material);
	}

	{
		// Object
		_obj = make_shared<GameObject>();
		_obj->GetOrAddTransform();
		_obj->AddComponent(make_shared<MeshRenderer>());
		{
			auto mesh = RESOURCES->Get<Mesh>(L"Sphere");
			_obj->GetMeshRenderer()->SetMesh(mesh);
		}
		{
			auto material = RESOURCES->Get<Material>(L"Sky");
			_obj->GetMeshRenderer()->SetMaterial(material);
		}
	}

	// Camera
	_camera = make_shared<GameObject>();
	_camera->GetOrAddTransform()->SetPosition(Vec3{ 0.f, 0.f, -5.f });
	_camera->AddComponent(make_shared<Camera>());
	_camera->AddComponent(make_shared<CameraScript>());


	RENDER->Init(_shader);
}

void SkyDemo::Update()
{
	_camera->Update();
	RENDER->Update();

	{
		LightDesc lightDesc;
		lightDesc.ambient = Vec4(0.4f);
		lightDesc.diffuse = Vec4(1.f);
		lightDesc.specular = Vec4(0.f);
		lightDesc.direction = Vec3(1.f, 0.f, 1.f);
		RENDER->PushLightData(lightDesc);
	}

	{
		_obj->Update();
	}
}

void SkyDemo::Render()
{

}

만약 깊이를 정해주는 부분에서 1로 밀어주게 되면
output.position.z = output.position.w * 0.999999f;이 부분을 그냥 w만 곱해주면 깊이 테스트에서 최대값인 1로 같기때문에 그려주지 않는다.
만약 월드, 뷰포트 변환 행렬은 스킵하게 된다면
// Local -> World -> View -> Projection
float4 viewPos = mul(float4(input.position.xyz, 0), V);
우리가 아무리 회전을 해도 한 곳만 바라보게 된다. 프로젝션 연산에서 Z값은 w값에 세이브해두고 레스터라이저단계에서 나눠주는 것으로 -1 ~ 1 0~1로 설정해주게 된다.
'게임공부 > Directx11' 카테고리의 다른 글
| [Directx11][C++][3D]18. 인스턴싱(MeshRenderer,ModelRenderer) (0) | 2024.09.24 |
|---|---|
| [Directx11][C++][3D]17. 인스턴싱과 드로우콜 (1) | 2024.09.23 |
| [Directx11][C++][3D]15. 애니메이션(활용2~3) (0) | 2024.09.19 |
| [Directx11][C++][3D]14. 애니메이션(데이터추출& 활용1) (0) | 2024.09.17 |
| [Directx11][C++][3D]13. 애니메이션(이론& 스키닝) (1) | 2024.09.16 |