
피격시에 부숴지는 물체를 만들어보자.
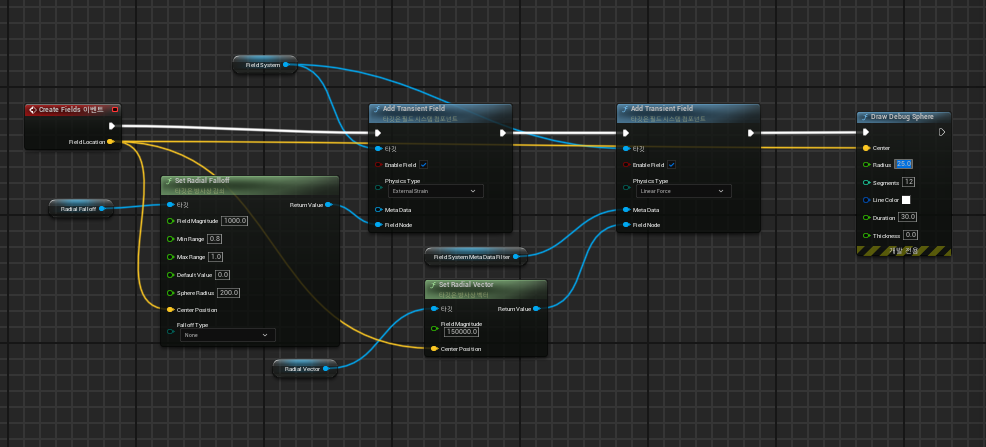
부숴지는 물체는 프팩처 모드를 통해 만들 수 있다. 이를 위해 매쉬를 지정해주고 새로운 프랙처를 만들어주자.
프랙처는 매쉬가 있을 때 알고리즘에 따라 어떤식으로 부숴질지 정해주는 툴이다. 다양한 옵션을 지정해줄 수 있다.
예를 들어 밑의 변수를 조절해주면 더 자세하게 쪼개질 수 있는 것이다.

이렇게 만들어주면 만들어 준데로 부숴지는 모습도 볼 수 있다.
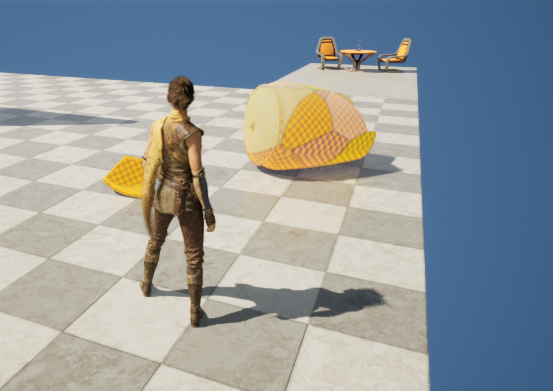
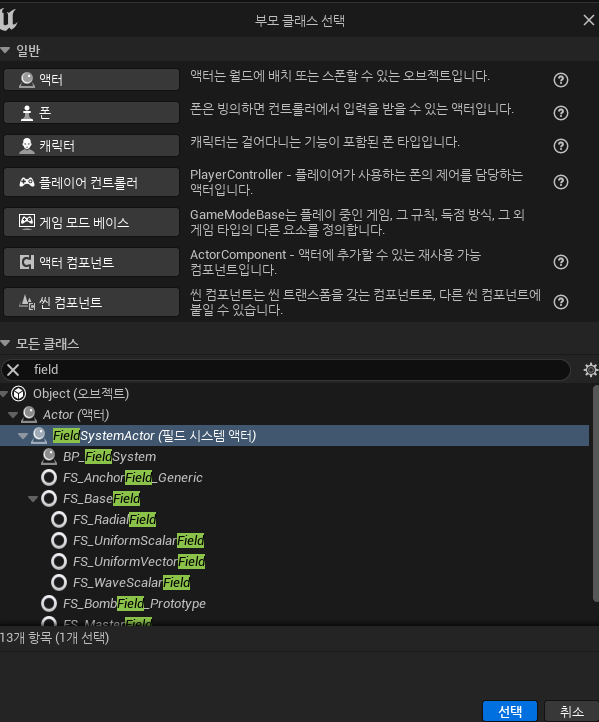
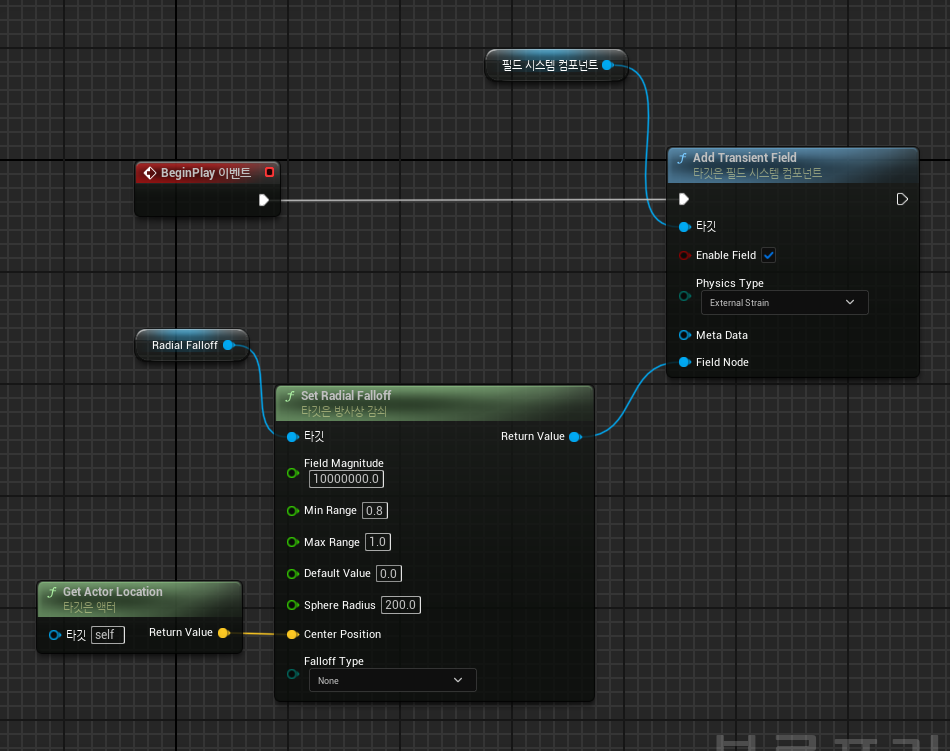
이를 피격시에 부숴지도록 구현하기 위해 블루프린트 클래스를 만들어주자. 이 블루프린트는 FieldSystem Actor를 상속받게 하자. 이것은 필드에 일시적인 힘을 생성해서 물체가 부숴지도록 해줄 것이다. 이때 Add Transient Field함수를 통해 일시적인 External한 힘을 생성해주는데 Set Radial Fall off를 통해 방사형 줄어드는 힘으로 만들어 줄 것이다.
이렇게 해주면 잘 부숴지는 것을 볼 수 있다.

그리고 여기서 또 다른 힘을 줘볼텐데 이때 선형적인 힘을 줘보자 이 선형적인 힘은 Radial Vector변수를 설정해주는 것으로 지정해줄 수 있다.

이렇게 해주면 부숴진다음 멀리 날아가는 것을 볼 수 있다.

여기서 힘이 캐릭터나 다른것에 영향을 주는 것을 방지하기 위해 Meta Data Filter 변수를 추가해서 Destruction 타입에만 작용하도록 해주면 된다.

이때 클러스터링을 꺼주면 힘에 따라 더 부숴지는 모습을 볼 수 있다.


이렇게 일시적으로 힘을 생성해주는 함수를 무기의 블루프린트에서 지정가능하도록 코드상에서 함수를 선언해주자.
Weapon.h
protected:
    UFUNCTION(BlueprintImplementableEvent)
	void CreateFields(const FVector& FieldLocation);
이렇게 해주고 호출은 코드상에서 해줘야하기 때문에 겹쳐질 때 작동하도록하자.
Weapon.cpp
void AWeapon::OnBoxOverlap(UPrimitiveComponent* OverlappedComponent, AActor* OtherActor, UPrimitiveComponent* OtherComp, int32 OtherBodyIndex, bool bFromSweep, const FHitResult& SweepResult)
{
	const FVector Start = BoxTraceStart->GetComponentLocation();
	const FVector End = BoxTraceEnd->GetComponentLocation();

	TArray<AActor*> ActorsToIgnore;
	ActorsToIgnore.Add(this);

	for (AActor* Actor : IgnoreActors)
	{
		ActorsToIgnore.AddUnique(Actor);
	}

	//충돌 결과
	FHitResult BoxHit;

	UKismetSystemLibrary::BoxTraceSingle(
		this,
		Start,
		End,
		FVector(5.f, 5.f, 5.f),
		BoxTraceStart->GetComponentRotation(),
		ETraceTypeQuery::TraceTypeQuery1,
		false,
		ActorsToIgnore,		//무시할거
		EDrawDebugTrace::ForDuration,
		BoxHit,
		true		//자신무시
	);

	if (BoxHit.GetActor())
	{
		IHitInterface* HitInterface = Cast<IHitInterface>(BoxHit.GetActor());
		if (HitInterface)
		{
			HitInterface->GetHit(BoxHit.ImpactPoint);
		}
		IgnoreActors.AddUnique(BoxHit.GetActor());

		CreateFields(BoxHit.ImpactPoint);
	}
}
컴파일해주고 함수는 다음과 같이 구성해주자.

이렇게 해주고 물체의 콜리전세팅을 조금 바꿔주면 된다.


이렇게 해주고 실제로 충돌하는지 Draw Debug Sphere를 통해 확인해보자.
잘 작동하는 것을 볼 수 있다.

이렇게 하고 힘의 크기를 조금 키워주면 잘 부숴지는것도 볼 수 있다.


이제 항아리는 잘 부숴지는데 이것을 하나의 기본 Actor로 만들어주자. 그러려면 Actor에 Geometry Collection이 있어야한다.
BreakableActor.h
// Fill out your copyright notice in the Description page of Project Settings.

#pragma once

#include "CoreMinimal.h"
#include "GameFramework/Actor.h"
#include "BreakableActor.generated.h"

class UGeometryCollectionComponent;

UCLASS()
class SLASH_API ABreakableActor : public AActor
{
	GENERATED_BODY()

public:
	ABreakableActor();
	virtual void Tick(float DeltaTime) override;
protected:
	virtual void BeginPlay() override;

private:
	UPROPERTY(VisibleAnywhere)
	UGeometryCollectionComponent* GeometryCollection;
};
BreakableActor.cpp
// Fill out your copyright notice in the Description page of Project Settings.


#include "Breakable/BreakableActor.h"
#include "GeometryCollection/GeometryCollectionComponent.h"

ABreakableActor::ABreakableActor()
{

	PrimaryActorTick.bCanEverTick = false;

	GeometryCollection = CreateDefaultSubobject<UGeometryCollectionComponent>(TEXT("GeometryCollection"));
	SetRootComponent(GeometryCollection);
	GeometryCollection->SetGenerateOverlapEvents(true);
}

void ABreakableActor::BeginPlay()
{
	Super::BeginPlay();

}

void ABreakableActor::Tick(float DeltaTime)
{
	Super::Tick(DeltaTime);

}
이렇게 해주고 Build.cs 코드에 모듈을 추가해줘야 정상적으로 빌드된다.
PublicDependencyModuleNames.AddRange(new string[] { "Core", "CoreUObject", "Engine", "InputCore","EnhancedInput","HairStrandsCore", "Niagara", "GeometryCollectionEngine" });
이렇게 해주고 이를 바탕으로한 BlueprintClass를 만들어주자.
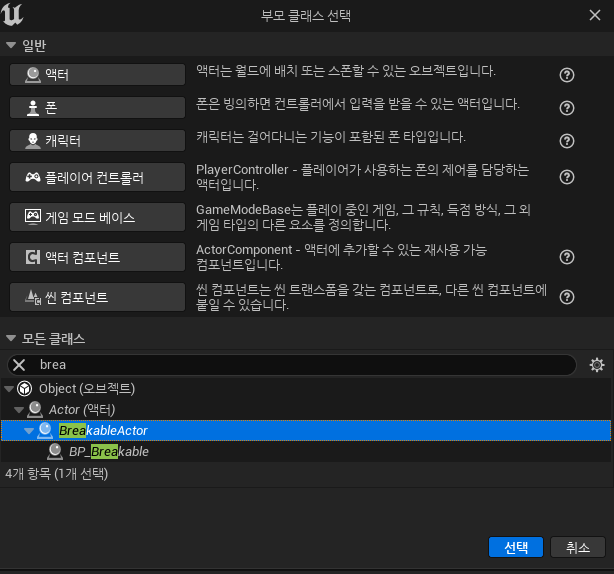
이렇게 해주면 Geometry Collection이 생성된 블루프린트가 나오는데 이때 카오스 피직스의 컬렉션지정으로 기본 켈렉션을 지정해줄 수 있다.


이렇게 해주고 씬에 배치해보면 잘 작동하는 것을 볼 수 있다.

'게임공부 > Unreal Engine' 카테고리의 다른 글
| [Unreal Engine][C++]17. Treasure (0) | 2025.01.03 |
|---|---|
| [Unreal Engine][C++]16. Breakable Actors2 (1) | 2025.01.02 |
| [Unreal Engine][C++]14. Hit React (3) | 2024.12.27 |
| [Unreal Engine][C++]13. Enemy Class (0) | 2024.09.25 |
| [Unreal Engine][C++]12. Weapon Class(Attacking) (1) | 2024.08.16 |