
이제 UI에 대해 알아보고 코드로 구현해볼 것인데 먼저 직교투영 카메라에 대해 알아보자
직교투영은 원근투영과 달리 절두체 평면이 직사각형 모양으로 크기가 유지된 채로 투영되는 화면이다. unity에서 UI는 영화에 CG를 붙이는 것처럼 기존 결과물에 추가적으로 붙이는 것을 볼 수 있다.
또다른 방법에는 직교투영과 원근투영 카메라를 둘 다 만든다음에 적절히 조합해서 결과물을 만드는 방법도 있다.
우선 원근투영과 직교투영을 구분하고 카메라를 여러개 만들어서 사용할 수 있게 하자.
우선은 카메라가 여러개 등장할 수 있도록 구조를 바꿔주자. 지금은 물체가 인스턴싱으로 생성될 때 마지막으로 적용된
뷰, 프로젝션 행렬을 통해 물체들이 연산되어 만들어지고 있는데 이것을 카메라 마다 돌아가면서 갱신하도록 바꿔주어야한다.
그러려면 카메라마다 자기가 찍을 애들을 렌더링하는 코드를 넣어줘야할 것이다. 즉 레이어에 따라서 카메라에서 비트플래그를 통해 그려줄지 안그려줄지를 선택해서 렌더링해주면 될 것이다. 또한 원근투영이 가능하도록 프로젝션 연산부분을 수정해주자.
Camera.h
#pragma once
#include "Component.h"

enum class ProjectionType
{
	Perspective, // 원근 투영
	Orthographic, // 직교 투영
};

class Camera : public Component
{
	using Super = Component;
public:
	Camera();
	virtual ~Camera();

	virtual void Update() override;

	void SetProjectionType(ProjectionType type) { _type = type; }
	ProjectionType GetProjectionType() { return _type; }

	void UpdateMatrix();

	void SetNear(float value) { _near = value; }
	void SetFar(float value) { _far = value; }
	void SetFOV(float value) { _fov = value; }
	void SetWidth(float value) { _width = value; }
	void SetHeight(float value) { _height = value; }

	Matrix& GetViewMatrix() { return _matView; }
	Matrix& GetProjectionMatrix() { return _matProjection; }

	float GetWidth() { return _width; }
	float GetHeight() { return _height; }

private:
	ProjectionType _type = ProjectionType::Perspective;
	Matrix _matView = Matrix::Identity;
	Matrix _matProjection = Matrix::Identity;

	float _near = 1.f;
	float _far = 1000.f;
	float _fov = XM_PI / 4.f;
	float _width = 0.f;
	float _height = 0.f;

public:
	static Matrix S_MatView;
	static Matrix S_MatProjection;


public:
	//관련된 물체들을 소팅해서 가져오기
	void SortGameObject();

	void Render_Forward();

	void SetCullingMaskLayerOnOff(uint8 layer, bool on)
	{
		if (on)
			_cullingMask |= (1 << layer);
		else
			_cullingMask &= ~(1 << layer);
	}

	//아무것도 그려주지않겠다
	void SetCullingMaskAll() { SetCullingMask(UINT32_MAX); }
	void SetCullingMask(uint32 mask) { _cullingMask = mask; }
	//비트연산을 통해 그려줄지 안그려줄지 판단
	bool IsCulled(uint8 layer) { return (_cullingMask & (1 << layer)) != 0; }

private:
	//비트마스크 - 그릴지 안그릴지에 대한 규칙
	uint32 _cullingMask = 0;
	vector<shared_ptr<GameObject>> _vecForward;

};
Camera.cpp
#include "pch.h"
#include "Camera.h"
#include "Scene.h"

Matrix Camera::S_MatView = Matrix::Identity;
Matrix Camera::S_MatProjection = Matrix::Identity;

Camera::Camera() : Super(ComponentType::Camera)
{
	_width = static_cast<float>(GAME->GetGameDesc().width);
	_height = static_cast<float>(GAME->GetGameDesc().height);
}

Camera::~Camera()
{

}

void Camera::Update()
{
	UpdateMatrix();

}

void Camera::SortGameObject()
{
	shared_ptr<Scene> scene = CUR_SCENE;
	unordered_set<shared_ptr<GameObject>>& gameObjects = scene->GetObjects();

	_vecForward.clear();

	for (auto& gameObject : gameObjects)
	{
		if (IsCulled(gameObject->GetLayerIndex()))
			continue;

		if (gameObject->GetMeshRenderer() == nullptr
			&& gameObject->GetModelRenderer() == nullptr
			&& gameObject->GetModelAnimator() == nullptr)
			continue;

		_vecForward.push_back(gameObject);
	}
}

void Camera::Render_Forward()
{
	S_MatView = _matView;
	S_MatProjection = _matProjection;

	//카메라에서 물체 그려주기
	GET_SINGLE(InstancingManager)->Render(_vecForward);
}

void Camera::UpdateMatrix()
{
	Vec3 eyePosition = GetTransform()->GetPosition();
	Vec3 focusPosition = eyePosition + GetTransform()->GetLook();
	Vec3 upDirection = GetTransform()->GetUp();

	_matView = S_MatView = ::XMMatrixLookAtLH(eyePosition, focusPosition, upDirection);

	if (_type == ProjectionType::Perspective)
	{
		_matProjection = ::XMMatrixPerspectiveFovLH(_fov, _width / _height, _near, _far);
	}
	else
	{
		_matProjection = ::XMMatrixOrthographicLH(_width, _height, _near, _far);
	}


}
이제 Scene에서 Render하는 부분을 따로 만들어주고 원근투영 타입의 메인카메라와 직교투영의 UI카메라를 가져오는 헬퍼 함수를 추가해주자.
Scene.h
#pragma once


class Scene
{
public:
	virtual void Start();
	virtual void Update();
	virtual void LateUpdate();

	virtual void Render();

	//추가
	virtual void Add(shared_ptr<GameObject> object);
	//제거
	virtual void Remove(shared_ptr<GameObject> object);


	unordered_set<shared_ptr<GameObject>>& GetObjects() { return _objects; }
	shared_ptr<GameObject> GetMainCamera();
	shared_ptr<GameObject> GetUICamera();
	shared_ptr<GameObject> GetLight() { return _lights.empty() ? nullptr : *_lights.begin(); }

	shared_ptr<class GameObject> Pick(int32 screenX, int32 screenY);

	void CheckCollision();

private:
	//물체를 가지고있는 추가 삭제 편하지만 순회에는 안좋다 검색활용
	unordered_set<shared_ptr<GameObject>> _objects;
	//카메라
	unordered_set<shared_ptr<GameObject>> _cameras;
	//빛
	unordered_set<shared_ptr<GameObject>> _lights;
};
Scene.cpp
void Scene::Render()
{
	for (auto& camera : _cameras)
	{
		camera->GetCamera()->SortGameObject();
		camera->GetCamera()->Render_Forward();
	}
}

shared_ptr<GameObject> Scene::GetMainCamera()
{
	for (auto& camera : _cameras)
	{
		if (camera->GetCamera()->GetProjectionType() == ProjectionType::Perspective)
			return camera;
	}

	return nullptr;
}

shared_ptr<GameObject> Scene::GetUICamera()
{
	for (auto& camera : _cameras)
	{
		if (camera->GetCamera()->GetProjectionType() == ProjectionType::Orthographic)
			return camera;
	}

	return nullptr;
}
이렇게 만들어준 Render부분을 SceneManager에서 호출해서 실제로 Render가 되도록 만들어주자.
SceneManager.cpp
#include "pch.h"
#include "SceneManager.h"

void SceneManager::Update()
{
	if (_currentScene == nullptr)
		return;

	_currentScene->Update();
	_currentScene->LateUpdate();

	_currentScene->Render();
}
이렇게 해주면 이전과 같이 잘 작동하는 것을 볼 수 있다.
이제 여기서 직교 투영 카메라를 추가로 배치하고 버튼역활을 할 오브젝트를 추가하고 테스트해보자
OrthoGraphicDemo.cpp
#include "pch.h"
#include "OrthoGraphicDemo.h"
#include "RawBuffer.h"
#include "TextureBuffer.h"
#include "Material.h"
#include "GeometryHelper.h"
#include "Camera.h"
#include "GameObject.h"
#include "CameraScript.h"
#include "MeshRenderer.h"
#include "Mesh.h"
#include "Material.h"
#include "Model.h"
#include "ModelRenderer.h"
#include "ModelAnimator.h"
#include "Mesh.h"
#include "Transform.h"
#include "VertexBuffer.h"
#include "IndexBuffer.h"
#include "Light.h"
#include "Graphics.h"
#include "SphereCollider.h"
#include "Scene.h"
#include "AABBBoxCollider.h"
#include "OBBBoxCollider.h"
#include "Terrain.h"
#include "Camera.h"

void OrthoGraphicDemo::Init()
{
	_shader = make_shared<Shader>(L"23. RenderDemo.fx");

	// Camera
	{
		auto camera = make_shared<GameObject>();
		camera->GetOrAddTransform()->SetPosition(Vec3{ 0.f, 0.f, -5.f });
		camera->AddComponent(make_shared<Camera>());
		camera->AddComponent(make_shared<CameraScript>());
		camera->GetCamera()->SetCullingMaskLayerOnOff(Layer_UI, true);
		CUR_SCENE->Add(camera);
	}

	//UI_Camera
	{
		auto camera = make_shared<GameObject>();
		camera->GetOrAddTransform()->SetPosition(Vec3{ 0.f, 0.f, -5.f });
		camera->AddComponent(make_shared<Camera>());
		camera->GetCamera()->SetProjectionType(ProjectionType::Orthographic);
		camera->GetCamera()->SetNear(1.f);
		camera->GetCamera()->SetFar(100.f);

		//UI만 그려주게
		camera->GetCamera()->SetCullingMaskAll();
		camera->GetCamera()->SetCullingMaskLayerOnOff(Layer_UI, false);
		CUR_SCENE->Add(camera);
	}

	// Light
	{
		auto light = make_shared<GameObject>();
		light->AddComponent(make_shared<Light>());
		LightDesc lightDesc;
		lightDesc.ambient = Vec4(0.4f);
		lightDesc.diffuse = Vec4(1.f);
		lightDesc.specular = Vec4(0.1f);
		lightDesc.direction = Vec3(1.f, 0.f, 1.f);
		light->GetLight()->SetLightDesc(lightDesc);
		CUR_SCENE->Add(light);
	}

	// Material
	{
		shared_ptr<Material> material = make_shared<Material>();
		material->SetShader(_shader);
		auto texture = RESOURCES->Load<Texture>(L"Veigar", L"..\\Resources\\Textures\\veigar.jpg");
		material->SetDiffuseMap(texture);
		MaterialDesc& desc = material->GetMaterialDesc();
		desc.ambient = Vec4(1.f);
		desc.diffuse = Vec4(1.f);
		desc.specular = Vec4(1.f);
		RESOURCES->Add(L"Veigar", material);
	}

	// Mesh - 버튼 역활
	{
		auto obj = make_shared<GameObject>();
		obj->GetOrAddTransform()->SetLocalPosition(Vec3(0.f, 200.f, 0.f));
		//크게해도 UI라서 작게나올것이다.
		obj->GetOrAddTransform()->SetScale(Vec3(200.f));
		obj->AddComponent(make_shared<MeshRenderer>());

		obj->SetLayerIndex(Layer_UI);
		{
			obj->GetMeshRenderer()->SetMaterial(RESOURCES->Get<Material>(L"Veigar"));
		}
		{
			auto mesh = RESOURCES->Get<Mesh>(L"Quad");
			obj->GetMeshRenderer()->SetMesh(mesh);
			obj->GetMeshRenderer()->SetPass(0);
		}

		CUR_SCENE->Add(obj);
	}

	// Mesh
	{
		auto obj = make_shared<GameObject>();
		obj->GetOrAddTransform()->SetLocalPosition(Vec3(0.f));
		obj->GetOrAddTransform()->SetScale(Vec3(2.f));
		obj->AddComponent(make_shared<MeshRenderer>());
		{
			obj->GetMeshRenderer()->SetMaterial(RESOURCES->Get<Material>(L"Veigar"));
		}
		{
			auto mesh = RESOURCES->Get<Mesh>(L"Sphere");
			obj->GetMeshRenderer()->SetMesh(mesh);
			obj->GetMeshRenderer()->SetPass(0);
		}

		CUR_SCENE->Add(obj);
	}
}

void OrthoGraphicDemo::Update()
{

}

void OrthoGraphicDemo::Render()
{

}
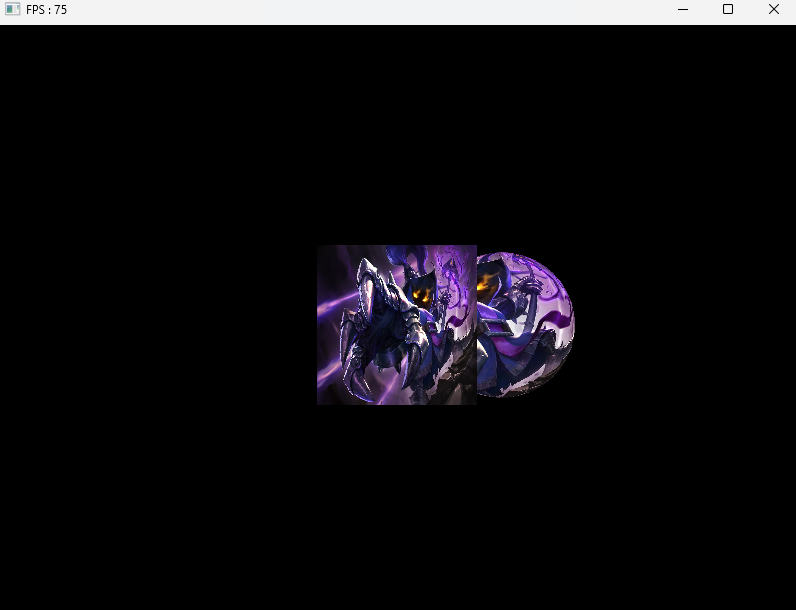
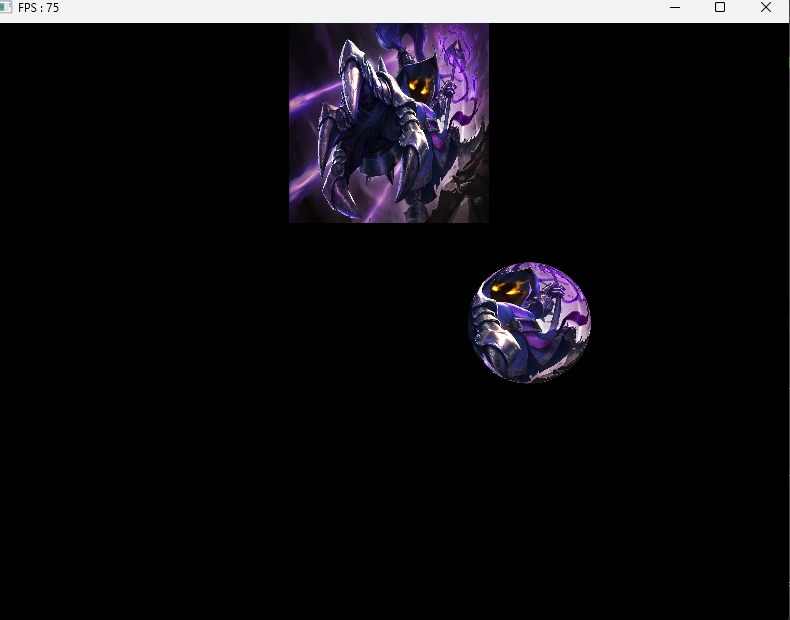
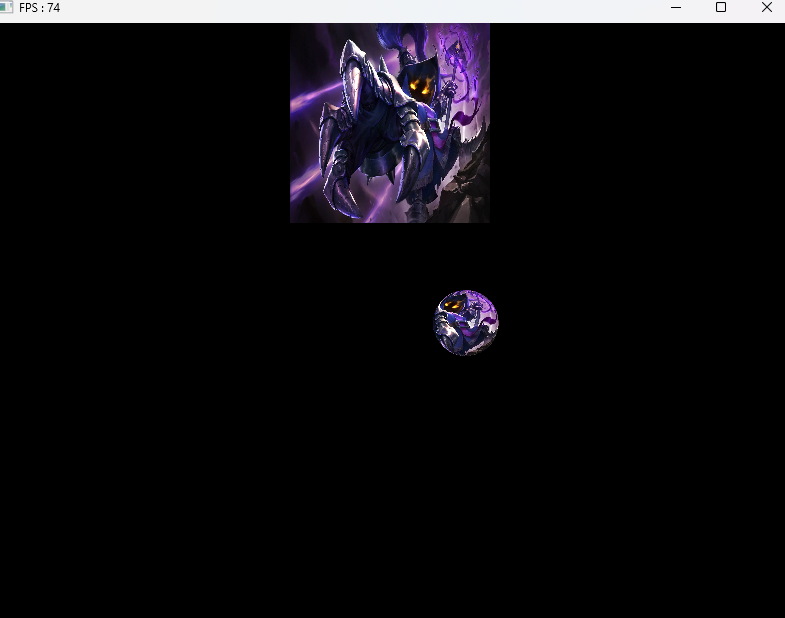
이렇게 해주면 한 오브젝트는 카메라가 움직여도 그래도 있지만 한 오브젝트는 카메라가 멀어지면 작아지는 모습을 볼 수 있다.
'게임공부 > Directx11' 카테고리의 다른 글
| [Directx11][C++][3D]35. 빌보드1 (1) | 2024.10.12 |
|---|---|
| [Directx11][C++][3D]34. 버튼 실습 (1) | 2024.10.11 |
| [Directx11][C++][3D]32. 수학3(Triangle) (5) | 2024.10.09 |
| [Directx11][C++][3D]31. 수학2(Intersection & RayCasting) (1) | 2024.10.09 |
| [Directx11][C++][3D]30. 도형 (0) | 2024.10.07 |