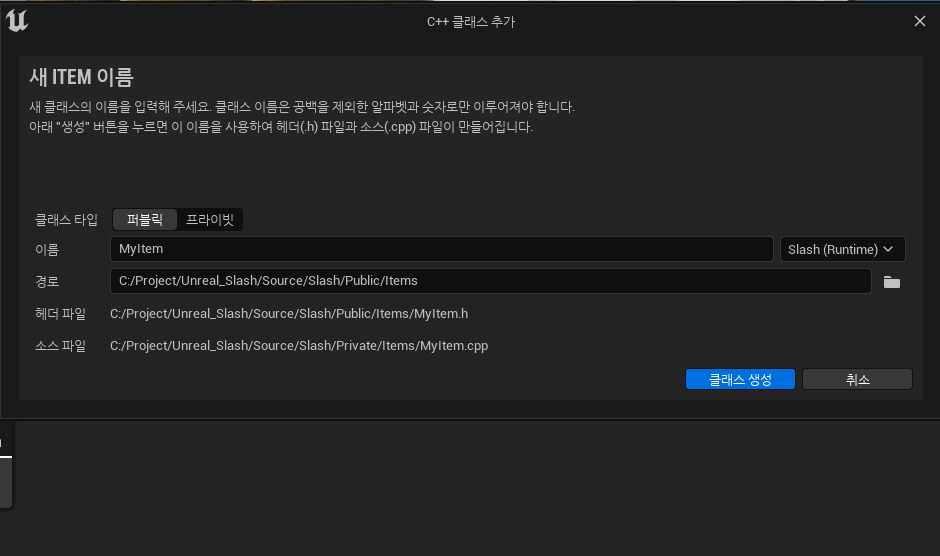
이제 항아리를 부쉈을 때 다양한 종류의 보물이 나오도록 구현해보자.

이를 구현하기에 앞서 플레이어가 모은 보물의 양에 따라 골드량이 달라지는 것을 구현해보자. 

우선 Treasure 클래스에 Gold변수를 추가해서 보물이 가진 골드량을 나타내도록 하자

Treasure.h

// Fill out your copyright notice in the Description page of Project Settings.

#pragma once

#include "CoreMinimal.h"
#include "Items/Item.h"
#include "Treasure.generated.h"

/**
 * 
 */
UCLASS()
class SLASH_API ATreasure : public AItem
{
	GENERATED_BODY()
protected:
	virtual void OnSphereOverlap(UPrimitiveComponent* OverlappedComponent, AActor* OtherActor, UPrimitiveComponent* OtherComp, int32 OtherBodyIndex, bool bFromSweep, const FHitResult& SweepResult) override;
private:
	UPROPERTY(EditAnywhere, Category = Sounds)
	USoundBase* PickupSound;

	UPROPERTY(EditAnywhere, Category = "Treasure Properties")
	int32 Gold;
};


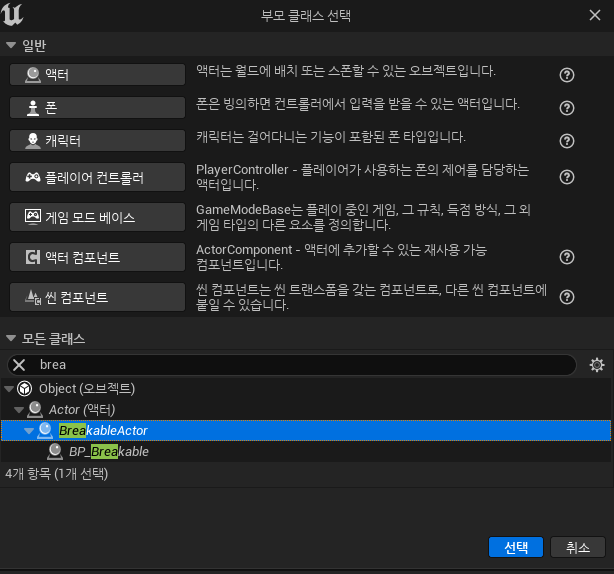
이렇게 해주고 Treasure 클래스를 바탕으로 만들어둔 블루프린트 클래스가 기본으로 두 다른 파생 블루프린트 클래스를 만들어주자.


보면 부모의 이벤트를 자동으로 호출하고 있는것도 볼 수 있다.


이제 이 방법으로 다양한 아이템을 만들어주자.


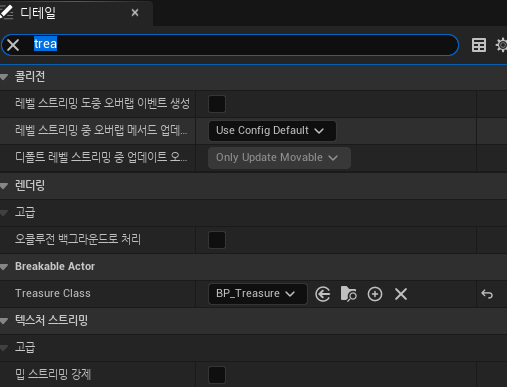
이렇게 만들어준 보물들중에 랜덤하게 스폰하도록 코드로 구현해보자. 이를 위해 TArray를 사용할 것이다.

BreakableActor.h

private:	

	UPROPERTY(EditAnywhere, Category="Breakable Properties")
	TArray<TSubclassOf<class ATreasure>> TreasureClasses;


BreakableActor.cpp

void ABreakableActor::GetHit_Implementation(const FVector& ImpactPoint)
{
	UWorld* World = GetWorld();
	if (World && TreasureClasses.Num() > 0)
	{
		FVector Location = GetActorLocation();
		Location.Z += 75.f;

		int32 Selection = FMath::RandRange(0, TreasureClasses.Num() - 1);

		World->SpawnActor<ATreasure>(TreasureClasses[Selection], Location, GetActorRotation());
	}
}


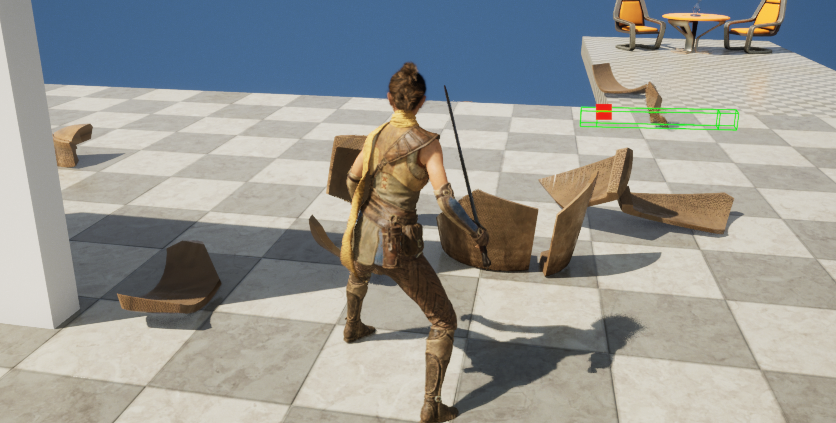
이렇게 해주면 랜덤하게 보물이 드랍된다.


여기에 약간의 효과를 추가해보자 이번에는 이펙트에 나이아가라 시스템을 사용해볼 것이다.

이를 위해 나이아가라시스템을 만들어주자.


이렇게 생성해주면 기본적인 요소들이 만들어져있다.

이 요소들을 살펴보면 다양하게 있는데 이를 통해 이펙트가 만들어지게 되는 것이다. 이 하나하나가 규칙이라고 보면 된다.

이 중에 렌더는 말 그대로 화면에 보이도록하는 것인데 지금은 하얀 입자 하나하나가 스프라이더 이고 이를 보이게 해준다.


Emitter State는 생명주기에 관한것으로 Self는 자체 수명 주기를 사용하는 것이다. 만약 이것을 시스템으로 바궈주면 시스템에서 생명주기를 정해주게 되는 것이다. 무한정 반복되며 주기는 2초이다.


SpawnRate 초당 스폰되는 Emitter의 수이다.

파티클 스폰은 스폰되는 모양에 관한 것으로 각 입자에 대한 초기값이다. 이때 Color값을 1보다 높게하면 반짝이는 효과를 낼 수 있다.


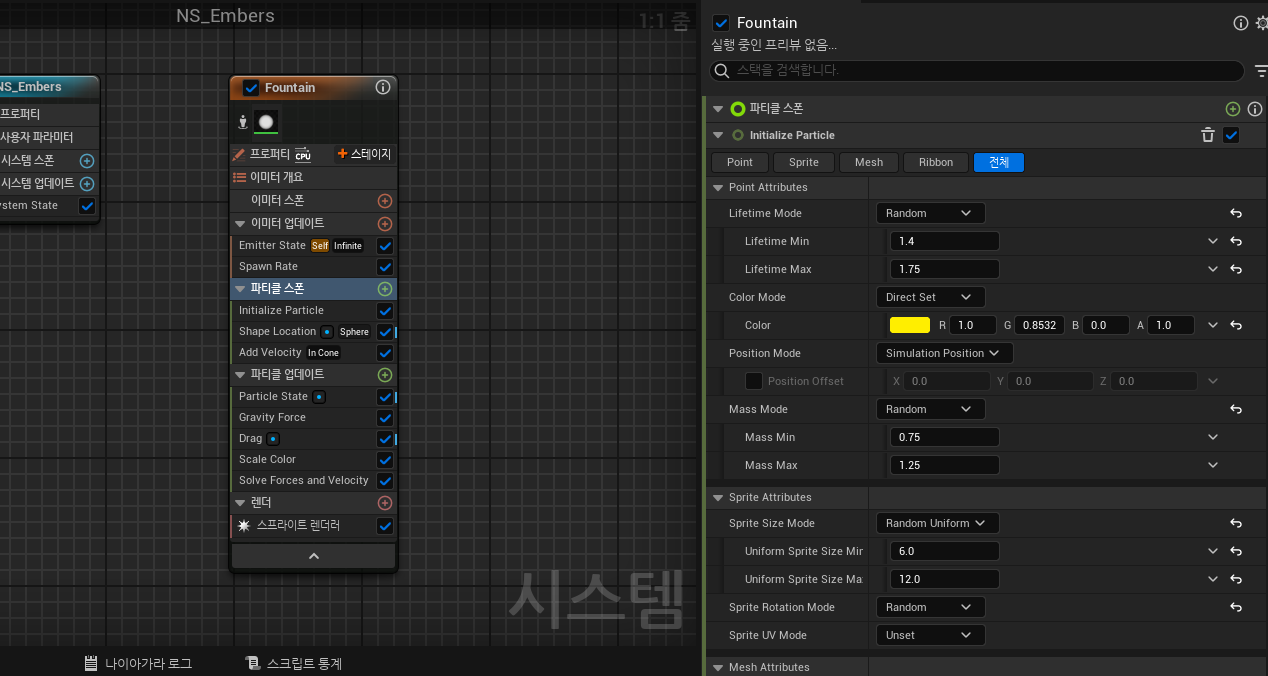
그리고 Shape Location을 조절해주는 것으로 이펙트 산란구역을 설정해줄 수 있다.


이펙트의 속도도 느리게 하고 나오는 각도도 조절해주자


그리고 이 이펙트가 자동으로 종료되는 것이 아닌 우리가 종료시키고 싶기 때문에 Kill Particles를 해제해준다.


Drag는 커질수록 입자의 속도를 느리게 해준다.


여기에 입자들이 소용돌이처럼 돌도록 하기위해 Vortex Velocity를 추가해주자. 그리고 Kill Particles를 다시 체크해주자.


효과는 성공적으로 만들었으니 이를 모든 아이템에서 작동하도록 아이템 코드에 나이아가라 시스템 변수 추가해주자.

Item.h

	private:
    UPROPERTY(EditAnywhere)
	class UNiagaraComponent* EmbersEffect;

Item.cpp

#include "NiagaraComponent.h"

// Sets default values
AItem::AItem()
{
	// Set this actor to call Tick() every frame.  You can turn this off to improve performance if you don't need it.
	PrimaryActorTick.bCanEverTick = true;

	ItemMesh = CreateDefaultSubobject<UStaticMeshComponent>(TEXT("ItemMeshComponent"));
	RootComponent = ItemMesh;

	Sphere = CreateDefaultSubobject<USphereComponent>(TEXT("Sphere"));
	Sphere->SetupAttachment(GetRootComponent());

	EmbersEffect = CreateDefaultSubobject<UNiagaraComponent>(TEXT("Embers"));
	EmbersEffect->SetupAttachment(GetRootComponent());
}


컴파일해준다음 BaseTreasure에 만들어둔 나이아가라 시스템을 추가해주자.
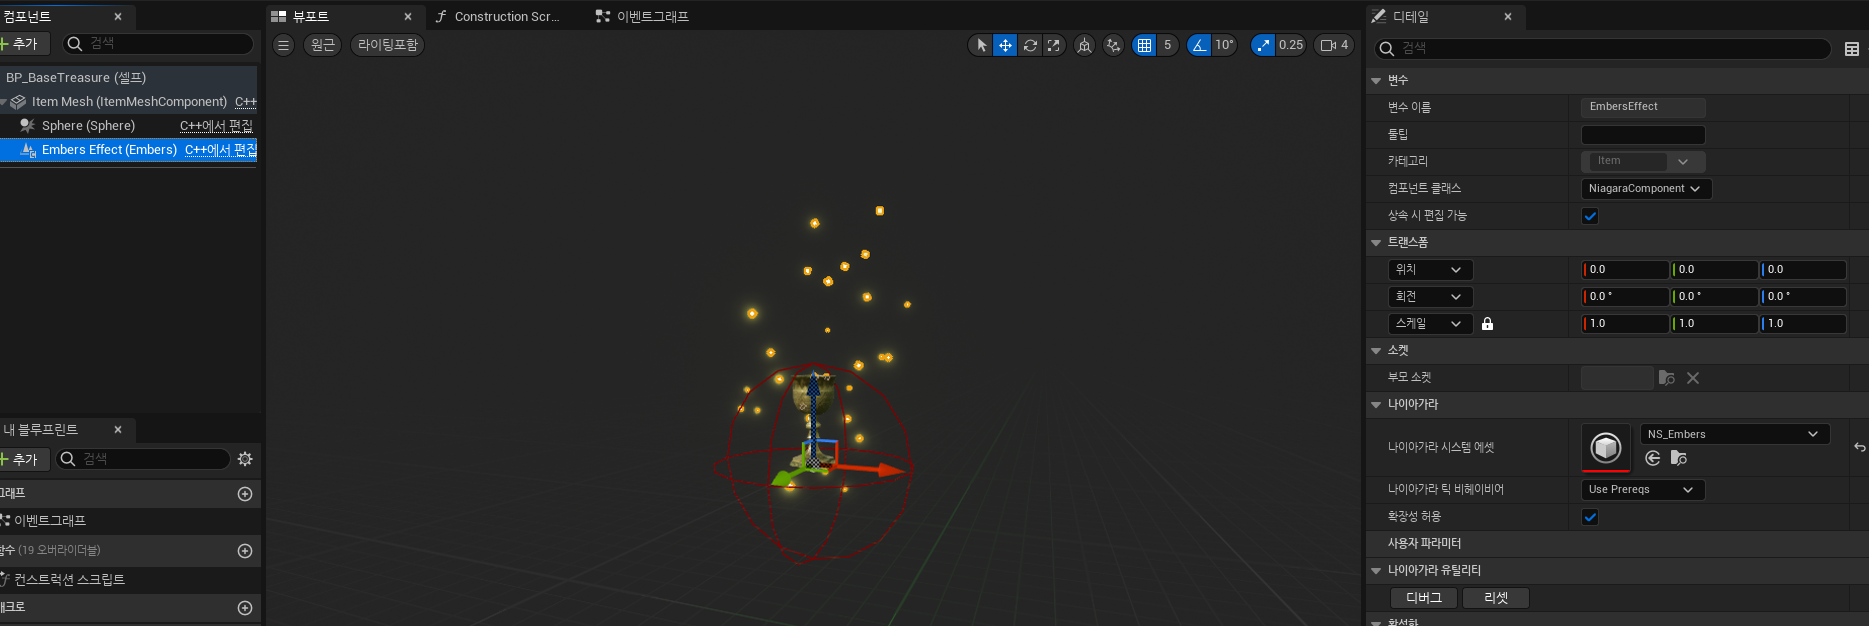
 

잘작동하는 것을 볼 수 있다.


이를 무기에도 붙여주는데 무기는 장착했을 때 이 효과가 없어지게 해주자.

Weapon.cpp

#include "NiagaraComponent.h"

void AWeapon::Equip(USceneComponent* Inparent, FName InSocketName)
{
	AttachMeshToSocket(Inparent, InSocketName);
	ItemState = EItemState::EIS_Equipped;
	if (EquipSound)
	{
		UGameplayStatics::PlaySoundAtLocation(
			this,
			EquipSound,
			GetActorLocation()
		);
	}
	if (Sphere)
	{
		Sphere->SetCollisionEnabled(ECollisionEnabled::NoCollision);
	}
	if (EmbersEffect)
	{
		EmbersEffect->Deactivate();
	}
}


이제 부숴지는 항아리는 만들었으니 부숴졌을 때 보물같은 것이 나오도록 구현해보자

우선 fab에서 무료 보물 에셋을 다운받아주자.

https://www.fab.com/ko/listings/a4c1584f-e305-4562-ad37-4c1483e09a10

다운받은 다음 보물이 나타날때 소리효과를 추가하기 위해 다음 사이트에서 Coin sfx를 하나 다운받아주자.

https://soundimage.org/


Soundimage.org | Thousands of free music tracks, sounds and images for your projects by Eric Matyas

“Ancient Mars”_Looping  (You can freely download this music track in MP3 format from my Sci-Fi 12 page…enjoy!) ______________________________________________________________________________ The purpose of this site to make good-sounding music, sound

soundimage.org


mp3로 다운받아 질텐데 wav로 변환한 다음 임포트해주고 이를 바탕으로 meta sound를 만들어주자.

이렇게 해준 다음 아이템 클래스를 상속받는 Treasure 클래스를 생성해주자.


이때 OnSphereOverlap 함수를 가져와서 재정의 해줄것이다. 이때 파생클래스는 UFUNCTION을 사용할 수 없다.

플레이와 overlap될 때 보물이 없어지고 소리가 재생되도록 해주자.

Treasure.h

// Fill out your copyright notice in the Description page of Project Settings.

#pragma once

#include "CoreMinimal.h"
#include "Items/Item.h"
#include "Treasure.generated.h"

/**
 * 
 */
UCLASS()
class SLASH_API ATreasure : public AItem
{
	GENERATED_BODY()
protected:
	virtual void OnSphereOverlap(UPrimitiveComponent* OverlappedComponent, AActor* OtherActor, UPrimitiveComponent* OtherComp, int32 OtherBodyIndex, bool bFromSweep, const FHitResult& SweepResult) override;
private:
	UPROPERTY(EditAnywhere, Category = Sounds)
	USoundBase* PickupSound;
};

Treasure.cpp

// Fill out your copyright notice in the Description page of Project Settings.


#include "Items/Treasure.h"
#include "Characters/SlashCharacter.h"
#include "Kismet\GameplayStatics.h"

void ATreasure::OnSphereOverlap(UPrimitiveComponent* OverlappedComponent, AActor* OtherActor, UPrimitiveComponent* OtherComp, int32 OtherBodyIndex, bool bFromSweep, const FHitResult& SweepResult)
{
	ASlashCharacter* SlashCharacter = Cast<ASlashCharacter>(OtherActor);
	if (SlashCharacter)
	{
		if (PickupSound)
		{
			UGameplayStatics::PlaySoundAtLocation(
				this,
				PickupSound,
				GetActorLocation()
			);
		}
		Destroy();
	}
}


컴파일해준 다음 이 클래스를 기반으로 블루프린트 클래스를 만들어주자. 만들어준 다음 소리를 추가해주고 매쉬를 적당한 매쉬로 추가해주자.


항아리가 깨졌을 때 스폰되게 만들어야하지만 일단 함수가 올바르게 작동하는지 확인하기 위해 씬에 하나 배치해보자.

시작하고 가까이 다가가면 소리가 재생되면서 없어지는 것을 볼 수 있다.


이제 항아리가 부숴지면 항아리가 있던 자리 중앙에 보물이 생성되게 만들어야한다. 이를 코드로 구현해보자. SpawnActor 함수를 통해 소환해줄 수 있다.
이때 함수의 정의와 매개변수에 대해 찾아보면 UClass를 매개변수로 받고있는 것을 볼 수 있다.


우선 코드상에서 각 클래스를 지정해주는 변수에 대해 알아보면 다음과 같다. 

UClass 변수를 지정해주고 블루프린트상에서 할당해주면 블루프린트 클래스를 가져다가 쓸수 있다.


항아리가 부숴질때 Actor를 Spawn하기 위해 Breakable 클래스에 UClass변수를 추가해주자.

BreakableActor.h

// Fill out your copyright notice in the Description page of Project Settings.

#pragma once

#include "CoreMinimal.h"
#include "GameFramework/Actor.h"
#include "Interfaces/HitInterface.h"
#include "BreakableActor.generated.h"

class UGeometryCollectionComponent;

UCLASS()
class SLASH_API ABreakableActor : public AActor, public IHitInterface
{
	GENERATED_BODY()

private:	
	UPROPERTY(EditAnywhere)
	UClass* TreasureClass;
};


이렇게 해주고 블루프린트상에서도 할당을 해주자.


이렇게 해주고 SpawnActor에서 이 변수를 매개변수로 사용하면 C++클래스 대신 블루프린트 클래스가 소환된다.

BreakableActor.cpp

void ABreakableActor::GetHit_Implementation(const FVector& ImpactPoint)
{
	UWorld* World = GetWorld();
	if (World && TreasureClass)
	{
		FVector Location = GetActorLocation();
		Location.Z += 75.f;
		World->SpawnActor<ATreasure>(TreasureClass, Location, GetActorRotation());
	}
}


컴파일 해주면 보물이 잘 생성되는 것을 볼 수 있다.


이때 UClass 변수로 생성해줬기 때문에 할당할 수 있는 것에 제한이 없다. 이러한 점을 보완하기 위해서 TSubclassOf라는 변수를 사용한다.


BreakableActor.h

private:	
	UPROPERTY(VisibleAnywhere)
	UGeometryCollectionComponent* GeometryCollection;

	UPROPERTY(EditAnywhere)
	TSubclassOf<class ATreasure> TreasureClass;
};


이렇게 해주고 컴파일해주면 선택할 수 있는 Actor가 제한되어있는것을 볼 수 있다.


그리고 여기서 부수고 난 다음에 충돌을 끄기 위해 UCapsuleComponent를 사용하자. 이것을 통해 Pawn이 통과하지 못하지만 깨지고 난 다음에는 지나다닐 수 있도록하자.

BreakableActor.h

	protected:
    UPROPERTY(VisibleAnywhere, BlueprintReadWrite)
	class UCapsuleComponent* Capsule;


BreakableActor.cpp

#include "Breakable/BreakableActor.h"
#include "Components/CapsuleComponent.h"
#include "GeometryCollection/GeometryCollectionComponent.h"
#include "Items/Treasure.h"

ABreakableActor::ABreakableActor()
{

	PrimaryActorTick.bCanEverTick = false;

	GeometryCollection = CreateDefaultSubobject<UGeometryCollectionComponent>(TEXT("GeometryCollection"));
	SetRootComponent(GeometryCollection);
	GeometryCollection->SetGenerateOverlapEvents(true);
	GeometryCollection->SetCollisionResponseToChannel(ECollisionChannel::ECC_Camera, ECollisionResponse::ECR_Ignore);
	GeometryCollection->SetCollisionResponseToChannel(ECollisionChannel::ECC_Pawn, ECollisionResponse::ECR_Ignore);

	Capsule = CreateDefaultSubobject<UCapsuleComponent>(TEXT("Capsule"));
	Capsule->SetupAttachment(GetRootComponent());
	Capsule->SetCollisionResponseToAllChannels(ECollisionResponse::ECR_Ignore);
	Capsule->SetCollisionResponseToChannel(ECollisionChannel::ECC_Pawn, ECollisionResponse::ECR_Block);

}


이렇게 해주고 LifeSpan이 끝날때 이 캡슐과 Pawn의 충돌도 Ignore로 바꿔준다.


이렇게 해주면 잘 작동하는 것을 볼 수 있다.


1. 장비 착용UI 만들기


플레이어가 착용한 장비가 보이게 UI를 수정해주자

착용한 장비에 따라 인벤토리칸이 달라지도록해야한다.

'


이렇게 만들고 UI_Inventory코드를 수정하고 EquipSlot코드도 새로 만들어주자.

UI_Inventory.cs

using System.Collections.Generic;
using UnityEngine;

public class UI_Inventory : UI_Popup
{
    [SerializeField] private Transform slotContainer; // 슬롯 UI 부모 객체
    [SerializeField] private GameObject slotPrefab;   // 슬롯 UI 프리팹

    enum GameObjects
    {
        EquipSlot,
    }

    private List<ItemSlot> itemSlots = new List<ItemSlot>();

    public override void Init()
    {
        Bind<GameObject>(typeof(GameObjects));
        base.Init();
        RefreshUI(); // UI 활성화 시 즉시 인벤토리 데이터 업데이트
    }

    public void RefreshUI()
    {
        List<ItemSlot> inventory = Managers.Inventory.GetOwnedItems();
        int requiredSlotCount = inventory.Count;

        GetObject((int)GameObjects.EquipSlot).GetComponent<EquipSlot>().Init();

        // **슬롯 초기화**
        for (int i = 0; i < slotContainer.childCount; i++)
        {
            GameObject slotObj = slotContainer.GetChild(i).gameObject;
            if (i < requiredSlotCount)
            {
                slotObj.SetActive(true);
                SlotButton slotButton = slotObj.GetComponent<SlotButton>();
                slotButton.UpdateSlotUI(inventory[i]);
            }
            else
            {
                slotObj.SetActive(false); // 남는 슬롯 비활성화
            }
        }

        // **부족한 슬롯 생성**
        for (int i = slotContainer.childCount; i < requiredSlotCount; i++)
        {
            GameObject newSlot = Instantiate(slotPrefab, slotContainer);
            newSlot.SetActive(true);
            SlotButton slotButton = newSlot.GetComponent<SlotButton>();
            slotButton.UpdateSlotUI(inventory[i]);
        }
    }


    private void CreateSlotUI(ItemSlot itemSlot)
    {
        GameObject slotObj = Instantiate(slotPrefab, slotContainer);
        slotObj.SetActive(true);
        SlotButton slotButton = slotObj.GetComponent<SlotButton>();
        slotButton.UpdateSlotUI(itemSlot);

        // 슬롯 데이터 디버그 확인
        Debug.Log($"Created Slot for Item: {itemSlot.itemData.itemName}, Quantity: {itemSlot.quantity}");
    }
}


EquipSlot.cs

using System.Collections;
using System.Collections.Generic;
using TMPro;
using UnityEngine;
using UnityEngine.EventSystems;
using UnityEngine.UI;

public class EquipSlot : UI_Base, IPointerClickHandler, IPointerUpHandler, IPointerEnterHandler, IPointerExitHandler
{
    [SerializeField] private Image itemIcon;          // 아이템 아이콘 표시
    [SerializeField] private TextMeshProUGUI itemName; // 아이템 이름 
    [SerializeField] private TextMeshProUGUI itemInfo;  // 아이템 설명
    [SerializeField] private TextMeshProUGUI AttackInfo; // 공격력 설명

    public ItemSlot currentItemSlot;                 // 현재 슬롯에 연결된 아이템 데이터


    public override void Init()
    {
        ItemSlot CurrentEquippedItem = Managers.Inventory.EquippedWeapon;

        if(CurrentEquippedItem != null ) 
        { 
            UpdateSlotUI(CurrentEquippedItem);
        }else
        {
            itemIcon.gameObject.SetActive(false);
            itemName.text = "장착 없음";
            itemInfo.text = "";
            AttackInfo.text = "";
        }
    }

    // 슬롯 UI 업데이트
    public void UpdateSlotUI(ItemSlot itemSlot)
    {
        currentItemSlot = itemSlot;

        if (currentItemSlot != null && currentItemSlot.itemData != null)
        {
            itemIcon.sprite = currentItemSlot.itemData.icon;
            itemIcon.gameObject.SetActive(true);
            itemName.text = currentItemSlot.itemData.itemName;
            itemInfo.text = currentItemSlot.itemData.description;
            AttackInfo.text = $"공격력: {currentItemSlot.itemData.AttackDamage}";
        }
        else
        {
            itemIcon.gameObject.SetActive(false);
            itemName.text = "장착 없음";
            itemInfo.text = "";
            AttackInfo.text = "";
        }
    }


    public void OnPointerClick(PointerEventData eventData)
    {
        Debug.Log("클릭 이벤트 호출!");

        UI_EquipSel uI_EquipSel = FindAnyObjectByType<UI_EquipSel>();
        if (uI_EquipSel == null)
        {
            uI_EquipSel = Managers.UI.ShowPopupUI<UI_EquipSel>();
            uI_EquipSel.gameObject.transform.SetParent(transform, false);
            Vector3 loaction = eventData.position;
            loaction.y -= 50;
            uI_EquipSel.gameObject.transform.SetPositionAndRotation(loaction, Quaternion.identity);
        }
        else
        {
            Managers.UI.ClosePopupUI(uI_EquipSel);
        }

    }
    }
}

그리고 단일 책임 원칙을 지키고 중앙화된 아이템 관리를 하기 위해  플레이어가 장착한 무기도 인벤토리 매니저에서 관리하도록 수정해주었다.

InventoryManager.cs

using System.Collections.Generic;
using UnityEngine;

public class InventoryManager : MonoBehaviour
{
    [SerializeField] private Transform slotContainer; // 슬롯 UI 부모 객체
    [SerializeField] private GameObject slotPrefab;   // 슬롯 UI 프리팹
    private List<ItemSlot> inventory = new List<ItemSlot>();
    private Dictionary<int, ItemData> itemDataCache = new Dictionary<int, ItemData>();

    public ItemSlot EquippedWeapon { get; private set; }

    public void Init()
    {
        inventory = new List<ItemSlot>();
        slotPrefab = Resources.Load<GameObject>("Prefabs/Item");
        CacheItemData();
        EquippedWeapon = null;
    }

    private void CacheItemData()
    {
        ItemData[] items = Resources.LoadAll<ItemData>("Items");
        foreach (var item in items)
        {
            if (!itemDataCache.ContainsKey(item.itemID))
            {
                itemDataCache.Add(item.itemID, item);
            }
        }
    }

    public ItemData FindItemDataByID(int itemID)
    {
        if (itemDataCache.TryGetValue(itemID, out ItemData itemData))
        {
            return itemData;
        }

        Debug.LogWarning($"ItemData를 찾을 수 없습니다: ID = {itemID}");
        return null;
    }

    public void EquipWeapon(ItemData itemData)
    {
        if (EquippedWeapon != null)
        {
            Debug.LogWarning("이미 무기가 장착되어 있습니다.");
            return;
        }

        ItemSlot slot = inventory.Find(s => s.itemData.itemID == itemData.itemID);
        if (slot != null)
        {
            slot.quantity--;
            if (slot.quantity <= 0)
            {
                inventory.Remove(slot);
            }

            EquippedWeapon = new ItemSlot { itemData = itemData, quantity = 1 };
            Debug.Log($"무기 '{itemData.itemName}' 장착 완료.");
        }
        else
        {
            Debug.LogWarning("장착하려는 무기가 인벤토리에 없습니다.");
        }

        RefreshUI();
    }

    public void UnEquipWeapon()
    {
        if (EquippedWeapon == null)
        {
            Debug.LogWarning("장착된 무기가 없습니다.");
            return;
        }

        TryAddItem(EquippedWeapon.itemData, 1);
        Debug.Log($"무기 '{EquippedWeapon.itemData.itemName}' 해제 완료.");
        EquippedWeapon = null;

        RefreshUI();
    }

    public bool TryAddItem(ItemData itemData, int count = 1)
    {
        ItemSlot slot = inventory.Find(s => s.itemData.itemID == itemData.itemID);

        if (itemData.itemType == Define.ItemType.Equipment)
        {
            if (slot != null && slot.quantity >= 1)
            {
                Debug.LogWarning("이미 인벤토리에 무기가 있습니다.");
                return false;
            }
        }

        if (inventory.Count >= 30)
        {
            Debug.LogWarning("인벤토리 용량이 초과되었습니다.");
            return false;
        }

        if (slot != null)
        {
            slot.quantity += count;
        }
        else
        {
            inventory.Add(new ItemSlot { itemData = itemData, quantity = count });
        }

        RefreshUI();
        return true;
    }

    public void RemoveItem(ItemData itemData, int count = 1)
    {
        ItemSlot slot = inventory.Find(s => s.itemData.itemID == itemData.itemID);
        if (slot != null)
        {
            slot.quantity -= count;
            if (slot.quantity <= 0)
            {
                inventory.Remove(slot);
                Debug.Log($"아이템 '{itemData.itemName}'이(가) 인벤토리에서 제거되었습니다.");
            }
            else
            {
                Debug.Log($"아이템 '{itemData.itemName}'의 수량이 {slot.quantity}로 줄었습니다.");
            }
        }
        else
        {
            Debug.LogWarning($"제거하려는 아이템 '{itemData.itemName}'이(가) 인벤토리에 없습니다.");
        }

        RefreshUI();
    }

    public void RefreshUI()
    {
        UI_WeaponSel uI_WeaponSel = FindAnyObjectByType<UI_WeaponSel>();
        UI_EquipSel uI_EquipSel = FindAnyObjectByType<UI_EquipSel>();
        if(uI_WeaponSel != null)
        {
            Managers.UI.ClosePopupUI(uI_WeaponSel);
        }else if(uI_EquipSel != null)
        {
            Managers.UI.ClosePopupUI(uI_EquipSel);
        }

        UI_Inventory inventoryUI = Managers.UI.GetTopPopupUI() as UI_Inventory;
        
        if (inventoryUI != null)
        {
            inventoryUI.RefreshUI();
        }
    }

    public List<ItemSlot> GetOwnedItems()
    {
        return inventory;
    }

    public void SaveInventory(ref SaveData saveData)
    {
        List<SerializedItemSlot> serializedInventory = new List<SerializedItemSlot>();
        foreach (var slot in inventory)
        {
            serializedInventory.Add(new SerializedItemSlot
            {
                itemID = slot.itemData.itemID,
                quantity = slot.quantity
            });
        }

        saveData.inventoryData = serializedInventory;

        saveData.equippedWeaponID = EquippedWeapon?.itemData.itemID ?? -1;
    }

    public void LoadInventory(SaveData saveData)
    {
        if (saveData.inventoryData == null) return;

        inventory.Clear();
        foreach (var serializedSlot in saveData.inventoryData)
        {
            ItemData itemData = FindItemDataByID(serializedSlot.itemID);
            if (itemData != null)
            {
                inventory.Add(new ItemSlot { itemData = itemData, quantity = serializedSlot.quantity });
            }
        }

        if (saveData.equippedWeaponID != -1)
        {
            ItemData weaponData = FindItemDataByID(saveData.equippedWeaponID);
            if (weaponData != null)
            {
                EquippedWeapon = new ItemSlot { itemData = weaponData, quantity = 1 };
                Debug.Log($"무기 '{weaponData.itemName}' 장착 복원.");
            }
        }

        RefreshUI();
    }
}


RefreshUI에서 만약 장착이나 장착해제 UI가 떠있는 상태라면 인벤토리 UI가 최상단이 아니기 때문에 꺼주고 최상단 UI를 불러와서 Refresh를 진행하도록 해주었다. 

이에 맞춰서 장착해제와 장착의 UI의 코드도 수정해줬다.

UI_WeaponSel.cs

using UnityEngine.EventSystems;
using UnityEngine.UI;

public class UI_WeaponSel : UI_Popup
{
    public enum Buttons
    {
        EquipButton,
        RemoveButton,
    }

    public override void Init()
    {
        Bind<Button>(typeof(Buttons));
        GetButton((int)Buttons.EquipButton).gameObject.AddUIEvent(EquipWeapon);
    }

    void EquipWeapon(PointerEventData eventData)
    {
        SlotButton slotButton = transform.parent.GetComponent<SlotButton>();
        if (slotButton != null)
        {
            Managers.Inventory.EquipWeapon(slotButton.currentItemSlot.itemData);
            Managers.Inventory.RefreshUI();
        }
    }
}


SlotButton.cs

using System.Collections;
using System.Collections.Generic;
using UnityEngine;
using UnityEngine.EventSystems;
using UnityEngine.UI;

public class UI_EquipSel : UI_Popup
{
    public enum Buttons
    {
        UnequipButton,
        RemoveButton,
    }

    public override void Init()
    {
        Bind<Button>(typeof(Buttons));

        GetButton((int)Buttons.UnequipButton).gameObject.AddUIEvent(UnequipWeapon);
    }

    void UnequipWeapon(PointerEventData eventData)
    {
        EquipSlot currentItem = transform.parent.gameObject.GetComponent<EquipSlot>();
        if (currentItem != null)
        {
            Managers.Inventory.UnEquipWeapon();
            Managers.Inventory.RefreshUI();
        }
    }
}


이렇게 해주면 인벤토리가 잘 작동하는 것을 볼 수 있다.


이제 항아리는 잘 부숴지는데 이것을 하나의 기본 Actor로 만들어주자. 그러려면 Actor에 Geometry Collection이 있어야한다. 

BreakableActor.h

// Fill out your copyright notice in the Description page of Project Settings.

#pragma once

#include "CoreMinimal.h"
#include "GameFramework/Actor.h"
#include "BreakableActor.generated.h"

class UGeometryCollectionComponent;

UCLASS()
class SLASH_API ABreakableActor : public AActor
{
	GENERATED_BODY()
	
public:	
	ABreakableActor();
	virtual void Tick(float DeltaTime) override;
protected:
	virtual void BeginPlay() override;

private:	
	UPROPERTY(VisibleAnywhere)
	UGeometryCollectionComponent* GeometryCollection;
};

BreakableActor.cpp

// Fill out your copyright notice in the Description page of Project Settings.


#include "Breakable/BreakableActor.h"
#include "GeometryCollection/GeometryCollectionComponent.h"

ABreakableActor::ABreakableActor()
{

	PrimaryActorTick.bCanEverTick = false;

	GeometryCollection = CreateDefaultSubobject<UGeometryCollectionComponent>(TEXT("GeometryCollection"));
	SetRootComponent(GeometryCollection);
	GeometryCollection->SetGenerateOverlapEvents(true);
}

void ABreakableActor::BeginPlay()
{
	Super::BeginPlay();
	
}

void ABreakableActor::Tick(float DeltaTime)
{
	Super::Tick(DeltaTime);

}


이렇게 해주고 Build.cs 코드에 모듈을 추가해줘야 정상적으로 빌드된다.

PublicDependencyModuleNames.AddRange(new string[] { "Core", "CoreUObject", "Engine", "InputCore","EnhancedInput","HairStrandsCore", "Niagara", "GeometryCollectionEngine" });


이렇게 해주고 이를 바탕으로한 BlueprintClass를 만들어주자.


이렇게 해주면 Geometry Collection이 생성된 블루프린트가 나오는데 이때 카오스 피직스의 컬렉션지정으로 기본 켈렉션을 지정해줄 수 있다.


이렇게 해주고 씬에 배치해보면 잘 작동하는 것을 볼 수 있다.


이제 부숴질 때의 동작을 IHitInterface를 상속받아서 작동하도록 만들어주자.

이때 override한 GetHit이 블루프린트상에서도 호출가능하게 하고 싶을 수 있는데 이때 BluePrint Natvie Event를 사용하면 된다.

HitInterface.h

// Fill out your copyright notice in the Description page of Project Settings.

#pragma once

#include "CoreMinimal.h"
#include "UObject/Interface.h"
#include "HitInterface.generated.h"

// This class does not need to be modified.
UINTERFACE(MinimalAPI)
class UHitInterface : public UInterface
{
	GENERATED_BODY()
};

/**
 * 
 */
class SLASH_API IHitInterface
{
	GENERATED_BODY()

	// Add interface functions to this class. This is the class that will be inherited to implement this interface.
public:
	UFUNCTION(BlueprintNativeEvent)
	void GetHit(const FVector& ImpactPoint);
};


이렇게 해주고 기존의 GetHit의 함수의 이름 을 GetHit_Implementation로 다 바꿔주자.

그리고 실제로 호출될 때는 언리얼엔진 에서 제공해주는 Execute함수를 통해 실행되도록 하자.

Weapon.cpp

void AWeapon::OnBoxOverlap(UPrimitiveComponent* OverlappedComponent, AActor* OtherActor, UPrimitiveComponent* OtherComp, int32 OtherBodyIndex, bool bFromSweep, const FHitResult& SweepResult)
{
	const FVector Start = BoxTraceStart->GetComponentLocation();
	const FVector End = BoxTraceEnd->GetComponentLocation();

	TArray<AActor*> ActorsToIgnore;
	ActorsToIgnore.Add(this);

	for (AActor* Actor : IgnoreActors)
	{
		ActorsToIgnore.AddUnique(Actor);
	}

	//충돌 결과
	FHitResult BoxHit;

	UKismetSystemLibrary::BoxTraceSingle(
		this,
		Start,
		End,
		FVector(5.f, 5.f, 5.f),
		BoxTraceStart->GetComponentRotation(),
		ETraceTypeQuery::TraceTypeQuery1,
		false,
		ActorsToIgnore,		//무시할거
		EDrawDebugTrace::ForDuration,
		BoxHit,
		true		//자신무시
	);

	if (BoxHit.GetActor())
	{
		IHitInterface* HitInterface = Cast<IHitInterface>(BoxHit.GetActor());
		if (HitInterface)
		{
			HitInterface->Execute_GetHit(BoxHit.GetActor(), BoxHit.ImpactPoint);
		}
		IgnoreActors.AddUnique(BoxHit.GetActor());

		CreateFields(BoxHit.ImpactPoint);
	}
}


이렇게 해주면 블루프린트상에서도 GetHit을 사용할 수 있다. 이때 부모의 Get Hit이 코드상의 GetHit이고 이벤트는 블루프린트 상의 새로운 GetHit이다.


이제 이 함수를 통해 부숴질 때 소리가 들리도록 구현해보자. 오디오소스를 임포트해주고 메타사운드를 만들어주자.


이렇게 해주고 Play Sound at location을 추가해주면 소리가 잘 재생되는 것을 볼 수 있다.


여기서 set Life Span을 설정해주면 부숴지고 나서 그 오브젝트가 Destroy되게 설정해줄 수 있다. 이때 notify Break를 켜주어야한다. 


이렇게 해주면 연쇄적으로 다른 것이 부숴지더라도 같이 없어지는 것을 볼 수 있다.

https://www.udemy.com/share/107vg03@STyi255Qzv5LK2e3RjDbD-KsF21JVkAeyR2gcIMEUwRMyVDjHyOz4P5LgBvz3Rj9mQ==/


피격시에 부숴지는 물체를 만들어보자. 

부숴지는 물체는 프팩처 모드를 통해 만들 수 있다. 이를 위해 매쉬를 지정해주고 새로운 프랙처를 만들어주자.

프랙처는 매쉬가 있을 때 알고리즘에 따라 어떤식으로 부숴질지 정해주는 툴이다. 다양한 옵션을 지정해줄 수 있다.

예를 들어 밑의 변수를 조절해주면 더 자세하게 쪼개질 수 있는 것이다. 


이렇게 만들어주면 만들어 준데로 부숴지는 모습도 볼 수 있다.


이를 피격시에 부숴지도록 구현하기 위해 블루프린트 클래스를 만들어주자. 이 블루프린트는 FieldSystem Actor를 상속받게 하자. 이것은 필드에 일시적인 힘을 생성해서 물체가 부숴지도록 해줄 것이다. 이때 Add Transient Field함수를 통해 일시적인 External한 힘을 생성해주는데 Set Radial Fall off를 통해 방사형 줄어드는 힘으로 만들어 줄 것이다.  


이렇게 해주면 잘 부숴지는 것을 볼 수 있다.

그리고 여기서 또 다른 힘을 줘볼텐데 이때 선형적인 힘을 줘보자 이 선형적인 힘은 Radial Vector변수를 설정해주는 것으로 지정해줄 수 있다.

이렇게 해주면 부숴진다음 멀리 날아가는 것을 볼 수 있다.


여기서 힘이 캐릭터나 다른것에 영향을 주는 것을 방지하기 위해 Meta Data Filter 변수를 추가해서 Destruction 타입에만 작용하도록 해주면 된다.


이때 클러스터링을 꺼주면 힘에 따라 더 부숴지는 모습을 볼 수 있다. 


이렇게 일시적으로 힘을 생성해주는 함수를 무기의 블루프린트에서 지정가능하도록 코드상에서 함수를 선언해주자.

Weapon.h

protected:
    UFUNCTION(BlueprintImplementableEvent)
	void CreateFields(const FVector& FieldLocation);


이렇게 해주고 호출은 코드상에서 해줘야하기 때문에 겹쳐질 때 작동하도록하자.

Weapon.cpp

void AWeapon::OnBoxOverlap(UPrimitiveComponent* OverlappedComponent, AActor* OtherActor, UPrimitiveComponent* OtherComp, int32 OtherBodyIndex, bool bFromSweep, const FHitResult& SweepResult)
{
	const FVector Start = BoxTraceStart->GetComponentLocation();
	const FVector End = BoxTraceEnd->GetComponentLocation();

	TArray<AActor*> ActorsToIgnore;
	ActorsToIgnore.Add(this);

	for (AActor* Actor : IgnoreActors)
	{
		ActorsToIgnore.AddUnique(Actor);
	}

	//충돌 결과
	FHitResult BoxHit;

	UKismetSystemLibrary::BoxTraceSingle(
		this,
		Start,
		End,
		FVector(5.f, 5.f, 5.f),
		BoxTraceStart->GetComponentRotation(),
		ETraceTypeQuery::TraceTypeQuery1,
		false,
		ActorsToIgnore,		//무시할거
		EDrawDebugTrace::ForDuration,
		BoxHit,
		true		//자신무시
	);

	if (BoxHit.GetActor())
	{
		IHitInterface* HitInterface = Cast<IHitInterface>(BoxHit.GetActor());
		if (HitInterface)
		{
			HitInterface->GetHit(BoxHit.ImpactPoint);
		}
		IgnoreActors.AddUnique(BoxHit.GetActor());

		CreateFields(BoxHit.ImpactPoint);
	}
}


컴파일해주고 함수는 다음과 같이 구성해주자.


이렇게 해주고 물체의 콜리전세팅을 조금 바꿔주면 된다.


이렇게 해주고 실제로 충돌하는지 Draw Debug Sphere를 통해 확인해보자.


잘 작동하는 것을 볼 수 있다.


이렇게 하고 힘의 크기를 조금 키워주면 잘 부숴지는것도 볼 수 있다.


이제 항아리는 잘 부숴지는데 이것을 하나의 기본 Actor로 만들어주자. 그러려면 Actor에 Geometry Collection이 있어야한다. 

BreakableActor.h

// Fill out your copyright notice in the Description page of Project Settings.

#pragma once

#include "CoreMinimal.h"
#include "GameFramework/Actor.h"
#include "BreakableActor.generated.h"

class UGeometryCollectionComponent;

UCLASS()
class SLASH_API ABreakableActor : public AActor
{
	GENERATED_BODY()
	
public:	
	ABreakableActor();
	virtual void Tick(float DeltaTime) override;
protected:
	virtual void BeginPlay() override;

private:	
	UPROPERTY(VisibleAnywhere)
	UGeometryCollectionComponent* GeometryCollection;
};

BreakableActor.cpp

// Fill out your copyright notice in the Description page of Project Settings.


#include "Breakable/BreakableActor.h"
#include "GeometryCollection/GeometryCollectionComponent.h"

ABreakableActor::ABreakableActor()
{

	PrimaryActorTick.bCanEverTick = false;

	GeometryCollection = CreateDefaultSubobject<UGeometryCollectionComponent>(TEXT("GeometryCollection"));
	SetRootComponent(GeometryCollection);
	GeometryCollection->SetGenerateOverlapEvents(true);
}

void ABreakableActor::BeginPlay()
{
	Super::BeginPlay();
	
}

void ABreakableActor::Tick(float DeltaTime)
{
	Super::Tick(DeltaTime);

}


이렇게 해주고 Build.cs 코드에 모듈을 추가해줘야 정상적으로 빌드된다.

PublicDependencyModuleNames.AddRange(new string[] { "Core", "CoreUObject", "Engine", "InputCore","EnhancedInput","HairStrandsCore", "Niagara", "GeometryCollectionEngine" });


이렇게 해주고 이를 바탕으로한 BlueprintClass를 만들어주자.


이렇게 해주면 Geometry Collection이 생성된 블루프린트가 나오는데 이때 카오스 피직스의 컬렉션지정으로 기본 켈렉션을 지정해줄 수 있다.


이렇게 해주고 씬에 배치해보면 잘 작동하는 것을 볼 수 있다.


1. 아이템 슬롯UI 및 코드 제작

만들어둔 인벤토리를 통해 실제 인벤토리 UI가 호출되고 이 UI에 아이템이 표시되도록 구현해보자.

아이템리스트가  ScrollView를 통해 나오도록 만들어 보려고 한다.

이를 위해 아이템슬롯 UI를 만들어보자 UI에 필요한 항목은 아이콘,이름,개수이다. 


프리팹을 제작해주고 이 SlotButton에 아이콘,이름, 개수를 아이템 정보에 따라 달라질 수 있도록 클래스를 만들어주자.

SlotButton.cs

using UnityEngine;
using UnityEngine.UI;
using TMPro;

public class SlotButton : MonoBehaviour
{
    [SerializeField] private Image itemIcon;          // 아이템 아이콘 표시
    [SerializeField] private TextMeshProUGUI itemName; // 아이템 이름 및 개수 표시
    [SerializeField] private TextMeshProUGUI itemCount; // 아이템 이름 및 개수 표시
    private ItemSlot currentItemSlot;                 // 현재 슬롯에 연결된 아이템 데이터

    // 슬롯 UI 업데이트
    public void UpdateSlotUI(ItemSlot itemSlot)
    {
        currentItemSlot = itemSlot;

        if (currentItemSlot != null && currentItemSlot.itemData != null)
        {
            if (currentItemSlot.itemData.icon != null)
            {
                itemIcon.sprite = currentItemSlot.itemData.icon;
                itemIcon.gameObject.SetActive(true);
            }
            else
            {
                Debug.LogWarning($"아이템 {currentItemSlot.itemData.itemName}에 아이콘이 없습니다!");
            }

            itemName.text = $"{currentItemSlot.itemData.itemName}";
            itemCount.text = $"{currentItemSlot.quantity} 개";
        }
        else
        {
            Debug.LogWarning("슬롯 UI를 업데이트할 데이터가 없습니다!");
            itemIcon.gameObject.SetActive(false);
            itemName.text = "";
            itemCount.text = "";
        }
    }

}


2.인벤토리UI제작 및 코그 구현


그리고 이에 맞춰 ScrollView가 포함된 UI를 제작해주자. 이때 아이템들이 담길 부모객체에 Vertical Layout Group과 Content Size Filter가 적용되어 있어야한다.


그리고 팝업UI로 이 UI를 호출할 수 있도록 UI_Popup을 상속받아서 UI_Inventory 클래스를 구현해주자. 이때 InventoryManager에서 가지고 있는 리스트를 반환해주는 함수를 추가해주자.

InventoryManager.cs

public List<ItemSlot> GetOwnedItems()
{
    return inventory;
}


UI_Inventory.cs

using System.Collections.Generic;
using UnityEngine;

public class UI_Inventory : UI_Popup
{
    [SerializeField] private Transform slotContainer; // 슬롯 UI 부모 객체
    [SerializeField] private GameObject slotPrefab;   // 슬롯 UI 프리팹

    private List<ItemSlot> itemSlots = new List<ItemSlot>();

    public override void Init()
    {
        base.Init();
        RefreshUI(); // UI 활성화 시 즉시 인벤토리 데이터 업데이트
    }

    public void RefreshUI()
    {
        List<ItemSlot> inventory = Managers.Inventory.GetOwnedItems(); // 현재 인벤토리 아이템 목록

        // 필요한 슬롯 개수와 현재 슬롯 개수 비교
        int requiredSlotCount = inventory.Count;
        int currentSlotCount = slotContainer.childCount;

        // 슬롯 부족 시 추가 생성
        for (int i = currentSlotCount; i < requiredSlotCount; i++)
        {
            GameObject newSlot = Instantiate(slotPrefab, slotContainer);
            newSlot.SetActive(false); // 비활성화 상태로 생성
        }

        // 슬롯 업데이트
        for (int i = 0; i < requiredSlotCount; i++)
        {
            Transform slotTransform = slotContainer.GetChild(i);
            slotTransform.gameObject.SetActive(true); // 활성화
            SlotButton slotButton = slotTransform.GetComponent<SlotButton>();
            slotButton.UpdateSlotUI(inventory[i]); // 슬롯 UI 업데이트
        }

        // 남는 슬롯 비활성화
        for (int i = requiredSlotCount; i < currentSlotCount; i++)
        {
            slotContainer.GetChild(i).gameObject.SetActive(false);
        }

        // 디버그 로그
        Debug.Log($"Inventory Count: {inventory.Count}");
        foreach (var slot in inventory)
        {
            Debug.Log($"Slot: {slot.itemData.itemName}, Quantity: {slot.quantity}");
        }
    }


    private void CreateSlotUI(ItemSlot itemSlot)
    {
        GameObject slotObj = Instantiate(slotPrefab, slotContainer);
        slotObj.SetActive(true);
        SlotButton slotButton = slotObj.GetComponent<SlotButton>();
        slotButton.UpdateSlotUI(itemSlot);

        // 슬롯 데이터 디버그 확인
        Debug.Log($"Created Slot for Item: {itemSlot.itemData.itemName}, Quantity: {itemSlot.quantity}");
    }
}


이렇게 해주고 Player에서 호출해주면 된다.

Player.cs

 private void OpenInventory(InputAction.CallbackContext context)
 {
     DebugEx.Log("인벤토리 키 입력");
     UI_Inventory inventoryPopup = FindAnyObjectByType<UI_Inventory>();
     if (inventoryPopup == null)
     {
         Managers.UI.ShowPopupUI<UI_Inventory>();
         
     } 
     else
     {
         Managers.UI.CloseAllPopupUI();
     }
 }


이렇게 해주면 정상적으로 인벤토리가 호출되는 것을 볼 수 있다. 


3.클릭이벤트 구현

인벤토리에서 아이템을 클릭했을 때 이벤트를 구현해보자

우선 아이템을 클릭했을 때 나올 UI를 제작해보자. 

일단 장착하기와 버리기 버튼만이 있는 상태로 버튼UI를 만들어주면 된다.


클릭이벤트를 구현하기 위해 전체 WeaponSel에 관한 코드를 작성해주자.

코드를 통해 2가지 버튼에 바인딩하고 이 버튼을 가져와서 이벤트를 추가해주자. 이때 게임오브젝트와 enum에서 변수의 명이 동일해야 바인딩이 가능하다.

UI_WeaponSel.cs

using System.Collections;
using System.Collections.Generic;
using UnityEngine;
using UnityEngine.EventSystems;
using UnityEngine.UI;

public class UI_WeaponSel : UI_Popup
{
    public enum Buttons
    {
        EquipButton,
        RemoveButton,
    }

    public override void Init()
    {
        Bind<Button>(typeof(Buttons));

        GetButton((int)Buttons.EquipButton).gameObject.AddUIEvent(EquipWeapon);
    }

    void EquipWeapon(PointerEventData eventData)
    {
        SlotButton currentItem = transform.parent.gameObject.GetComponent<SlotButton>();
        if (currentItem != null) 
        {
            currentItem.UseItem();
        }
    }
}


클릭이벤트를 위해 유니티에서 제공해주는 인터페이스를 사용해보자 

나는 IPointerClickHandler, IPointerUpHandler, IPointerEnterHandler, IPointerExitHandler 이렇게 4가지를 사용해보았다. 

SlotButton.cs

using UnityEngine;
using UnityEngine.UI;
using TMPro;
using UnityEngine.EventSystems;

public class SlotButton : UI_Base, IPointerClickHandler, IPointerUpHandler, IPointerEnterHandler, IPointerExitHandler
{
    [SerializeField] private Image itemIcon;          // 아이템 아이콘 표시
    [SerializeField] private TextMeshProUGUI itemName; // 아이템 이름 
    [SerializeField] private TextMeshProUGUI itemInfo;  // 아이템 설명
    [SerializeField] private TextMeshProUGUI itemCount; // 아이템 개수 
    private ItemSlot currentItemSlot;                 // 현재 슬롯에 연결된 아이템 데이터


    // 아이템 사용 로직
    public void UseItem()
    {
        if (currentItemSlot.itemData.itemType == Define.ItemType.Consumable)
        {
            Debug.Log($"사용: {currentItemSlot.itemData.itemName}");
            Managers.Inventory.RemoveItem(currentItemSlot.itemData, 1);
            //Managers.Inventory.RefreshUI();
        }
        else if(currentItemSlot.itemData.itemType == Define.ItemType.Equipment)
        {
            DebugEx.Log("장착하기!");
        }
        else
        {
            Debug.Log($"{currentItemSlot.itemData.itemName}는 사용할 수 없는 아이템입니다.");
        }
    }

    public void OnPointerClick(PointerEventData eventData)
    {
        Debug.Log("클릭 이벤트 호출!");

        UI_WeaponSel uI_WeaponSel = FindAnyObjectByType<UI_WeaponSel>();
        if( uI_WeaponSel == null ) 
        {
            uI_WeaponSel = Managers.UI.ShowPopupUI<UI_WeaponSel>();
            uI_WeaponSel.gameObject.transform.SetParent(transform, false);
            Vector3 loaction = eventData.position;
            loaction.y -= 50;
            uI_WeaponSel.gameObject.transform.SetPositionAndRotation(loaction, Quaternion.identity);
        }
        else
        {
            Managers.UI.ClosePopupUI(uI_WeaponSel);
        }
        // 팝업 생성
        
        
    }


    public void OnPointerUp(PointerEventData eventData)
    {
        
    }

    public void OnPointerEnter(PointerEventData eventData)
    {
        DebugEx.Log("마우스 올려두기 호출!");
    }

    public void OnPointerExit(PointerEventData eventData)
    {
        DebugEx.Log("마우스 내려놓기 호출!");
        UI_WeaponSel uI_WeaponSel = FindAnyObjectByType<UI_WeaponSel>();
        if (uI_WeaponSel != null)
        {
            Managers.UI.ClosePopupUI(uI_WeaponSel);
        }
    }
}


이때 선택된 아이템의 자식으로 팝업을 두는 것으로 나중에 아이템의 정보를 쉽게 얻어오려고 했다. 그리고 마우스 클릭하곳에서 가깝게 팝업이 뜨도록 transform의 위치를 수정해주었다.

실제로 작동시켜보면 잘 작동하는 것을 볼 수 있다.


https://www.udemy.com/course/unreal-engine-5-the-ultimate-game-developer-course/learn/lecture/33116784#overview


맞았을 때 맞은 위치에 따라 다른 애니메이션이 출력되는 것을 구현하기 위해 수학적인 이론을 먼저 학습하자.

만약 왼쪽에서 칼로 공격을 하면 적은 오른쪽으로 가야하고 오른쪽에서 공격을 하면 왼쪽으로 가야한다.

이때 타격점과 물체 중심까지의 벡터를 만들 수 있다. 이렇게 구한 벡터와 물체의 전방을 가리키는 전방 벡터 사이의 각을 통해 어떤 방향으로 때리는 지 알 수 있다.


내적을 했을 때의 공식에서 만약 A와 B의 크기가 Normalize이 된다면 즉 1이 된다면 Cos값을 알 수 있다.이 값을 역 코사인 함수를 취해서 각을 알아내면 된다.


 이것을 코드로 구현해볼텐데 Nomalize할때 GetSafeNormal함수를 통해 계산하는 것이 안전하다.

UKismetSystemLibrary::DrawDebugArrow를 통해 각 벡터를 눈으로 볼 수 있다. 

Enemy.cpp

void AEnemy::GetHit(const FVector& ImpactPoint)
{
	DRAW_SPHERE_COLOR(ImpactPoint,FColor::Orange);
	PlayHitReactMontage(FName("FromLeft"));

	const FVector Forward = GetActorForwardVector();
	const FVector ToHit = (ImpactPoint - GetActorLocation()).GetSafeNormal();

	// 전방 * 방향 = |전방|*|방향| * cos(theta)
	//이때 각 크기 1이면 cos구할 수 있음
	const double CosTheta = FVector::DotProduct(Forward, ToHit);
	//역함수=> 각도 알 수 있음.
	double Theta = FMath::Acos(CosTheta);

	Theta = FMath::RadiansToDegrees(Theta);

	UKismetSystemLibrary::DrawDebugArrow(this, GetActorLocation(), GetActorLocation() + Forward * 60.f, 5.f, FColor::Red, 5.f);
	UKismetSystemLibrary::DrawDebugArrow(this, GetActorLocation(), GetActorLocation() + ToHit * 60.f, 5.f, FColor::Green, 5.f);
}


이렇게 해주고 중요한 점은 전방벡터의 왼쪽에 방향벡터가 있는지 오른쪽에 있는지를 판별하는 것이다. 이때 외적을 사용할 수 있다.

외적은 벡터가 동시에 직교하는 벡터를 찾아준다. 이때 외적 순서에 따라 다른 결과가 나온다. 만약 외적값이 양수라면 전방벡터를 기준으로 오른쪽에서 공격한 것이고 아니라면 왼쪽에서 공격한 것이다.이를 통해 각도의 시작 방향을 정할 수 있다.


이를 코드로 적용하면 다음과 같다.

Enemy.cpp

void AEnemy::GetHit(const FVector& ImpactPoint)
{
	DRAW_SPHERE_COLOR(ImpactPoint,FColor::Orange);
	PlayHitReactMontage(FName("FromLeft"));

	const FVector Forward = GetActorForwardVector();
	//낮은 위치에서의 타격점 - 각 벡터 지평면에 평평하게 만들기 
	const FVector ImpactLowered(ImpactPoint.X, ImpactPoint.Y, GetActorLocation().Z);
	const FVector ToHit = (ImpactLowered - GetActorLocation()).GetSafeNormal();

	// 전방 * 방향 = |전방|*|방향| * cos(theta)
	//이때 각 크기 1이면 cos구할 수 있음
	const double CosTheta = FVector::DotProduct(Forward, ToHit);
	//역함수=> 각도 알 수 있음.
	double Theta = FMath::Acos(CosTheta);

	Theta = FMath::RadiansToDegrees(Theta);

	//외적을 통해 양수면 오른쪽 음수면 왼쪽에서 공격인지 판별
	const FVector CrossProduct = FVector::CrossProduct(Forward, ToHit);
	if (CrossProduct.Z < 0)
	{
		Theta *= -1.f;

	}
	UKismetSystemLibrary::DrawDebugArrow(this, GetActorLocation(), GetActorLocation() + CrossProduct * 100.f, 5.f, FColor::Blue, 5.f);

	UKismetSystemLibrary::DrawDebugArrow(this, GetActorLocation(), GetActorLocation() + Forward * 60.f, 5.f, FColor::Red, 5.f);
	UKismetSystemLibrary::DrawDebugArrow(this, GetActorLocation(), GetActorLocation() + ToHit * 60.f, 5.f, FColor::Green, 5.f);
}


이렇게 해주고 실제 Section을 달리해서 코드를 짜면 된다.

Enemy.cpp

void AEnemy::GetHit(const FVector& ImpactPoint)
{
	DRAW_SPHERE_COLOR(ImpactPoint,FColor::Orange);
	

	const FVector Forward = GetActorForwardVector();
	//낮은 위치에서의 타격점 - 각 벡터 지평면에 평평하게 만들기 
	const FVector ImpactLowered(ImpactPoint.X, ImpactPoint.Y, GetActorLocation().Z);
	const FVector ToHit = (ImpactLowered - GetActorLocation()).GetSafeNormal();

	// 전방 * 방향 = |전방|*|방향| * cos(theta)
	//이때 각 크기 1이면 cos구할 수 있음
	const double CosTheta = FVector::DotProduct(Forward, ToHit);
	//역함수=> 각도 알 수 있음.
	double Theta = FMath::Acos(CosTheta);

	Theta = FMath::RadiansToDegrees(Theta);

	//외적을 통해 양수면 오른쪽 음수면 왼쪽에서 공격인지 판별
	const FVector CrossProduct = FVector::CrossProduct(Forward, ToHit);
	if (CrossProduct.Z < 0)
	{
		Theta *= -1.f;

	}

	//디폴트 값
	FName Section("FromBack");

	if (Theta >= -45.f && Theta < 45.f)
	{
		Section = FName("FromFront");
	}
	else if (Theta >= -135.f &&  Theta < -45.f)
	{
		Section = FName("FromLeft");
	}
	else if(Theta >= 45.f &&  Theta < 135.f)
	{
		Section = FName("FromRight");
	}

	PlayHitReactMontage(Section);

	UKismetSystemLibrary::DrawDebugArrow(this, GetActorLocation(), GetActorLocation() + CrossProduct * 100.f, 5.f, FColor::Blue, 5.f);

	UKismetSystemLibrary::DrawDebugArrow(this, GetActorLocation(), GetActorLocation() + Forward * 60.f, 5.f, FColor::Red, 5.f);
	UKismetSystemLibrary::DrawDebugArrow(this, GetActorLocation(), GetActorLocation() + ToHit * 60.f, 5.f, FColor::Green, 5.f);
}


이렇게 해주면 잘 작동하는것을 볼 수 있다.


하지만 여기서 약간의 문제점이 있는데 때리는 동안의 피격점들때문에 계속 함수가 작동한다는 점이다.

이것을 한번만 작동하도록 바꿔보자

이 작업은 무기 클래스에서 OnBoxOverlap의 함수를 보면 되는데 여기서 무시할 배열들에 추가하는 것으로 중복 호출을 방지하도록 하자.

TArray<AActor*> ActorsToIgnore;
ActorsToIgnore.Add(this);


Weapon.cpp

void AWeapon::OnBoxOverlap(UPrimitiveComponent* OverlappedComponent, AActor* OtherActor, UPrimitiveComponent* OtherComp, int32 OtherBodyIndex, bool bFromSweep, const FHitResult& SweepResult)
{
	const FVector Start = BoxTraceStart->GetComponentLocation();
	const FVector End = BoxTraceEnd->GetComponentLocation();

	TArray<AActor*> ActorsToIgnore;
	ActorsToIgnore.Add(this);

	for (AActor* Actor : IgnoreActors)
	{
		ActorsToIgnore.AddUnique(Actor);
	}

	//충돌 결과
	FHitResult BoxHit;

	UKismetSystemLibrary::BoxTraceSingle(
		this,
		Start,
		End,
		FVector(5.f, 5.f, 5.f),
		BoxTraceStart->GetComponentRotation(),
		ETraceTypeQuery::TraceTypeQuery1,
		false,
		ActorsToIgnore,		//무시할거
		EDrawDebugTrace::ForDuration,
		BoxHit,
		true		//자신무시
	);

	if (BoxHit.GetActor())
	{
		IHitInterface* HitInterface = Cast<IHitInterface>(BoxHit.GetActor());
		if (HitInterface)
		{
			HitInterface->GetHit(BoxHit.ImpactPoint);
		}
		IgnoreActors.AddUnique(BoxHit.GetActor());
	}
}


이렇게 해준 캐릭터가 무기를 장착하거나 충돌하고 난 다음 이 배열을 초기화 하도록하자.

SlashCharacter.cpp

void ASlashCharacter::SetWeaponCollisionEnabled(ECollisionEnabled::Type CollisionEnabled)
{
	if (EquippedWeapon && EquippedWeapon->GetWeaponBox())
	{
		EquippedWeapon->GetWeaponBox()->SetCollisionEnabled(CollisionEnabled);
		EquippedWeapon->IgnoreActors.Empty();
	}
}


이렇게 해주면 정상적으로 피격이 한번만 이루어진다.


이제 피격시에 소리가 들리도록 구현해보자

우선 피격시에 들릴 소리들을 다운해주고 이를 바탕으로 메타사운드를 만들어주자.

3개의 피격음 중에 랜덤하게 재생하는데 이대 피치와 소리의 음향도 랜덤하게 해주도록 하자.


이것을 적이 가지고 있다가 재생할 수 있게 코드상에서 변수로 지정해주자. 그리고 피격당했을 때 소리가 재생되도록 

UGameplayStatics의 PlaySoundAtLocation함수를 활용해주자.

Enemy.h

	private:
    UPROPERTY(EditAnywhere, Category = Sounds)
	USoundBase* HitSound;


Enemy.cpp

void AEnemy::GetHit(const FVector& ImpactPoint)
{
	DRAW_SPHERE_COLOR(ImpactPoint,FColor::Orange);
	
	DirectionalHitReact(ImpactPoint);

	if (HitSound)
	{
		UGameplayStatics::PlaySoundAtLocation(
			this,
			HitSound,
			ImpactPoint
		);
	}
}


그리고 핫 리로드를 할때 Ctrl+Alt+F11 를 누르면 바로 가능하다.

이렇게 해주고 맵에 생성되어있는 인스턴스에 metasound를 할당해주고 실행해주면 정상적으로 재생되는 것을 볼 수 있다.


여기서 피격음이 거리에 따라 어떻게 다르게 들릴지 설정하기 위해 사운드 어테뉴에이션을 추가해주자.

현재 어테뉴에이션 값을 보면 구로 설정되어있는데 이 설정한 거리만큼의 반경에서 소리가 재생되고 감쇠되는 거리또한 바꿀 수 있다.


이것을 메타사운드에 적용할 수 도 있다.


가장 자연스럽게 소리를 구현하기 위해 어테뉴에이션을 자연으로 바꿔주었다.

이제 여기서 VFX 시각 효과를 추가해보자

언리얼에서 VFX 시각 이펙트는 Cascade와 Niagara가 있는데 나이아가라가 최신 시스템이지만 둘다 다룰줄 알아야한다.


우선 Cascade 시스템으로 제작된 피격 효과를 가져와서 사용해보자. 적마다 다른 피격 이펙트가 가능하도록 적 클래스에 변수를 만들어주자.

테스트를 위해 블루프린트에서는 이 이펙트를 사용하자.

Spawn Emitter의 At location과 attached가 있는데 attached는 계속 붙어있어야하는 불과 같은 이펙트에 사용하고 location은 그 장소에 이펙트가 재생되는 것이다.


이렇게 해주면 캐릭터 정가운데에 이펙트가 재생되는 것을 볼 수 있다.


이것을 코드로 구현해보자

우선 이펙트를 지정할 수 있게 변수로 만들어주고 관련 함수를 구현하자.

ctrl + k + o -> 바로 cpp파일 열수있다.

Enemy.h

	private:
    UPROPERTY(EditAnywhere, Category = VisualEffects)
	UParticleSystem* HitParticles;

Enemy.cpp

void AEnemy::GetHit(const FVector& ImpactPoint)
{
	DRAW_SPHERE_COLOR(ImpactPoint,FColor::Orange);
	
	DirectionalHitReact(ImpactPoint);

	if (HitSound)
	{
		UGameplayStatics::PlaySoundAtLocation(
			this,
			HitSound,
			ImpactPoint
		);
	}

	if (HitParticles&& GetWorld())
	{
		UGameplayStatics::SpawnEmitterAtLocation(
			GetWorld(),
			HitParticles,
			ImpactPoint
		);
	}
}


이렇게 해주고 이펙트를 지정해주면 정상적으로 작동한다.


여기에 공격시에 공격이펙트를 추가해보자 

이것은 공격애니메이션몽타주에서 Trail을 추가하는 것으로 할 수 있는데 Trail은 일정구간에 파티클을 실행시킬수 있는것으로 시작과 끝점을 지정해주면 된다. 이 시작과 끝점은 소켓으로 구현해두면 된다.

이를 위해 캐릭터의 스켈레톤 오른손에 소켓 2개를 추가해주자. 검의 시작과 끝에 위치시켜주면 된다.


이렇게 해주고 애니메이션 몽타주에 Trail을 새로운 트렉에 배치해주고 원하는 구간을 설정해주면 검기같은 이펙트가 생긴다.


오늘은 만들어둔 시스템의 데이터를 저장하고 불러오는 기능을 구현해보자. 

우선 Save를 관리해줄 SaveManager를 만들어주자. 경로는 기본경로로 해주고 저장방식은 Json으로 저장해주도록 하자.

SaveManager.cs

public class SaveManager
{
    public void Init()
    {
        // 경로 설정
        _defaultPath = Path.Combine(Application.persistentDataPath, "saveData.json");

        // 디렉터리 확인 및 생성
        string directoryPath = Path.GetDirectoryName(_defaultPath);
        if (!Directory.Exists(directoryPath))
        {
            Directory.CreateDirectory(directoryPath);
        }

        Debug.Log($"Save File Path Initialized: {_defaultPath}");

    }
}


그리고 지금까지 만들어둔 시스템에서 저장할 부분을 직렬화방식으로 저장하기 위해 SaveData를 따로 만들어주자. 저장해야할 부분은 Inventory,Quest,Player 데이터를 저장하면 된다.


SaveData.cs

using System;
using System.Collections.Generic;
using UnityEngine;

[System.Serializable]
public class SaveData
{
    public List<SerializedItemSlot> inventoryData; // 인벤토리 데이터
    public PlayerData playerData;                 // 플레이어 데이터
    public List<SerializedQuestData> questData;             // 퀘스트 데이터
}

[System.Serializable]
public class PlayerData
{
    public Vector3 position; // 플레이어 위치
    public Vector3 rotation; // 플레이어 방향
    public float health;     // 플레이어 체력
}

[System.Serializable]
public class SerializedItemSlot
{
    public int itemID;   // 아이템 ID
    public int quantity; // 아이템 개수
}

[System.Serializable]
public class SerializedQuestData
{
    public int questID;       // 퀘스트 ID
    public string questState; // 퀘스트 상태
}


이렇게 하고 저장하는 부분을 구현해볼텐데 저장은 직렬화로 구현된 부분을 각 객체의 함수로 추가하고 마지막에 SaveManager에서 Json으로 저장하도록하자

Player.cs

// 저장
public void SavePlayer(ref SaveData saveData)
{
    saveData.playerData = new PlayerData
    {
        position = transform.position,
        rotation = transform.eulerAngles,
        health = currentHealth
    };
}

QuestManager.cs

 public void SaveQuests(ref SaveData saveData)
 {
     List<SerializedQuestData> serializedQuests = new List<SerializedQuestData>();
     foreach (var quest in Quests.Values)
     {
         serializedQuests.Add(new SerializedQuestData
         {
             questID = quest.questId,
             questState = quest.questState.ToString()
         }); 
     }
     saveData.questData = serializedQuests;
 }

InventoryManager.cs

 // 저장
 public void SaveInventory(ref SaveData saveData)
 {
     List<SerializedItemSlot> serializedInventory = new List<SerializedItemSlot>();
     foreach (var slot in inventory)
     {
         serializedInventory.Add(new SerializedItemSlot
         {
             itemID = slot.itemData.itemID,
             quantity = slot.quantity
         });
     }
     saveData.inventoryData = serializedInventory;
 }

SaveManager.cs

  public void SaveData()
  {
      SaveData saveData = new SaveData();

      Managers.Inventory.SaveInventory(ref saveData);
      Managers.Game.GetPlayer().GetComponent<Player>().SavePlayer(ref saveData);
      Managers.Quest.SaveQuests(ref saveData);

      string json = JsonUtility.ToJson(saveData, true);
      File.WriteAllText(_defaultPath, json);
      Debug.Log($"게임 데이터가 저장되었습니다: {_defaultPath}");
  }


이렇게 만들고 게임 데이터를 가져오는 기능을 만들어주자. 이때 만약 저장데이터가 없다면 기본 데이터를 저장해주고 

다른 시스템을 초기화해주는 기능도 넣어주도록 하자.

SaveManager.cs

public void LoadData()
{
    if (!File.Exists(_defaultPath))
    {
        Debug.LogWarning("저장된 데이터가 없습니다. 초기 데이터를 생성합니다.");

        // 초기 데이터를 생성
        CreateInitialData();
        SaveData(); // 초기 데이터를 저장
        return;
    }
    string json = File.ReadAllText(_defaultPath);
    SaveData saveData = JsonUtility.FromJson<SaveData>(json);

    SpawnPlayer();

    Managers.Quest.Init();
    Managers.Inventory.LoadInventory(saveData);
    Managers.Game.GetPlayer().GetComponent<Player>().LoadPlayer(saveData);
    Managers.Quest.LoadQuestsFromSaveFile(saveData);

    Debug.Log("게임 데이터가 불러와졌습니다.");
}

private void CreateInitialData()
{
   SpawnPlayer();

    // 인벤토리 초기화
    Managers.Inventory.Init();
    //Managers.Inventory.AddItem(Resources.Load<ItemData>("Items/Potion"), 5); // 기본 아이템 추가
    //Managers.Inventory.AddItem(Resources.Load<ItemData>("Items/Sword"), 1); // 기본 무기 추가

    // 플레이어 초기화
    var player = Managers.Game.GetPlayer().GetComponent<Player>();
    player.transform.position = Vector3.zero; // 기본 위치
    player.CurrentHealth = 100f; // 기본 체력
    player.index = 0; // 초기 퀘스트 인덱스

    // 플레이어 정보 출력
    Debug.Log("=== 플레이어 초기화 ===");
    Debug.Log($"위치: {player.GetComponent<Player>().transform.position}");
    Debug.Log($"체력: {player.GetComponent<Player>().CurrentHealth}");
    Debug.Log($"퀘스트 진행 상태: {player.GetComponent<Player>().index}");

    // 퀘스트 초기화
    Managers.Quest.Init();
}

public void SpawnPlayer()
{
    GameObject player = Managers.Game.Spawn(Define.WorldObject.Player, "Player");
    CinemachineVirtualCamera virtualCamera = GameObject.FindObjectOfType<CinemachineVirtualCamera>();
    virtualCamera.Follow = player.transform; // virtual camera의 Follow에 플레이어 등록
}


Player.cs

// 불러오기
public void LoadPlayer(SaveData saveData)
{
    if (saveData.playerData == null) return;

    transform.position = saveData.playerData.position;
    transform.eulerAngles = saveData.playerData.rotation;
    currentHealth = saveData.playerData.health;
}

QuestManager.cs

public class QuestManager 
{
    [SerializeField] private Dictionary<int, QuestData> Quests;

    public void Init()
    {
        LoadQuestsFromResources();
        InitializeQuest();
    }

    // Resources 폴더에서 모든 ScriptableObject를 로드하고 Dictionary로 초기화
    private void LoadQuestsFromResources()
    {
        QuestData[] loadedQuests = Resources.LoadAll<QuestData>("Quest");
        Quests = new Dictionary<int, QuestData>();
        if (loadedQuests.Length == 0)
        {
            Debug.LogError("Resources/Quest 폴더에 퀘스트 데이터가 없습니다.");
            return;
        }

        foreach (QuestData questData in loadedQuests)
        {
            if (!Quests.ContainsKey(questData.questId))
            {
                Quests.Add(questData.questId, questData);
                Debug.Log($"퀘스트 Id '{questData.questId}' 인 '{questData.questName}'가 추가되었습니다.");
            }
            else
            {
                Debug.LogWarning($"중복된 questId({questData.questId})가 발견되었습니다. QuestName: {questData.questName}");
            }
        }

        Debug.Log($"{Quests.Count}개의 퀘스트가 로드되었습니다.");
    }

        // Dictionary를 사용하여 퀘스트를 초기화
        private void InitializeQuest()
    {
        if (Quests == null || Quests.Count == 0)
        {
            Debug.LogError("Quests가 null이거나 비어 있습니다. LoadQuestsFromResources를 확인하세요.");
            return;
        }

        foreach (var questData in Quests.Values)
        {
            if (questData.QuestIndex >= Managers.Game.GetPlayer().GetComponent<Player>().index &&
                questData.questState == QuestState.REQUIREMENTS_NOT_MET)
            {
                // 진행 가능한 상태로 변경
                questData.questState = QuestState.CAN_START;
                Debug.Log($"퀘스트 Id '{questData.questId}' 인 '{questData.questName}'가 CAN_START로 초기화되었습니다.");
            }
        }
    }
    
     public void LoadQuestsFromSaveFile(SaveData saveData)
     {
         if (saveData.questData == null) return;

         Quests.Clear();

         foreach (var serializedQuest in saveData.questData)
         {
             QuestData quest = FindQuestByID(serializedQuest.questID);
             if (quest != null)
             {
                 quest.questState = Enum.Parse<QuestState>(serializedQuest.questState);
                 Quests.Add(quest.questId, quest);
             }
         }
     }
     
}

InventoryManager.cs

// 불러오기
public void LoadInventory(SaveData saveData)
{
    if (saveData.inventoryData == null) return;

    inventory.Clear();
    foreach (var serializedSlot in saveData.inventoryData)
    {
        // 저장된 itemID를 통해 ItemData 불러오기
        ItemData itemData = FindItemDataByID(serializedSlot.itemID);
        if (itemData != null)
        {
            // 인벤토리에 새로운 ItemSlot 추가
            inventory.Add(new ItemSlot { itemData = itemData, quantity = serializedSlot.quantity });
        }
        else
        {
            Debug.LogWarning($"ItemData를 찾을 수 없습니다: ID {serializedSlot.itemID}");
        }
    }
}


이렇게 해주고 테스트해보면 정상적으로 작동하는것을 볼 수 있다.


오늘은 아이템과 관련된 시스템을 만들어보자.

우선 아이템에 필요한 것을 생각해보자. 우선 아이템 이름, 설명, 식별자, 사진, 종류등이 필요할 것 같다. 

이를 클래스로 구현해보자 

이때 나중에 저장기능을 구현할 때

직렬화에 적합하고 데이터 관리와 로직을 분리하며 확장성을 높이기 위해 ItemData 객체를 만들어 이 곳에 정보를 넣고 

Item객체에는 필요한 정보만 가지고 있도록 구현했다.

Item.cs

using Controllers.Entity;
using UnityEngine;

public class Item : MonoBehaviour, IPickable
{
    public ItemData itemData; // ScriptableObject 참조
    public int quantity = 1;

    public void Pickup()
    {
        Managers.Inventory.AddItem(itemData, quantity); // ScriptableObject 기반 인벤토리 추가
        Destroy(gameObject);
    }
}


ItemData.cs

using UnityEngine;

[CreateAssetMenu(fileName = "NewItemData", menuName = "Inventory/Item Data")]
public class ItemData : ScriptableObject
{
    public string itemName;
    public int itemID;
    public Sprite icon;
    public string description;
    public ItemType itemType; // 예: 무기, 소비 아이템 등
}


ItemType.cs

using System.Collections;
using System.Collections.Generic;
using UnityEngine;

public enum ItemType
{
    Weapon,
    Healing,
    ingredients,
    etc
}


이렇게 만든다음에 아이템을 습득할 수 있게 해야하는데 이것은 전에 npc와 상호작용에서 사용한 인터페이스과 레이케스틍을 통해 구현해보자.

IPickable.cs

namespace Controllers.Entity
{
    public interface IPickable
    {
        /// <summary>
        /// Pickable의 필수 구현 사항
        /// </summary>
        void Pickup();
    }
}

Player.cs

private void PickupSomeThing()
{
    RaycastHit2D hit = Physics2D.Raycast(transform.position, facingDirection, interactDistance, LayerMask.GetMask("Pickable"));

    if (hit.collider != null)
    {
        IPickable pickable = hit.collider.GetComponent<IPickable>();
        if (pickable != null)
        {
            pickable.Pickup();
        }
        else
        {
            Debug.LogWarning("주울수 있는 객체가 아닙니다.");
        }
    }
    else
    {
        Debug.LogWarning("주울수 있는 대상이 없습니다.");
    }
}


이렇게 해준다음 주웠을 때 플레이어의 인벤토리에 추가될 수 있도록 Inventory를 관리해줄 Manager를 만들어보자.

나는 인벤토리를 리스트로 구현해보았다. 그리고 아이템 추가, 제거, 정보가져오기와 같은 기능들이 들어가도록 구현해보았다.

저장할 때 직렬화에 적합하도록 ItemSlot을 통해 데이터를 조작하도록 구현하였다.

ItemSlot.cs

[System.Serializable]
public class ItemSlot
{
    public ItemData itemData; // ScriptableObject 참조
    public int quantity;      // 해당 아이템 개수
}


InventoryManager.cs

using System.Collections.Generic;
using UnityEngine;

public class InventoryManager : MonoBehaviour
{
    private List<ItemSlot> inventory; // 슬롯 기반 관리

    public void Init()
    {
        inventory = new List<ItemSlot>();
    }

    // 아이템 추가
    public void AddItem(Item item, int count = 1)
    {
        ItemSlot slot = inventory.Find(s => s.itemData.itemID == item.itemID);
        if (slot != null)
        {
            slot.quantity += count; // 이미 존재하면 개수 증가
            Debug.Log(slot.itemData.itemName + "의 아이템의 개수가 " + slot.quantity + "개로 늘어났습니다.");
        }
        else
        {
            inventory.Add(new ItemSlot { itemData = item, quantity = count }); // 새로운 슬롯 추가
            Debug.Log(item.itemName + "의 아이템의 개수가 " + count + "개로 늘어났습니다.");
        }
    }

    // 아이템 제거
    public void RemoveItem(Item item, int count = 1)
    {
        ItemSlot slot = inventory.Find(s => s.itemData.itemID == item.itemID);
        if (slot != null)
        {
            slot.quantity -= count;
            if (slot.quantity <= 0)
            {
                inventory.Remove(slot); // 개수가 0 이하일 경우 슬롯 제거
            }
        }
    }

    // 특정 아이템 개수 가져오기
    public int GetItemCount(Item item)
    {
        ItemSlot slot = inventory.Find(s => s.itemData.itemID == item.itemID);
        return slot != null ? slot.quantity : 0;
    }

    private Item FindItemDataByID(int itemID)
    {
        return Resources.Load<Item>($"Items/{itemID}"); // Resources에서 아이템 데이터 검색
    }
}


이렇게 해서 테스트해보면 잘 작동하는 것을 볼 수 있다.


https://www.acmicpc.net/problem/3273


수열을 입력받고 정렬한 다음에 제일 작은 쪽의 인덱스를 가리키는 수 하나와 제일 큰 쪽의 인덱스를 가리키는 수를 통해 문제를 해결하면 된다. 만약 목표로 하는 수보다 크다면 큰 쪽의 인덱스를 줄여주고 목표로 하는 수보다 작다면 작은 쪽의 인덱스를 증가시켜주고 만약 같다면 작은 쪽은 증가시켜주고 큰 쪽은 감소시키고 횟수 카운트를 증가시켜주면 된다.


정답코드

#include <iostream>
#include <vector>
#include <algorithm>

using namespace std;

int main()
{
    int n;
    cin >> n; // 수열 크기
    vector<int> v(n);

    for (int i = 0; i < n; i++) {
        cin >> v[i];
    }

    sort(v.begin(), v.end()); // 수열 정렬

    int target, cnt = 0;
    cin >> target; // 목표 합

    int p = 0, q = n - 1; // 투 포인터 초기화

    while (p < q) {
        int sum = v[p] + v[q];
        if (sum == target) { // 목표 합과 같으면
            cnt++;
            p++;    
            q--;    
        }
        else if (sum < target) {
            p++;    // 합이 작으면 작은 값을 증가
        }
        else {
            q--;    // 합이 크면 큰 값을 감소
        }
    }

    cout << cnt << endl; // 쌍의 개수 출력

    return 0;
}

+ Recent posts